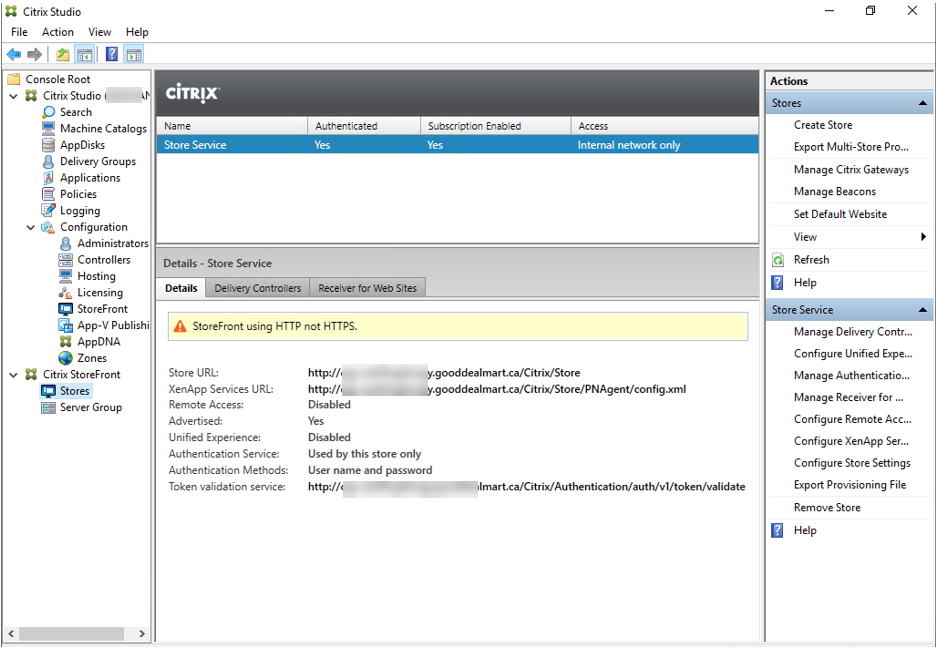
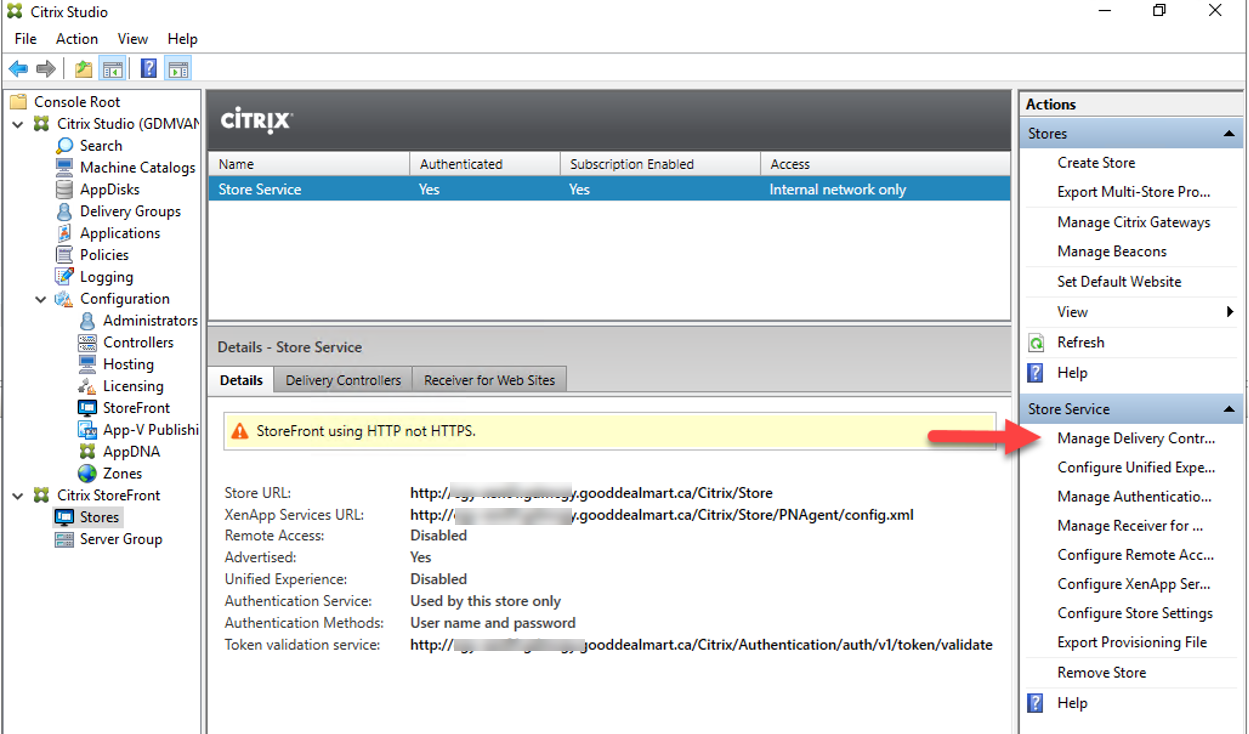
Today, my customer told me his StoreFront store service is using HTTP not HTTPs, the warning message as follow:

If you are getting the same warning message, you can follow below steps to change it to HTTPS.
1.Login to Virtual App server (Storefront server).
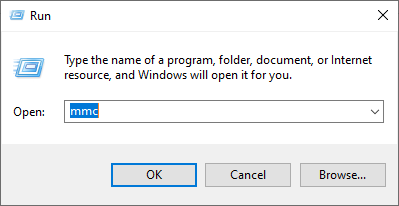
2.Run Microsoft Management Console.
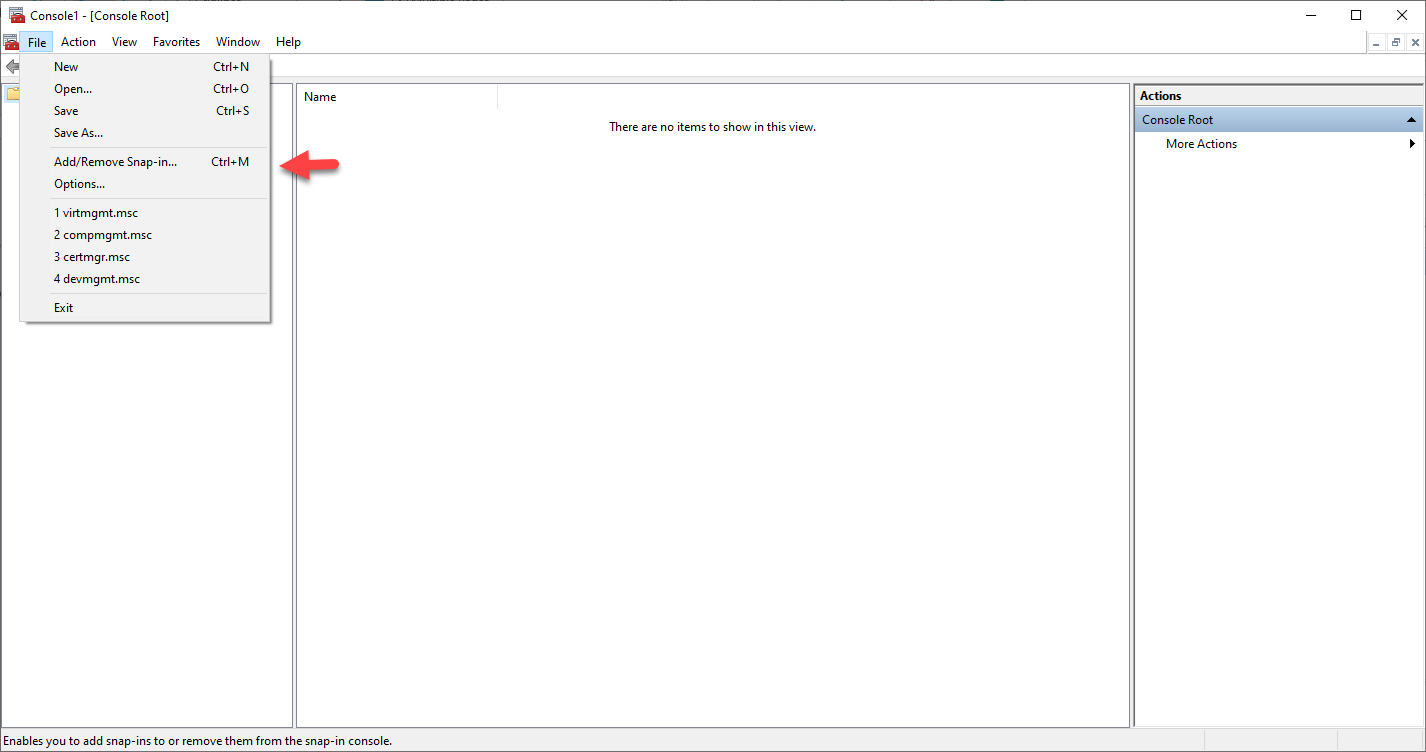
3.On the MMC console, select File, click Add/Remove Snap-in…..
4.On the Add or Remove Snap-ins page, select Certificates, click Add.
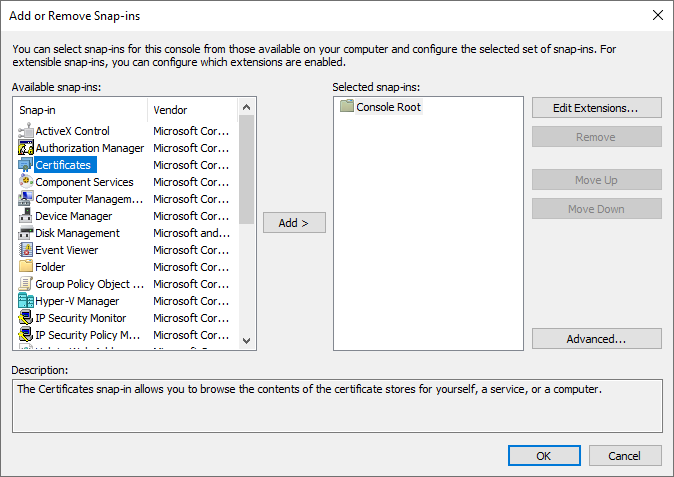
5.On the Certificates snap-in page, select Computer account, click Next.
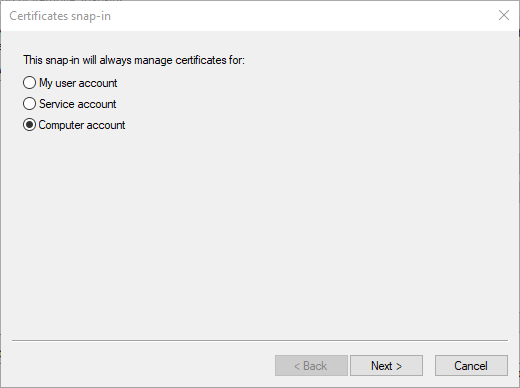
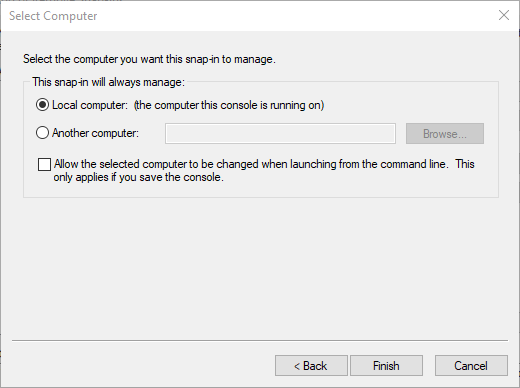
6.On the Select Computer page, select Local computer, click Finish.
7.On the Add or Remove Snap-ins page, click OK.
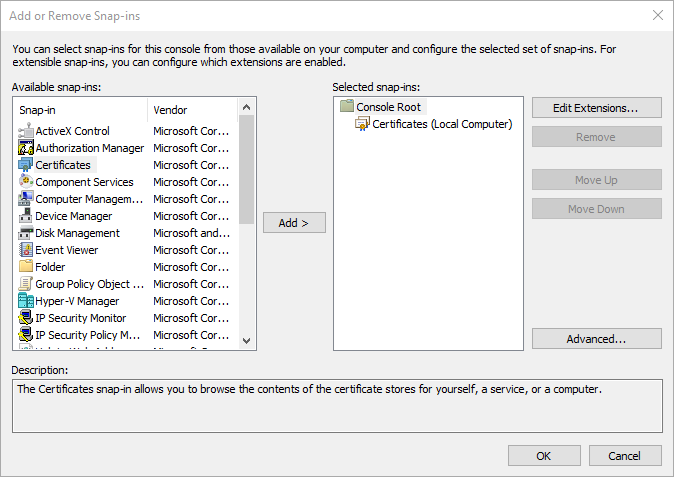
8.Under the Certificates (Local Computer), right-click Personal, select All Tasks, and then click Request New Certificate…
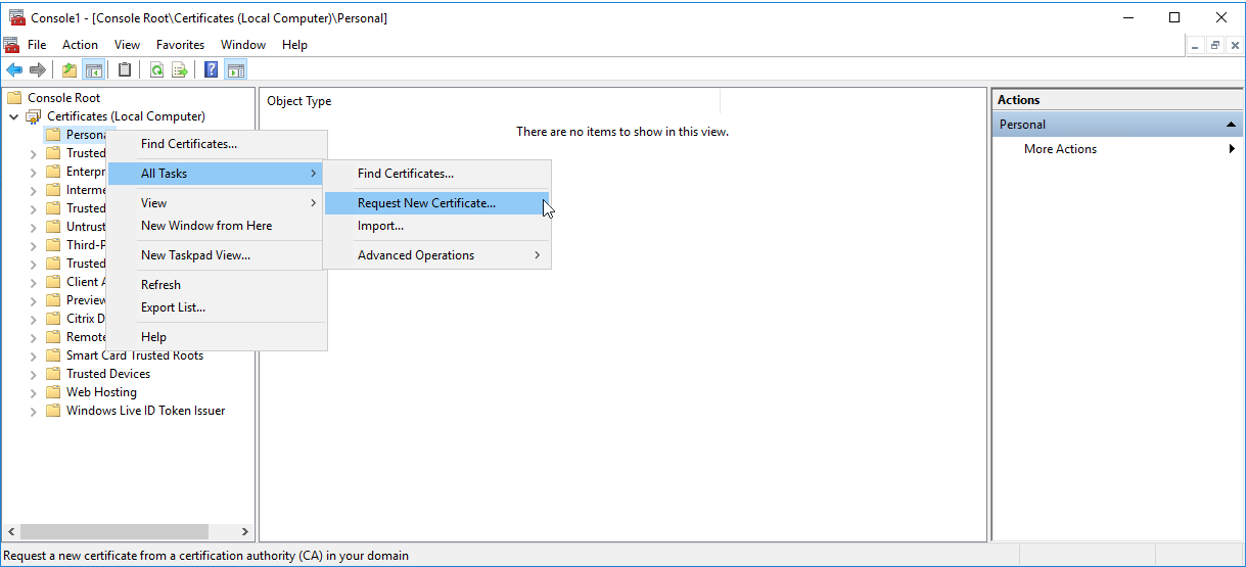
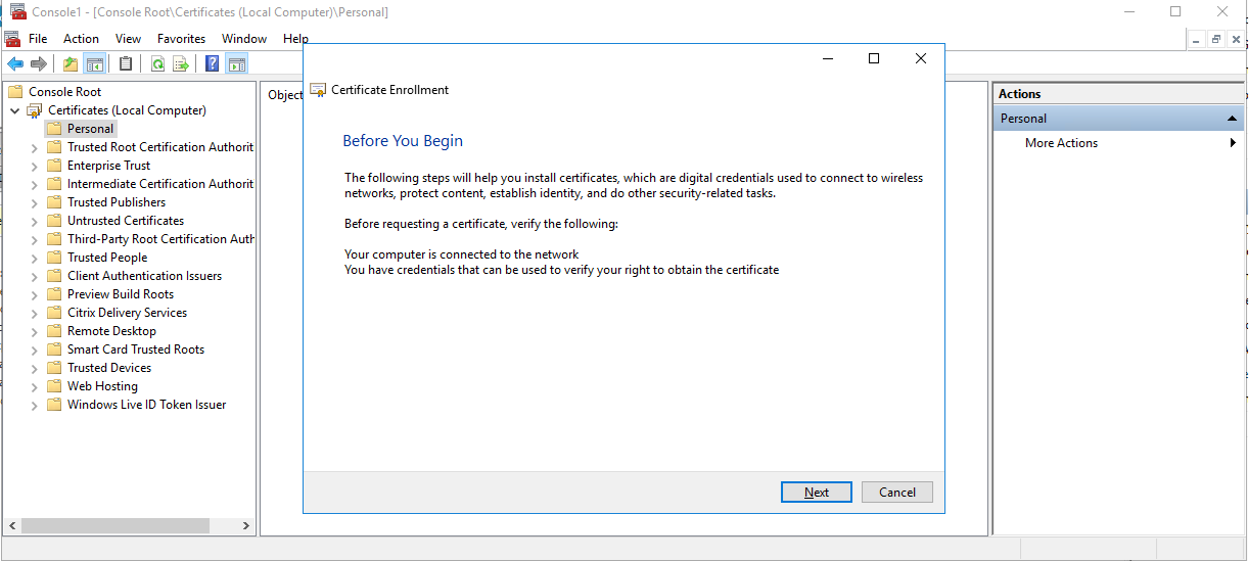
9.On the Before You Begin page, click Next.
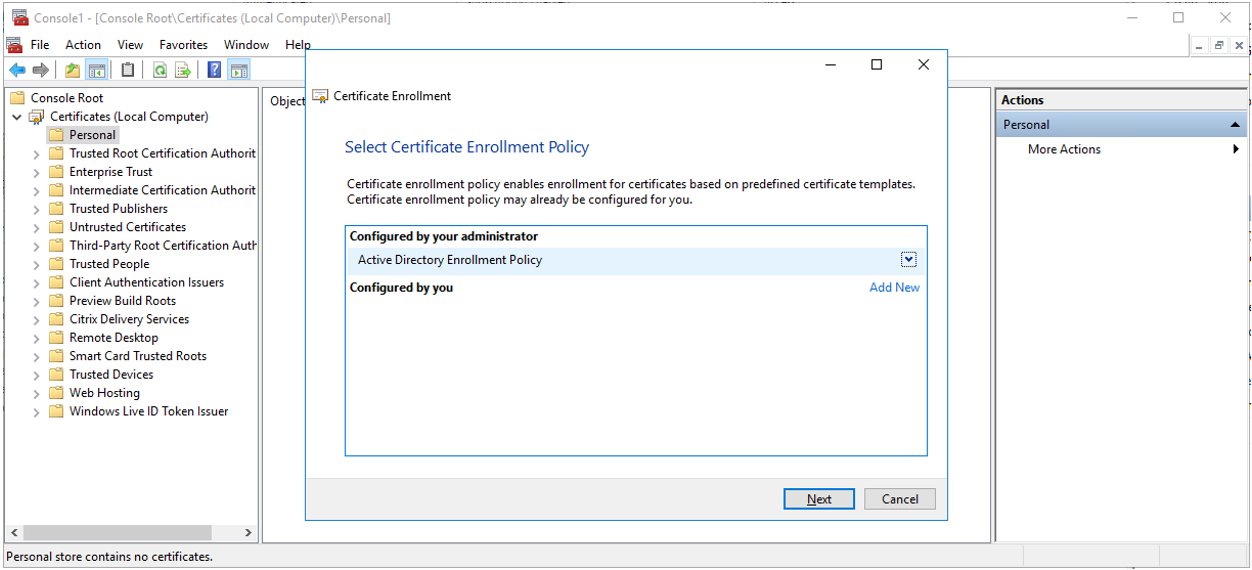
10.On the Certificate Enrollment page, select Active Directory Enrollment Policy, click Next.
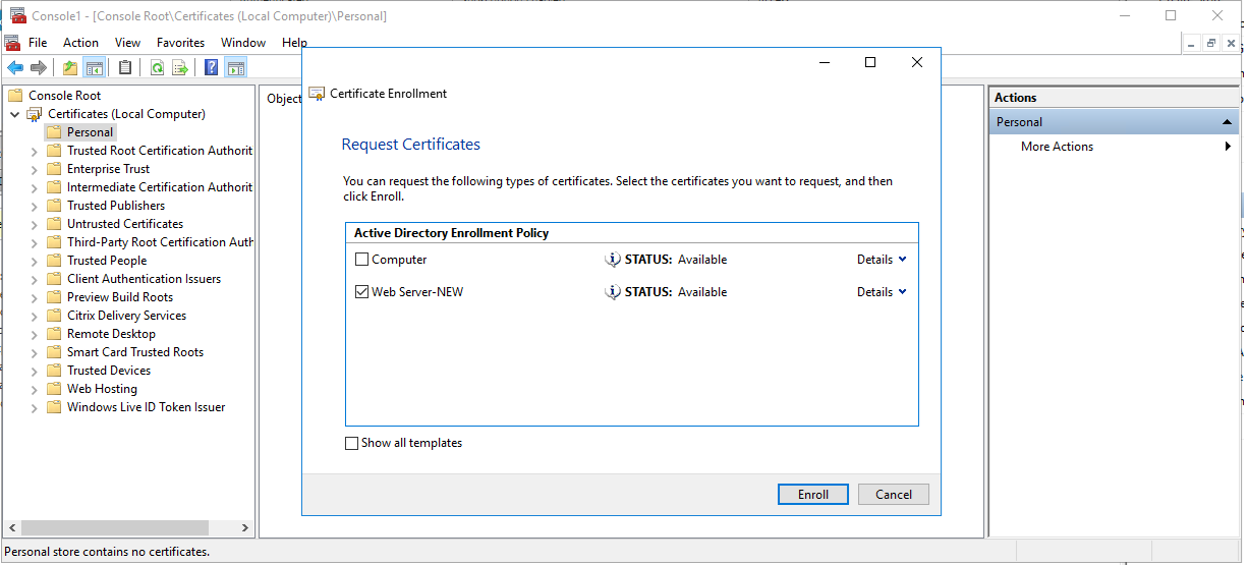
11.On the Request Certificate page, select Web Server-New, click More information is required to enroll for this certificate. Web Server-New was be created from Certificate template of Internal CA.
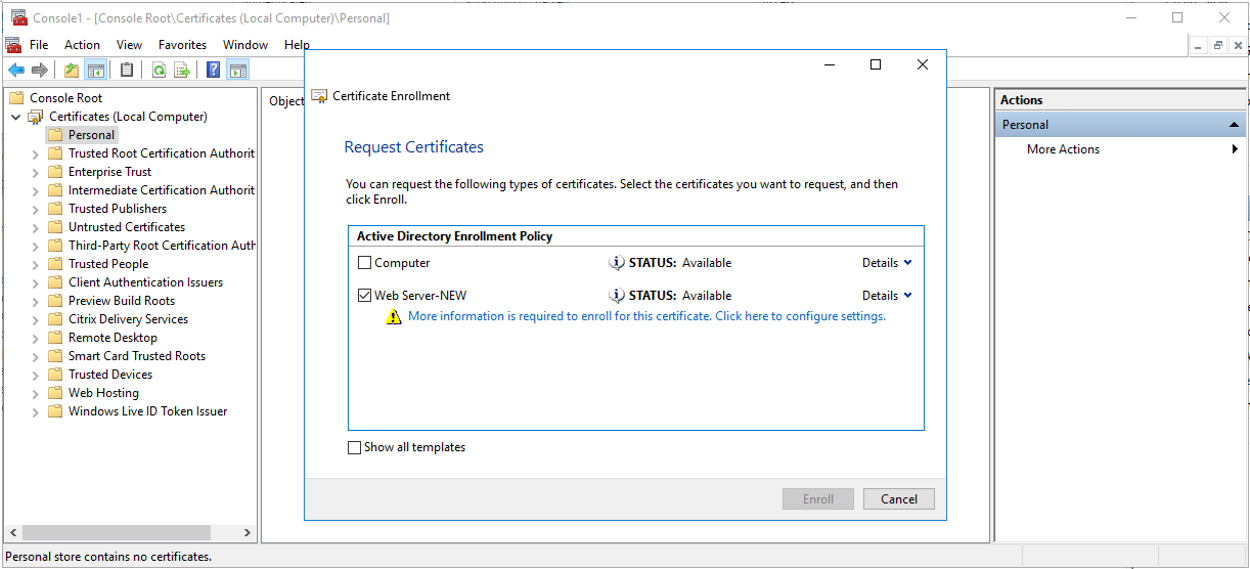
12.On the Certificate Properties page, click Subject, at the Alternative name field, select DNS Type and enter the storefront server internal FQDN in the Value, click Add.
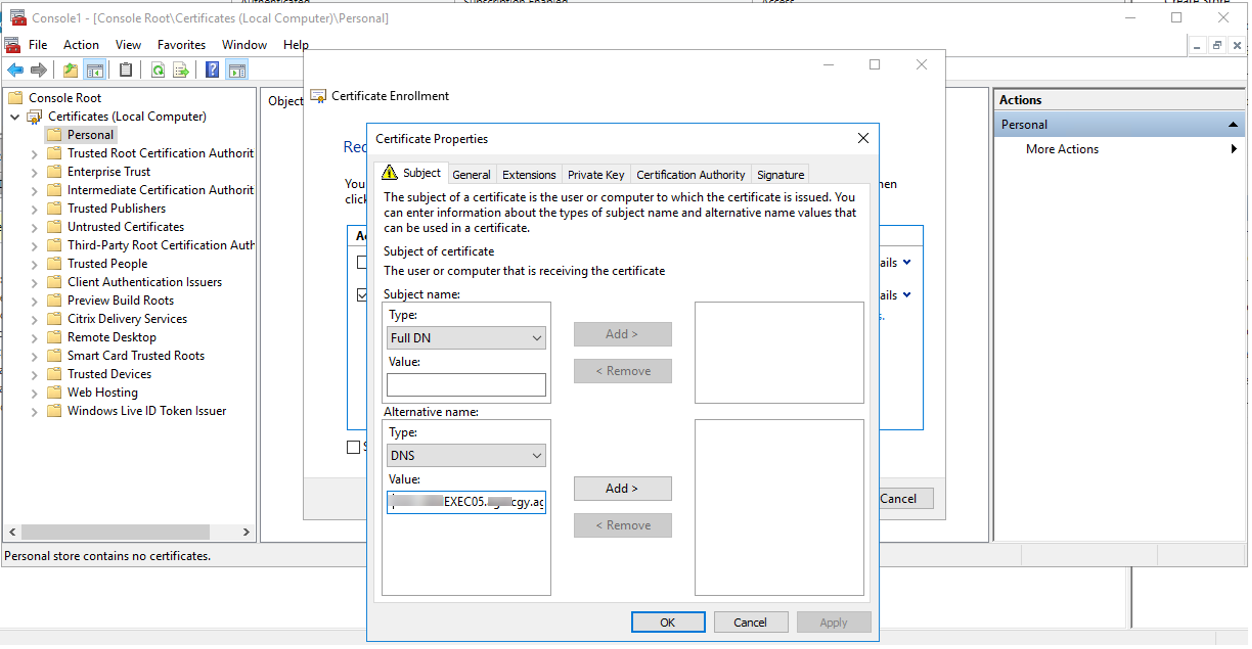
13.On the Certificate Properties page, click OK.
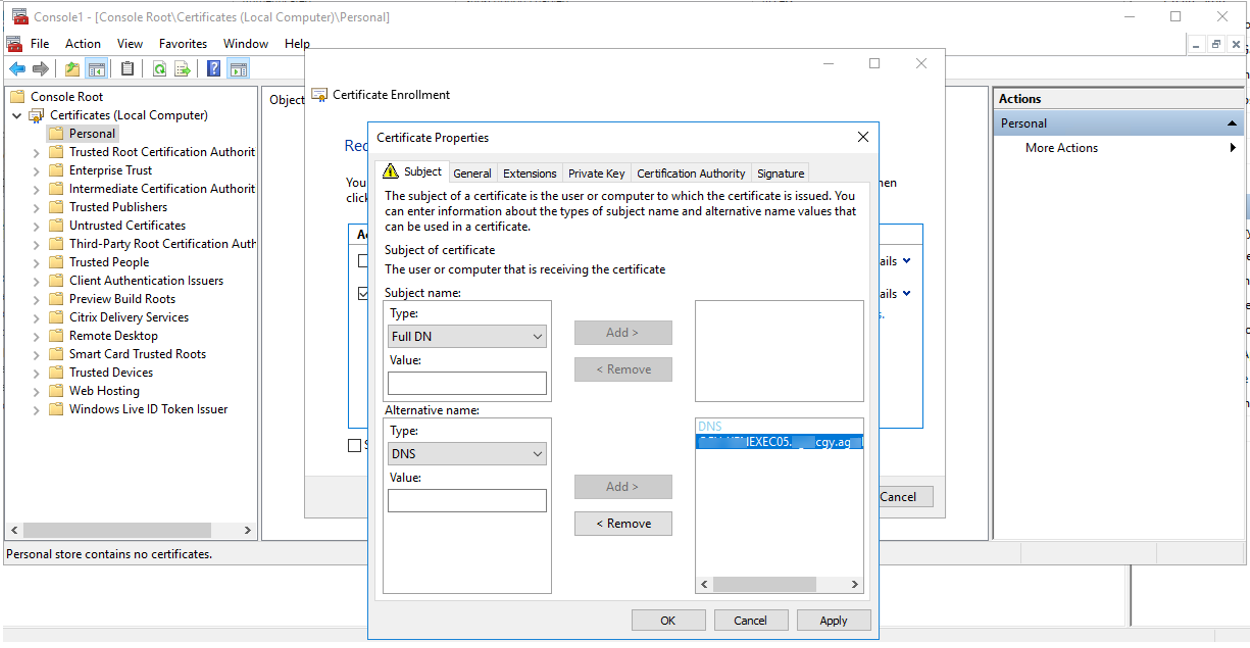
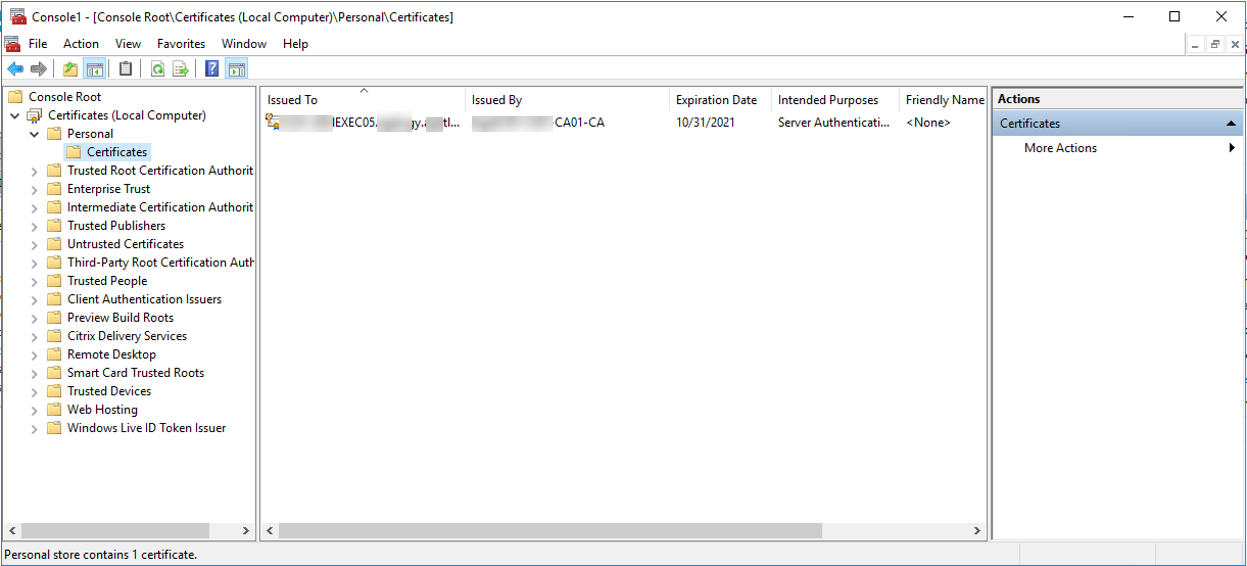
14.On the Certificate Enrollment page, click Enroll.
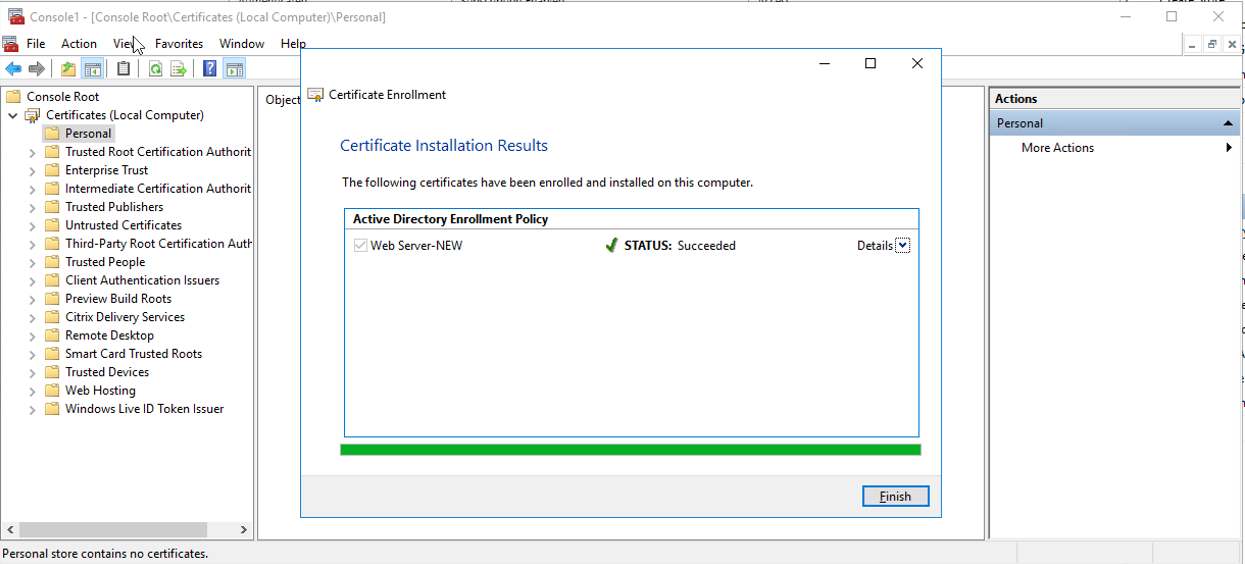
15.Verify Certificate install succeeded, click Finish.
16.Close MMC Console.
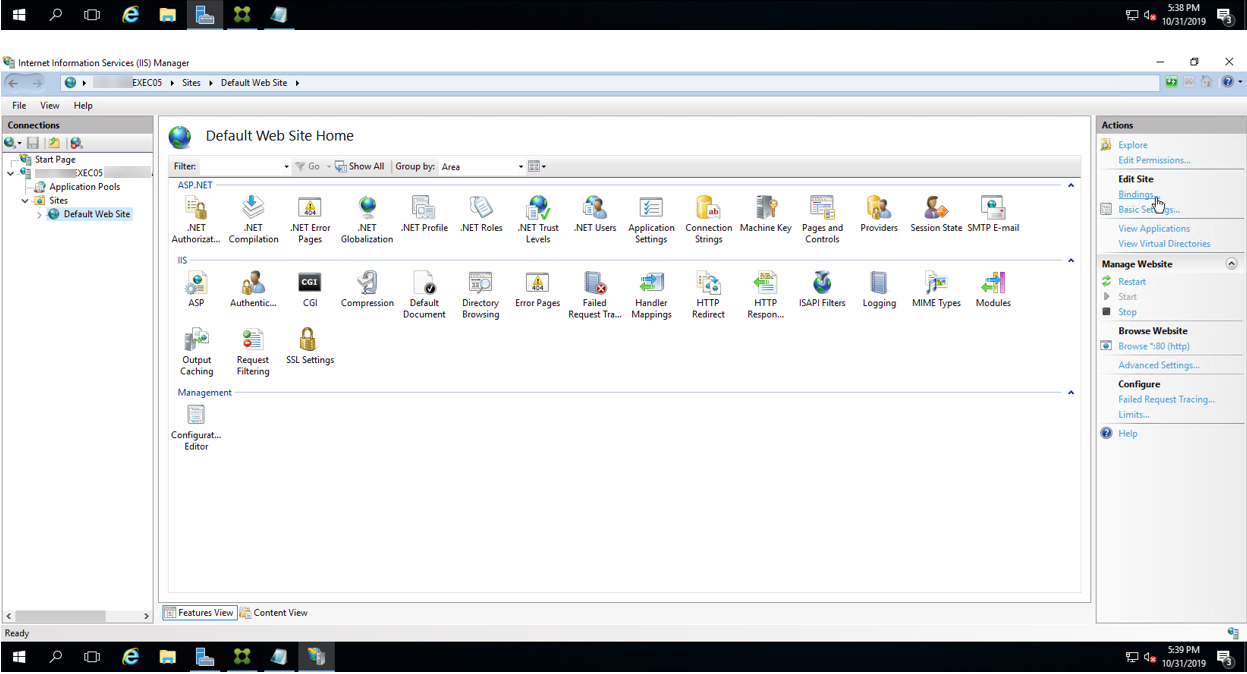
17.Open IIS Manager from Server Manager.

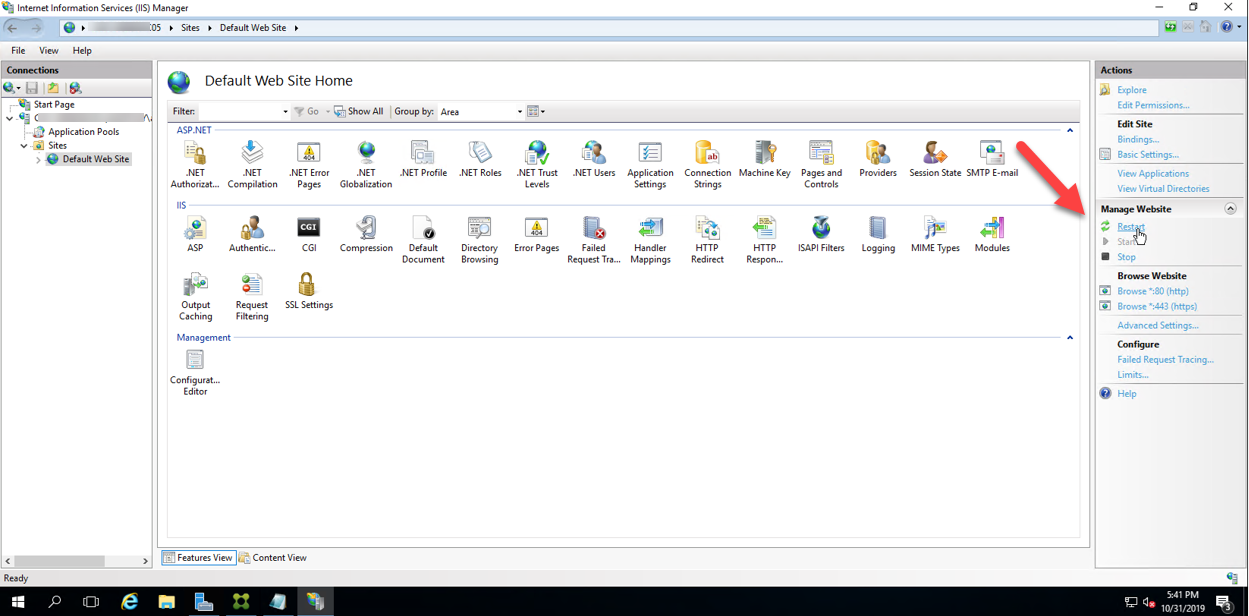
18.On the IIS Manager, select Default Web Site, click Binding at Actions filed.
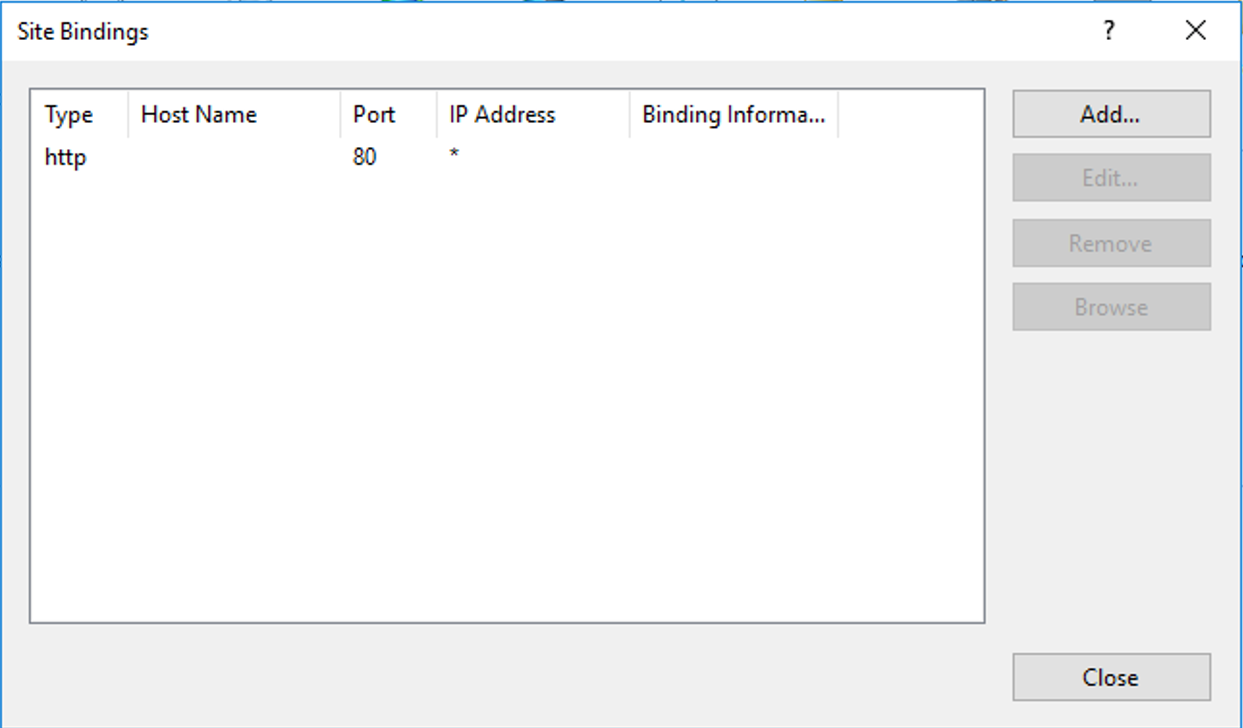
19.On the Site Bindings page, click Add.
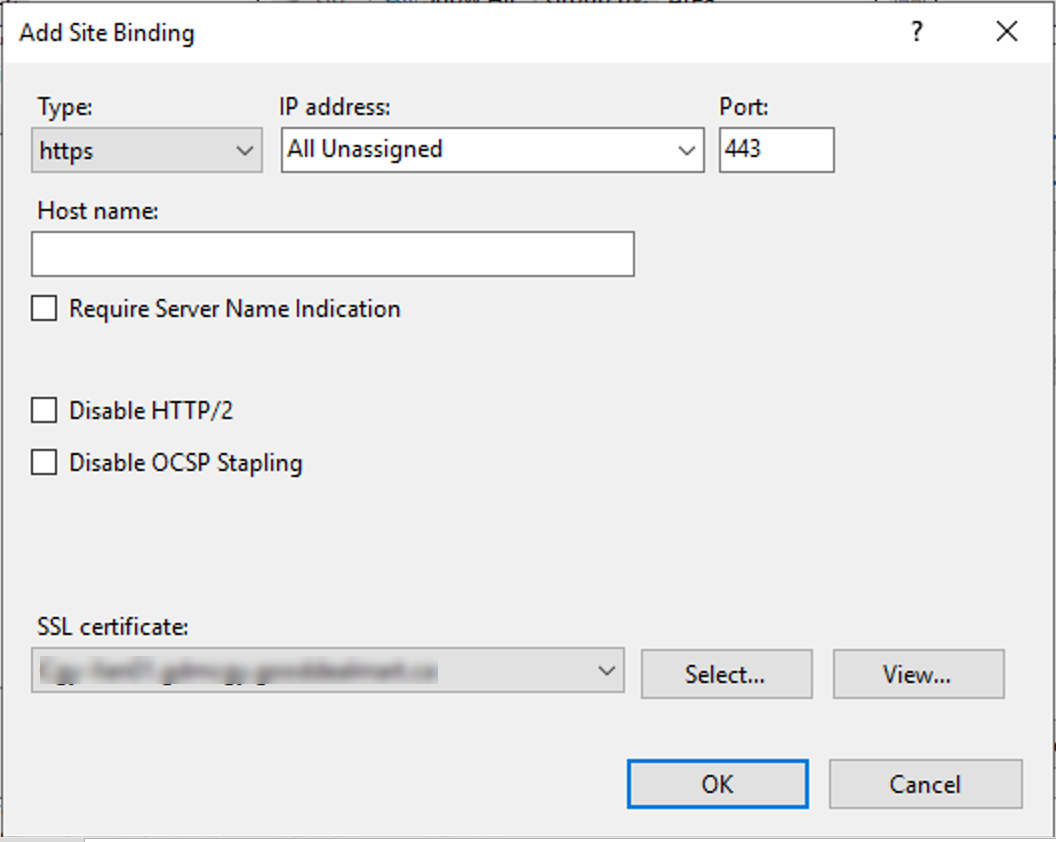
20.On the Add Site Binding page, select Type to https, select the new certificate from the SSL certificate, click OK.
21.On the Default Web Site, click Restart.
22.Open Citrix Studio, under the Citrix StoreFront, select Stores, click Manage Delivery Controller Store Service.
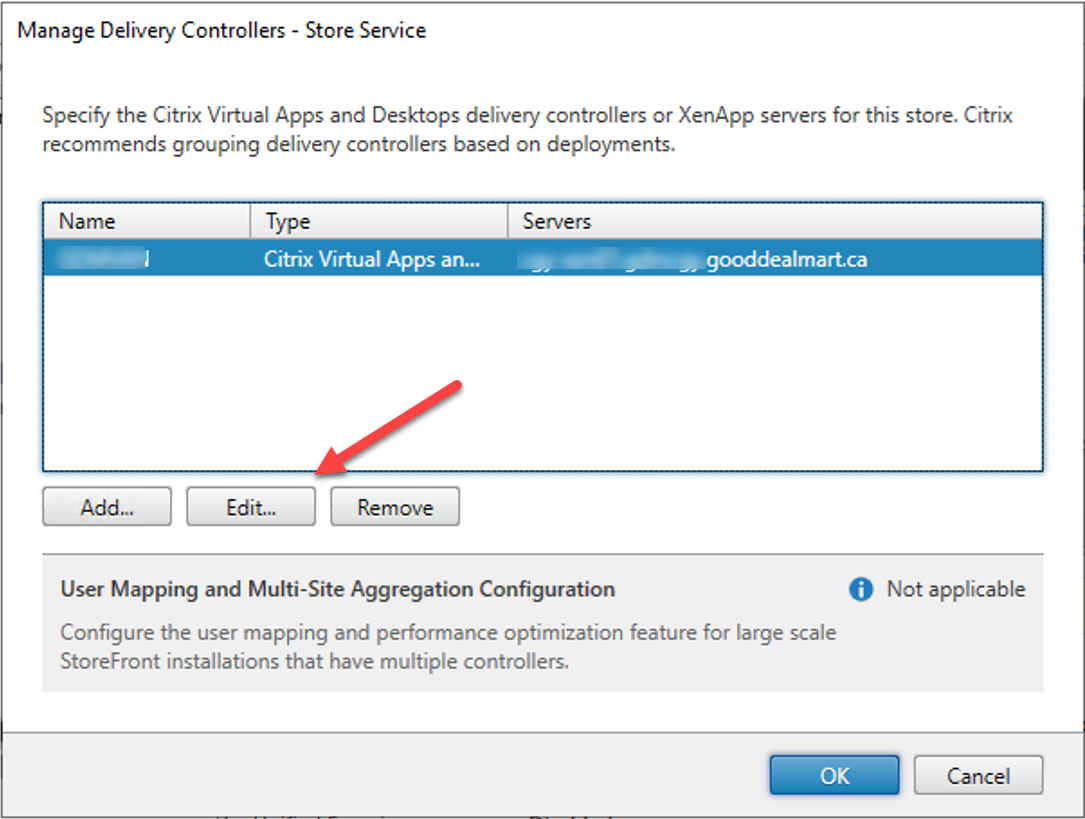
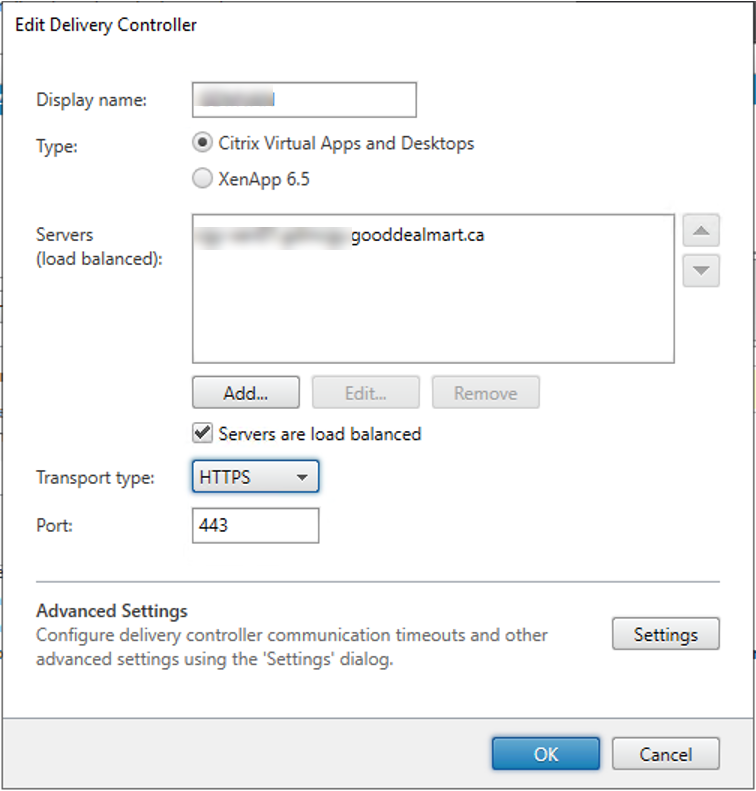
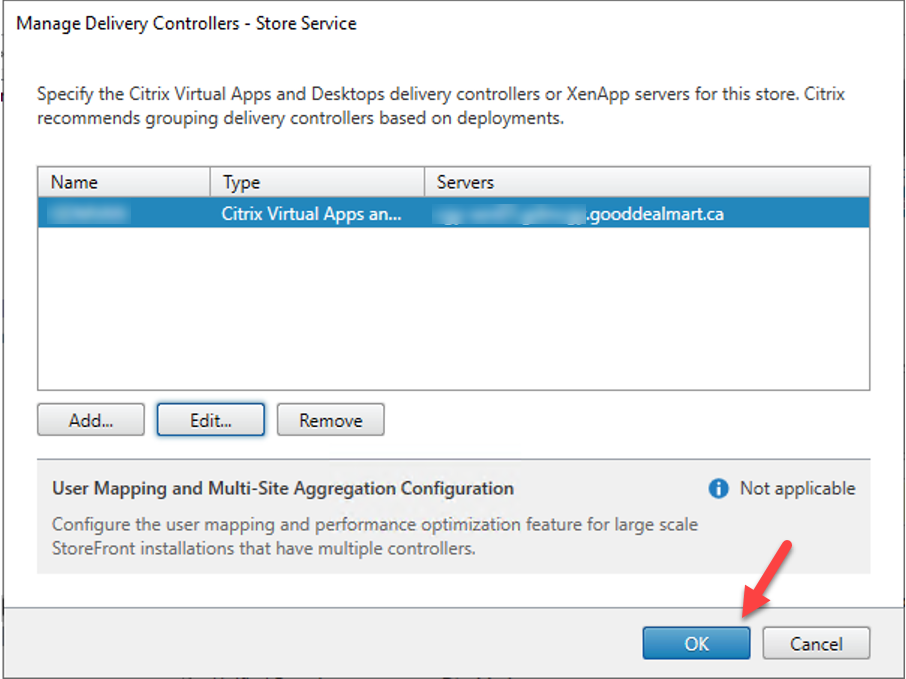
23.On the Manage Delivery Controllers – Store Service page, click Edit.
24.On the Edit Delivery Controller page, change the Transport type from HTTP to HTTPS.
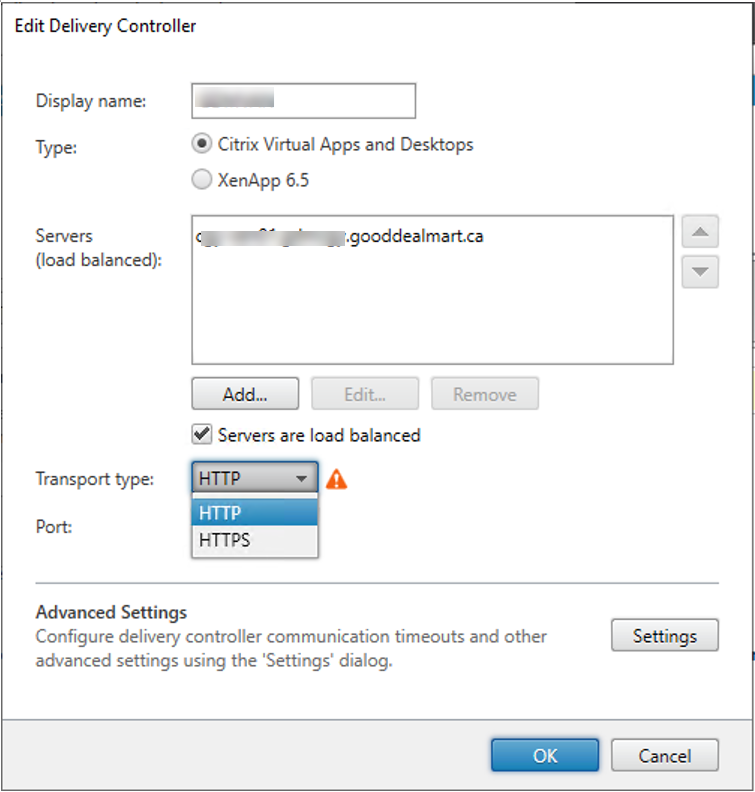
25..On the Edit Delivery Controller page, click OK.
26.On the Manage Delivery Controllers – Store Service page, click OK.
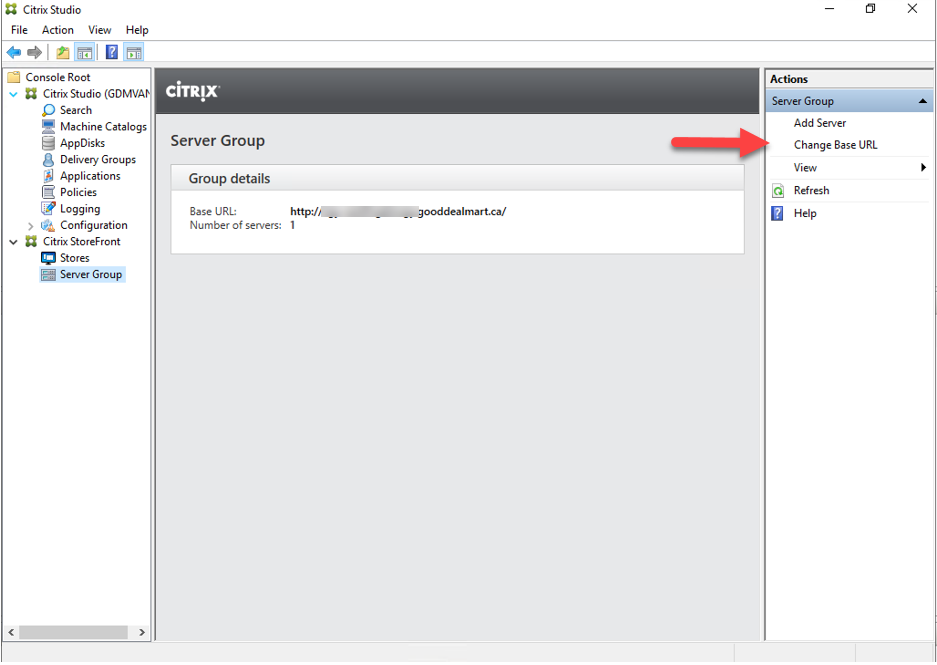
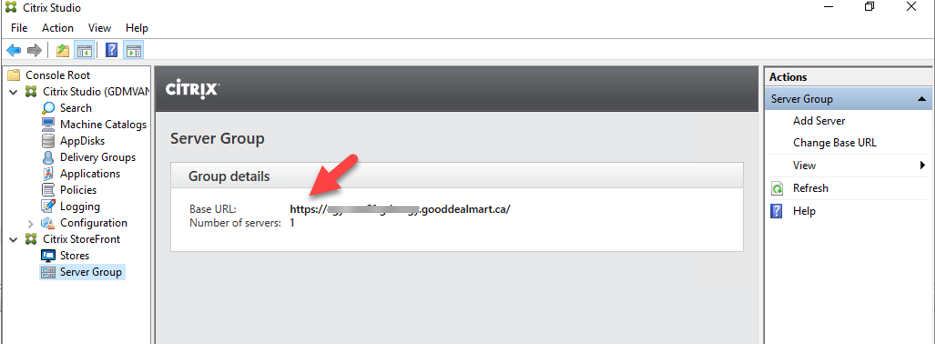
27.Open Citrix Studio, under the Citrix StoreFront, select Server Group, click Change Base URL.
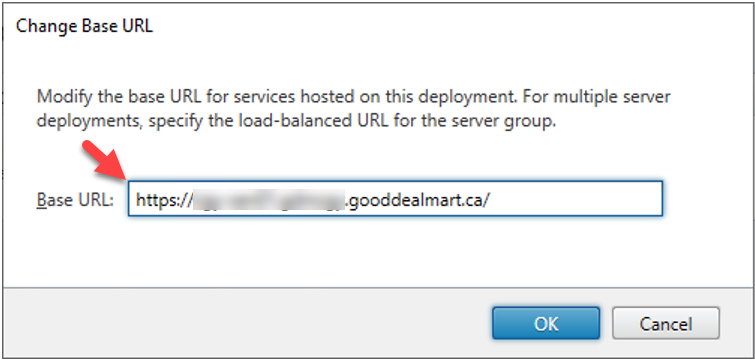
28.On the Change Base URL, change the URL from HTTP to HTTPS, click OK.
29.On the Server Group page, verify the Base URL changed to HTTPS.
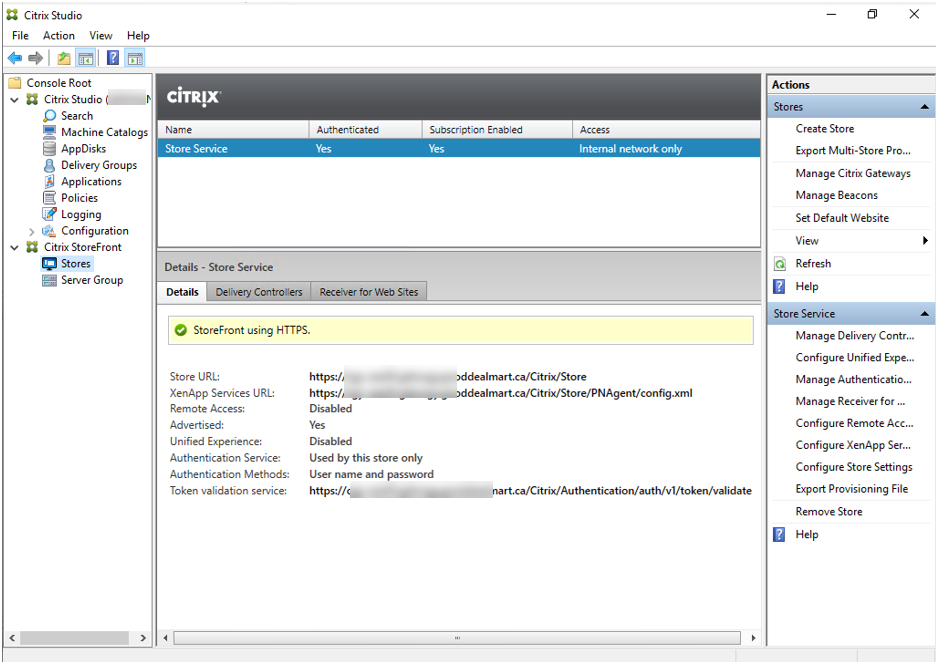
30.On the Store page, verify the Details-Store Service.
Hope you enjoy this post.
Cary Sun
Twitter: @SifuSun
Web Site: carysun.com
Blog Site: checkyourlogs.net
Blog Site: gooddealmart.com
Author: Cary Sun
Cary Sun has a wealth of knowledge and expertise in data center and deployment solutions. As a Principal Consultant, he likely works closely with clients to help them design, implement, and manage their data center infrastructure and deployment strategies.
With his background in data center solutions, Cary Sun may have experience in server and storage virtualization, network design and optimization, backup and disaster recovery planning, and security and compliance management. He holds CISCO CERTIFIED INTERNETWORK EXPERT (CCIE No.4531) from 1999. Cary is also a Microsoft Most Valuable Professional (MVP), Microsoft Azure MVP, Veeam Vanguard and Cisco Champion. He is a published author with several titles, including blogs on Checkyourlogs.net, and the author of many books.
Cary is a very active blogger at checkyourlogs.net and is permanently available online for questions from the community. His passion for technology is contagious, improving everyone around him at what they do.
Blog site: https://www.checkyourlogs.net
Web site: https://carysun.com
Blog site: https://gooddealmart.com
Twitter: @SifuSun
in: https://www.linkedin.com/in/sifusun/
Amazon Author: https://Amazon.com/author/carysun
