A Group Managed Service Account (gMSA) is a domain account that can be configured on the server. The Microsoft Windows operating system manages the password, so the administrator does not need to manage the password. Complex passwords are generated randomly and changed every 30 days, reducing the risk of brute force and dictionary attacks.
gMSA has the following requirements and limitations:
- Microsoft Windows Server 2012 and later support gMSAs.
- Backups of Linux target machines that are members of an Active Directory domain are not supported by gMSAs.
- Because gMSAs require a connection to the domain controller, these accounts can only be accessed via the network.
- If you use a gMSA to back up a machine, both the backup proxy and the target machine must have access to the domain controller to obtain the gMSA password. The gMSA must be added to a member of the Administrators group on the target machine (local or domain). Add to the member if Domain Administrator is only required for Microsoft Active Directory backups and local Administrator permissions are sufficient for all other supported applications.
Note:
gMSA is supported for application-aware processing for backups or replicas of VMs running Microsoft Active Directory (domain controllers), Microsoft Exchange, Microsoft SQL Server, and Oracle 12c Release 2 and later. The gMSA cannot back up or replicate VMs that run Microsoft SharePoint.
1. Log in to the domain controller server.
2. Open Windows PowerShell and run as administrator.
3. Run the cmdlet below to generate a root key.
Add-KdsRootKey –EffectiveTime ((get-date).addhours(-10))

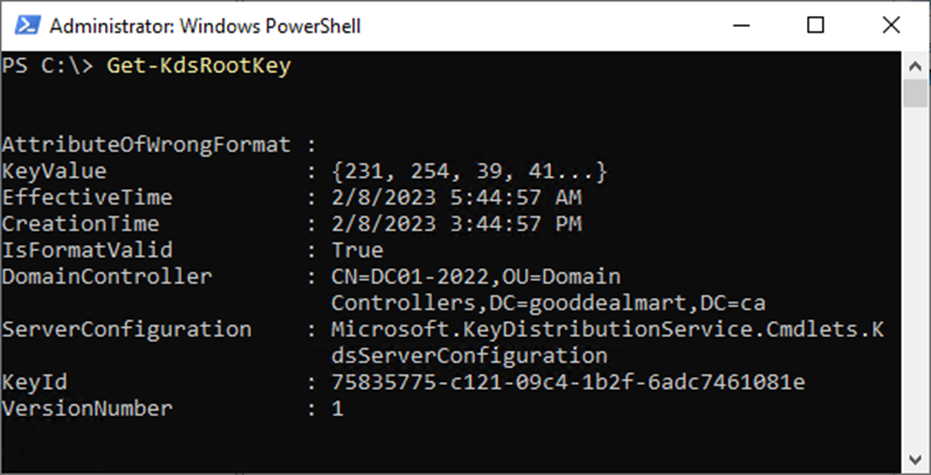
4. Run the cmdlet below to ensure the KDS root key has been created successfully.
Get-KdsRootKey
5. Run the cmdlet below to check the KDS key.
Test-KdsRootKey -KeyId (Get-KdsRootKey).KeyId

6. Run the below cmdlet to enable gMSA.
Add-WindowsFeature NET-Framework, RSAT-ADDS 2>&1 | Out-Null
Import-Module ServerManager
Install-WindowsFeature -IncludeAllSubFeature RSAT | Out-Null
Import-Module ActiveDirectory

7. Restart the domain controller server.
8. Login to the domain controller server.
9. Select the Active Directory Users and Computers item from the Tools drop-down list on the Server Manager page.
10. Create a new Active Directory OU.
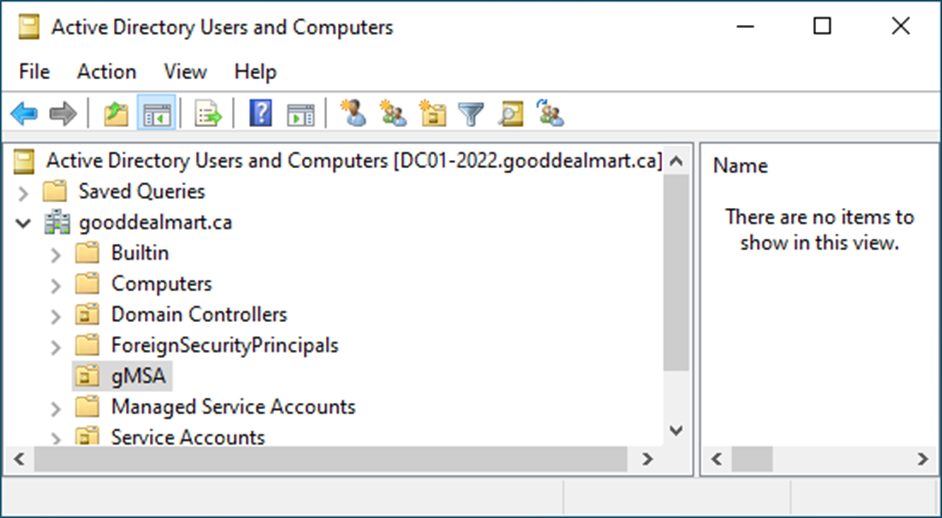
Note:
New-ADOrganizationalUnit -Name "gMSA" -Path "DC=GOODDEALMART, DC=CA"

11. Create a new security group for gMSA computers.
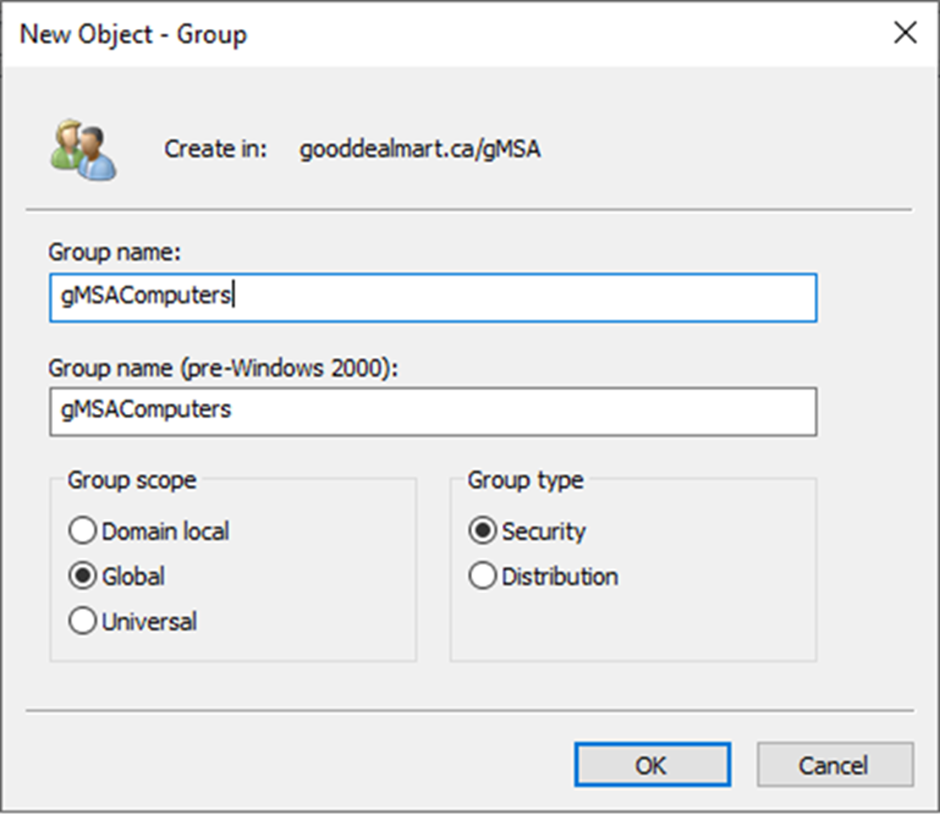
Note:
New-ADGroup -Name gMSAComputers -GroupCategory Security -GroupScope Global -Path "OU=gMSA, DC=GOODDEALMART, DC=CA"

12. Add computer objects to the new security group. These computer objects will be allowed to use gMSA.
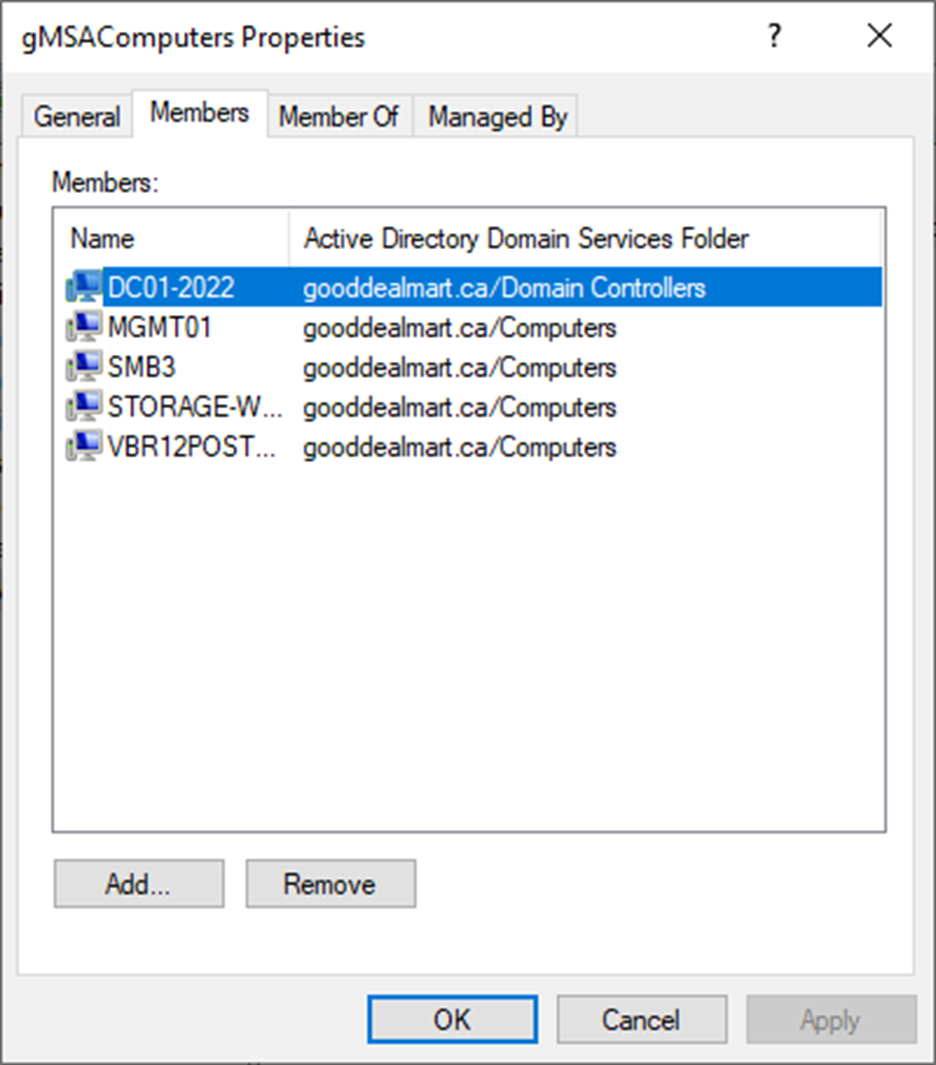
Note:
$gMSAComputers = @('DC01-2022$','MGMT01$','SMB3$','STORAGE-WIN$','VBR12POSTGRESQL$')
Add-AdGroupMember -Identity gMSAComputers -Members $gMSAComputers

13. Open Windows PowerShell and run as administrator.
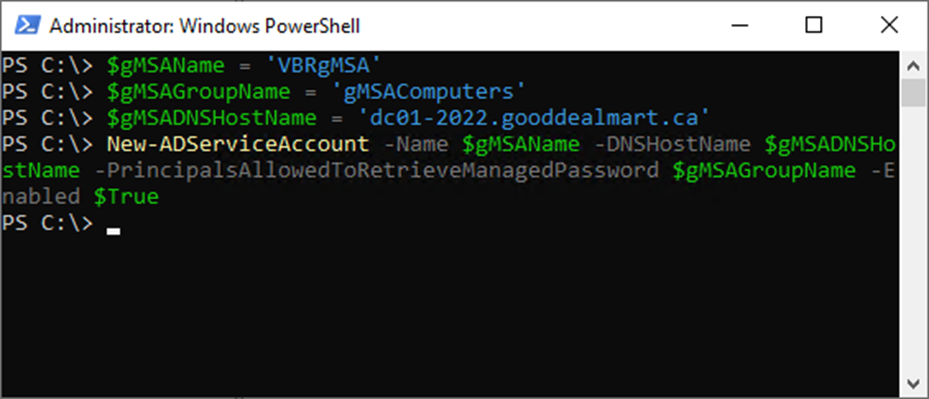
14. Run the below cmdlet to create a gMSA account.
$gMSAName = 'VBRgMSA'
$gMSAGroupName = 'gMSAComputers'
$gMSADNSHostName = 'dc01-2022.gooddealmart.ca'
New-ADServiceAccount -Name $gMSAName -DNSHostName $gMSADNSHostName -PrincipalsAllowedToRetrieveManagedPassword $gMSAGroupName -Enabled $True
15. Select the Active Directory Users and Computers from the Tools drop-down list on the Server Manager page.
16. Ensure the newly created VBRgMSA service account is shown in the Managed Service Accounts OU.
Note:
Use separate gMSAs accounts for critical backup infrastructure components to provide a more secure environment.
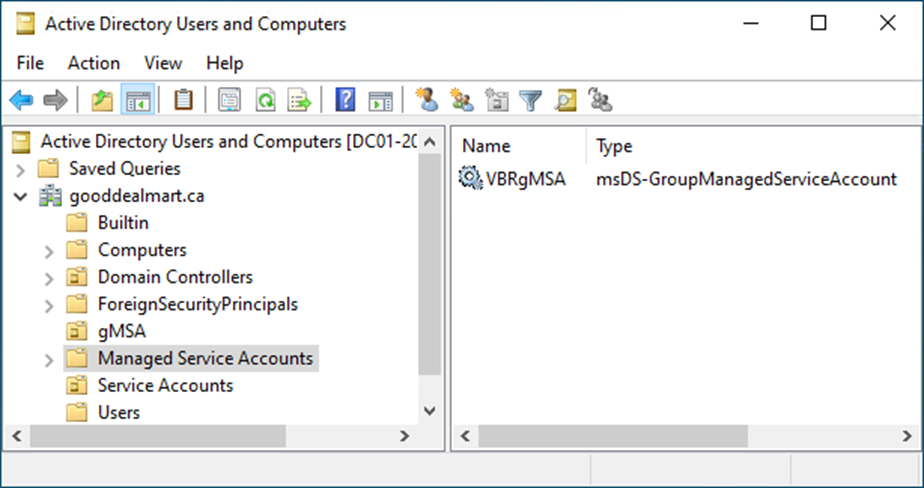
17. Run the below cmdlet to install gMSA on the domain controller as the target machine.
Install-ADServiceAccount VBRgMSA

18. Run the below cmdlet to ensure that the gMSA was successfully installed.
Test-ADServiceAccount VBRgMSA

19. Run the below cmdlet to Add the VBRgMSA service account to the domain Admins group.
Add-ADGroupMember -Identity Administrators -Members VBRgMSA$

20. Run the below cmdlet to Add the VBRgMSA service account to the Local Administrators group.
$gMSAComputers = @('MGMT01','SMB3','STORAGE-WIN','VBR12POSTGRESQL')
Invoke-Command $gMSAComputers {Add-LocalGroupMember -Group 'Administrators' -Member 'VBRgMSA$'}

21. Login to the Veeam Backup and replication manager server.
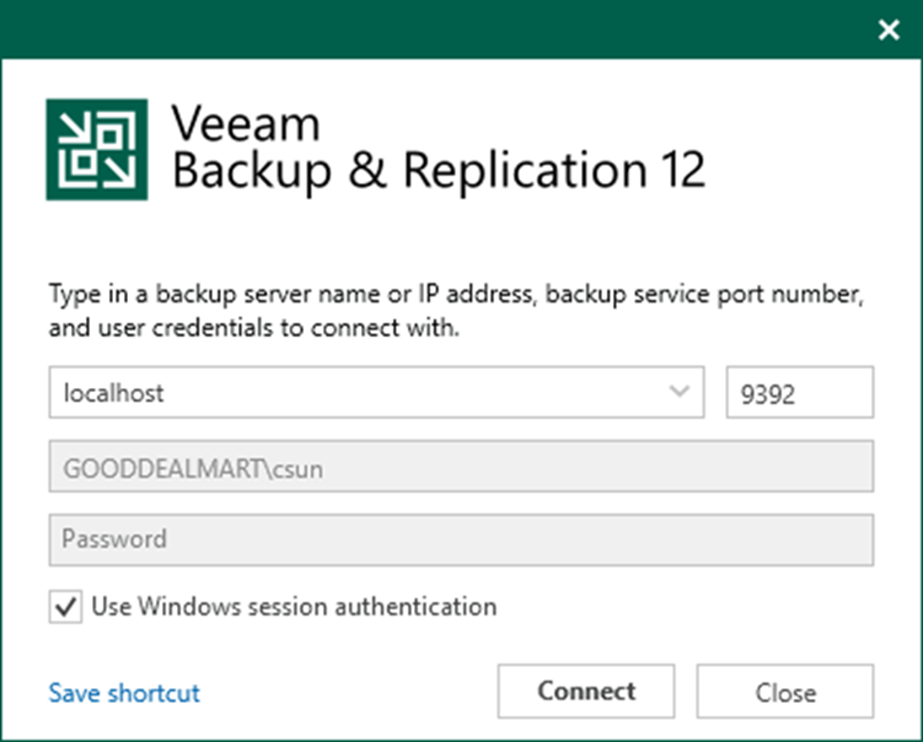
22. Open the Veeam Backup & Replication Console and click Connect.
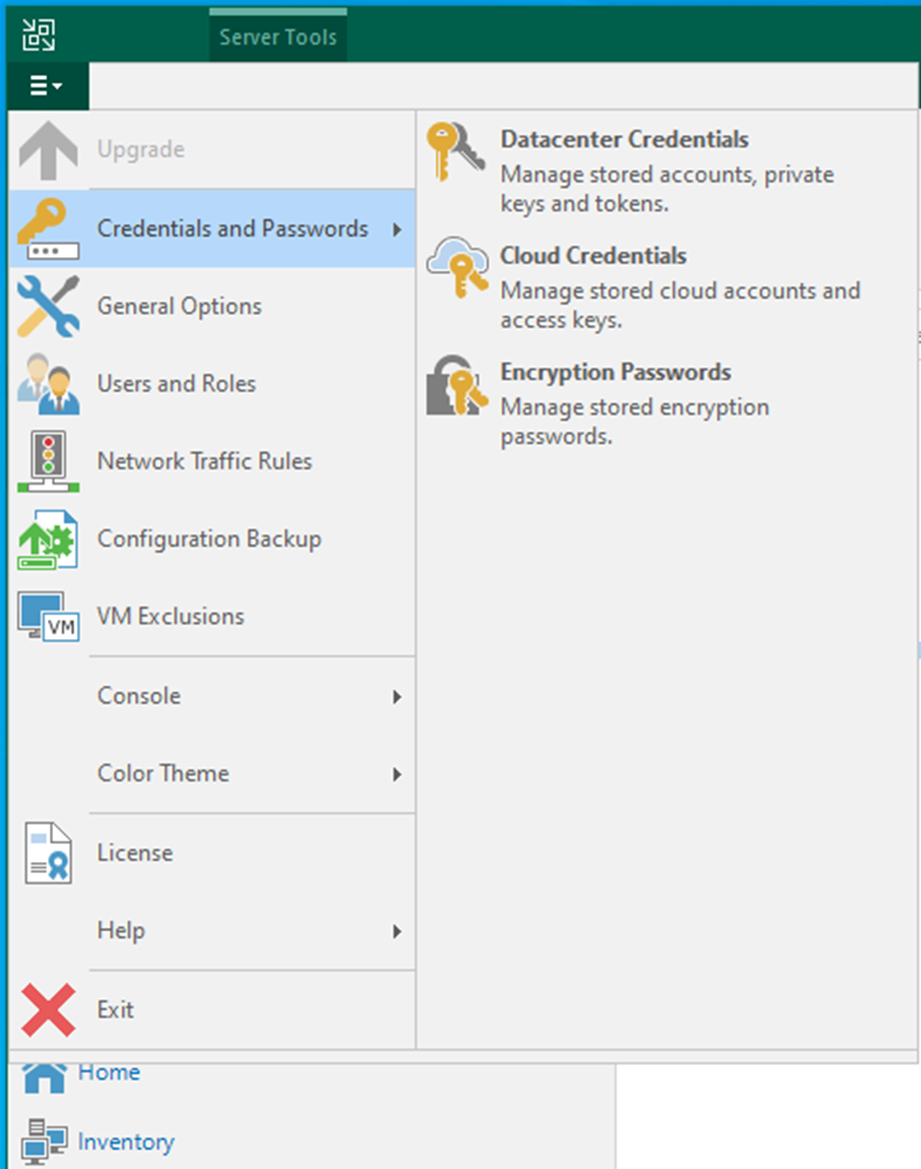
23. Select Credentials and Passwords from the main menu.
24. Select Datacenter Credentials.
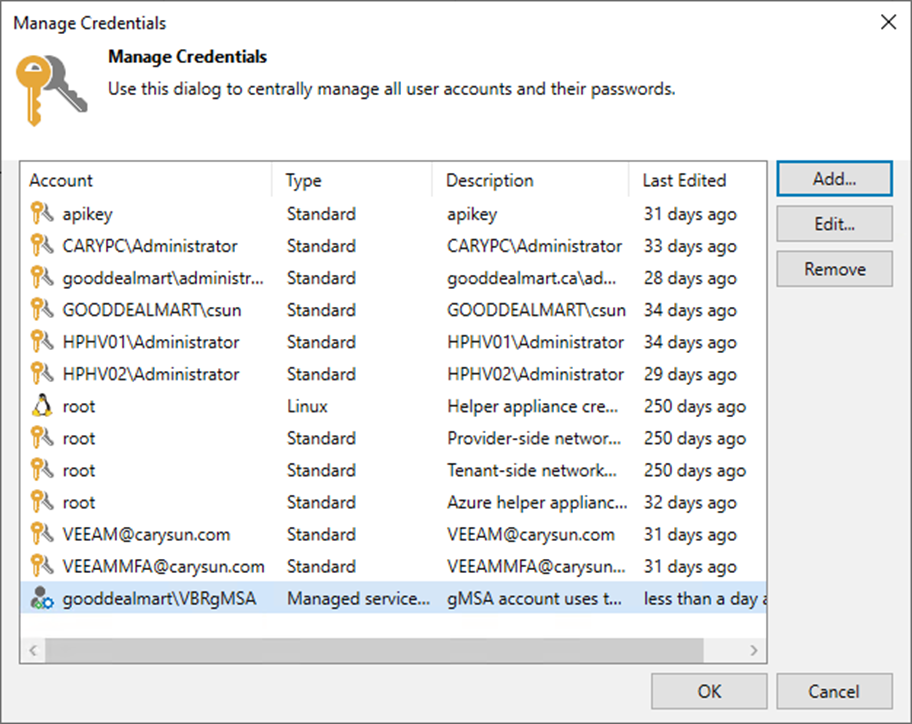
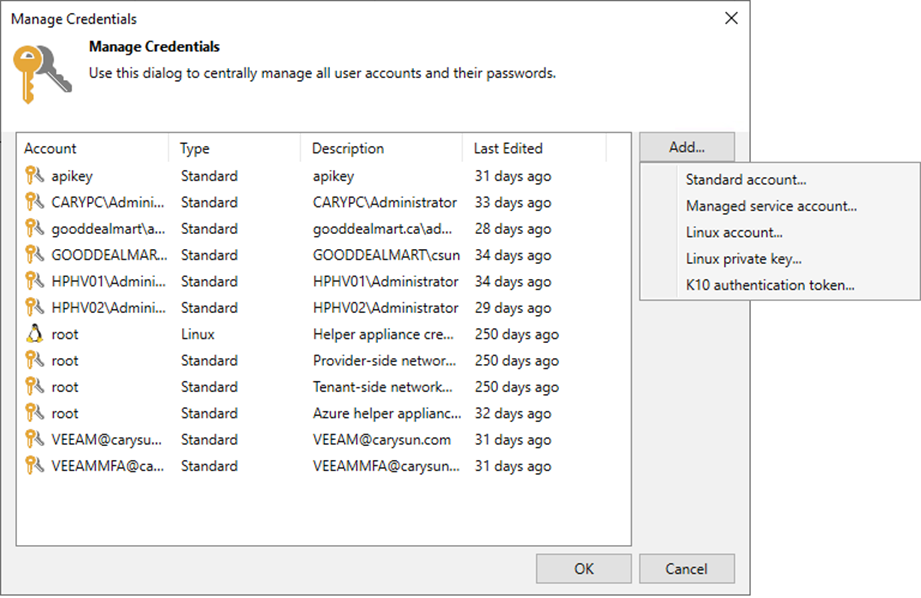
25. Click Add on the Manage Credentials page and select Managed service account.
26. Enter the new gMSA account in the Username field on the Credentials page.
27. Give a brief description in the Description field for future reference and click OK.
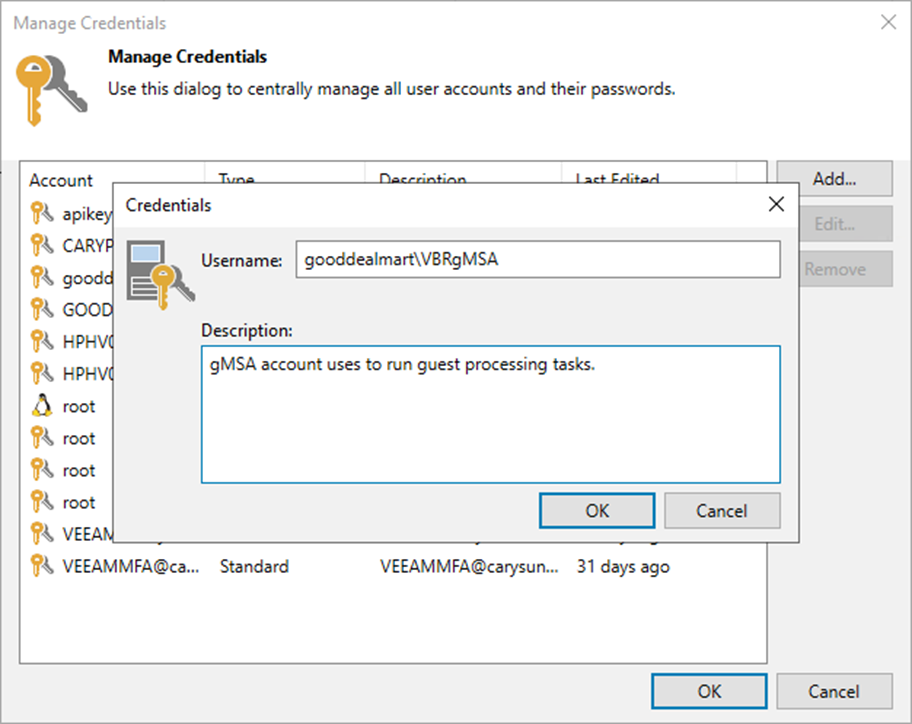
28. Ensure the gMSA account is added to the Manage Credentials page and click OK.

I hope you enjoy this post.
Cary Sun
Twitter: @SifuSun
Web Site: carysun.com
Blog Site: checkyourlogs.net
Blog Site: gooddealmart.com
Author: Cary Sun
Cary Sun has a wealth of knowledge and expertise in data center and deployment solutions. As a Principal Consultant, he likely works closely with clients to help them design, implement, and manage their data center infrastructure and deployment strategies.
With his background in data center solutions, Cary Sun may have experience in server and storage virtualization, network design and optimization, backup and disaster recovery planning, and security and compliance management. He holds CISCO CERTIFIED INTERNETWORK EXPERT (CCIE No.4531) from 1999. Cary is also a Microsoft Most Valuable Professional (MVP), Microsoft Azure MVP, Veeam Vanguard and Cisco Champion. He is a published author with several titles, including blogs on Checkyourlogs.net, and the author of many books.
Cary is a very active blogger at checkyourlogs.net and is permanently available online for questions from the community. His passion for technology is contagious, improving everyone around him at what they do.
Blog site: https://www.checkyourlogs.net
Web site: https://carysun.com
Blog site: https://gooddealmart.com
Twitter: @SifuSun
in: https://www.linkedin.com/in/sifusun/
Amazon Author: https://Amazon.com/author/carysun
