A replication job must be configured before you can create VM replicas. The replication job specifies how, where, and when VM data is replicated. A single job can process one or more virtual machines.
This procedure creates a replication job to replicate the specified production virtual machines at the same production site.
1. Login to the Veeam Backup and replication manager server.
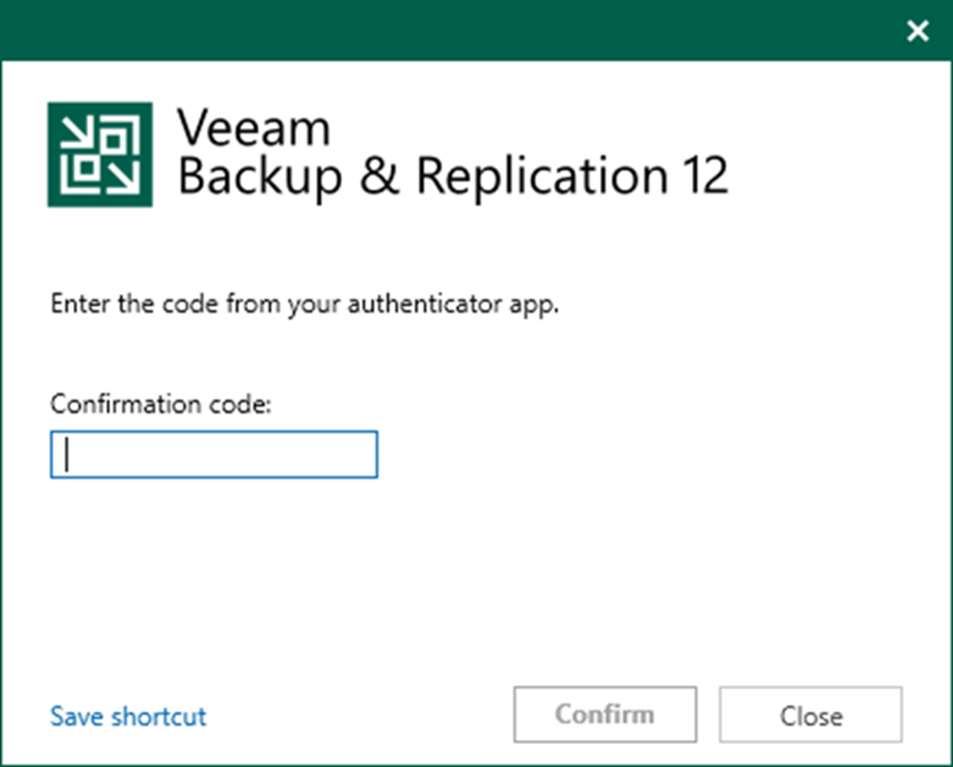
2. Open the Veeam Backup & Replication Console and click Connect.
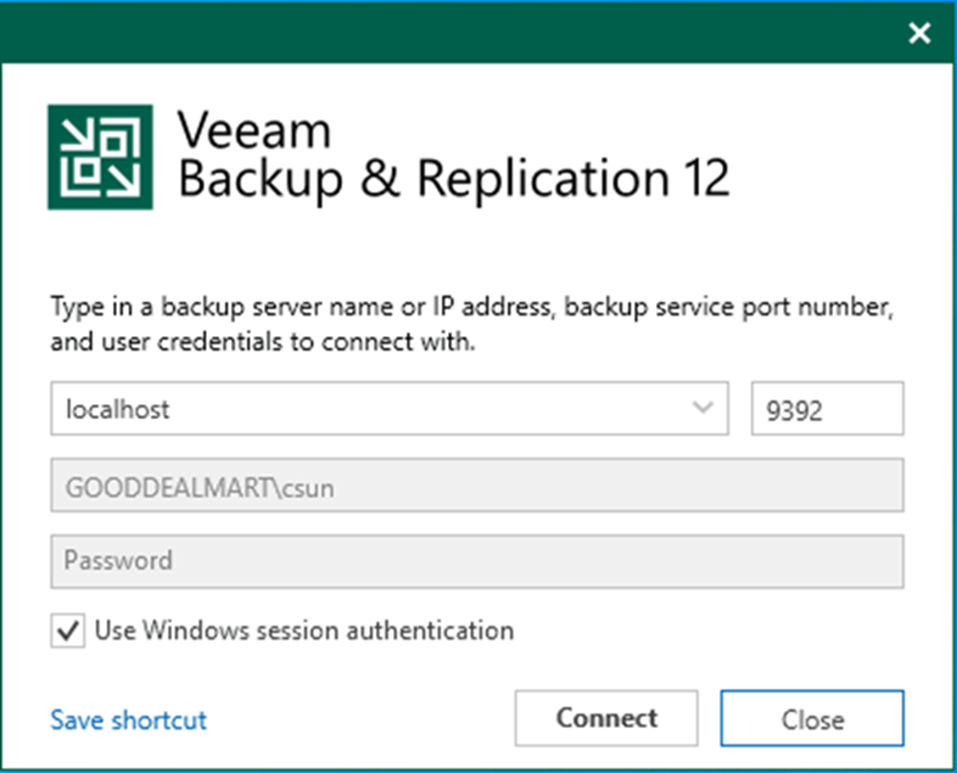
3. Enter the MFA Confirmation code and click Confirm.
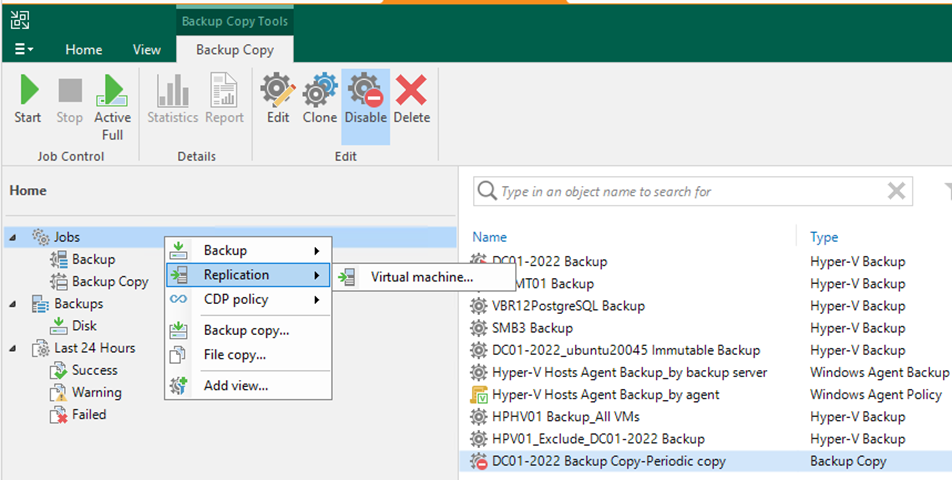
4. On the Home page, select Jobs.
5. Right-click Jobs, select Replication.
6. Click Virtual machine.
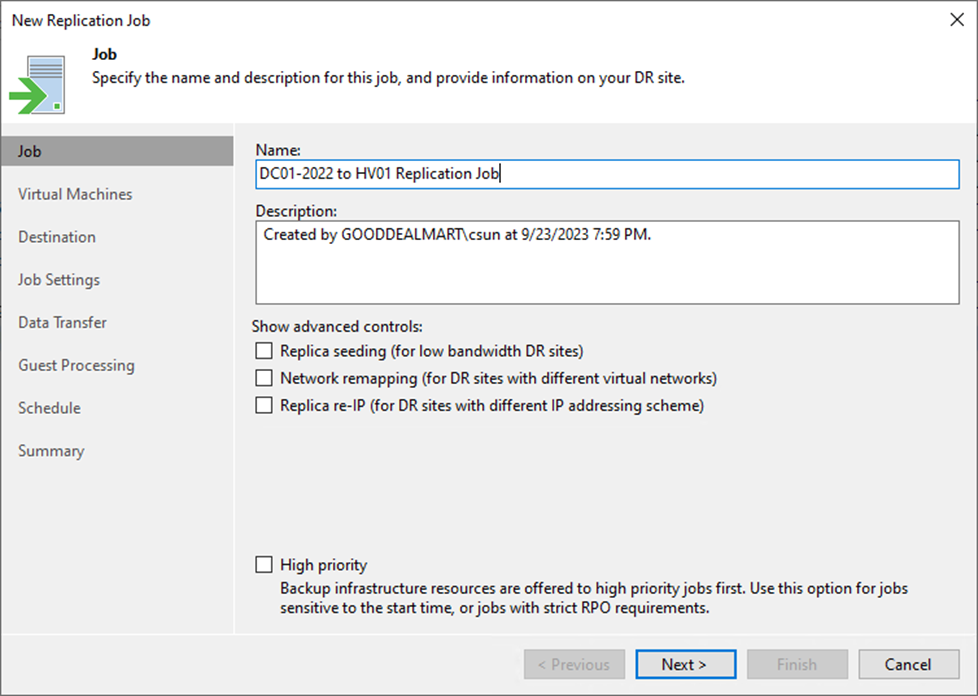
7. On the Job page, enter a name for the replication job in the Name field.
8. Describe the Description field.
9. Select the High priority check box if required.
10. Click Next.

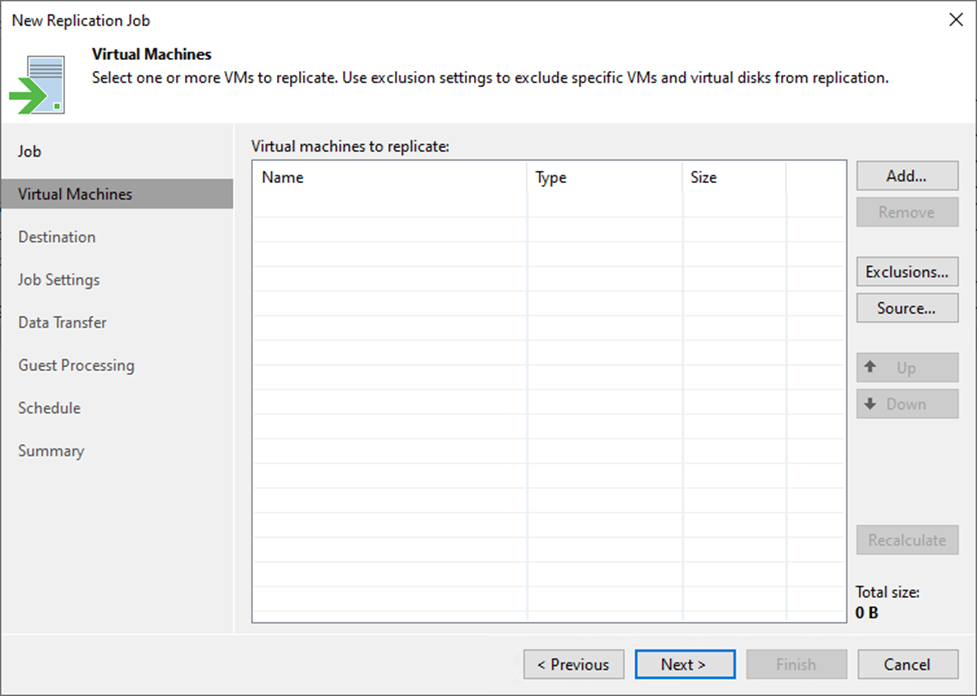
11. On the Virtual Machines page, click Add.
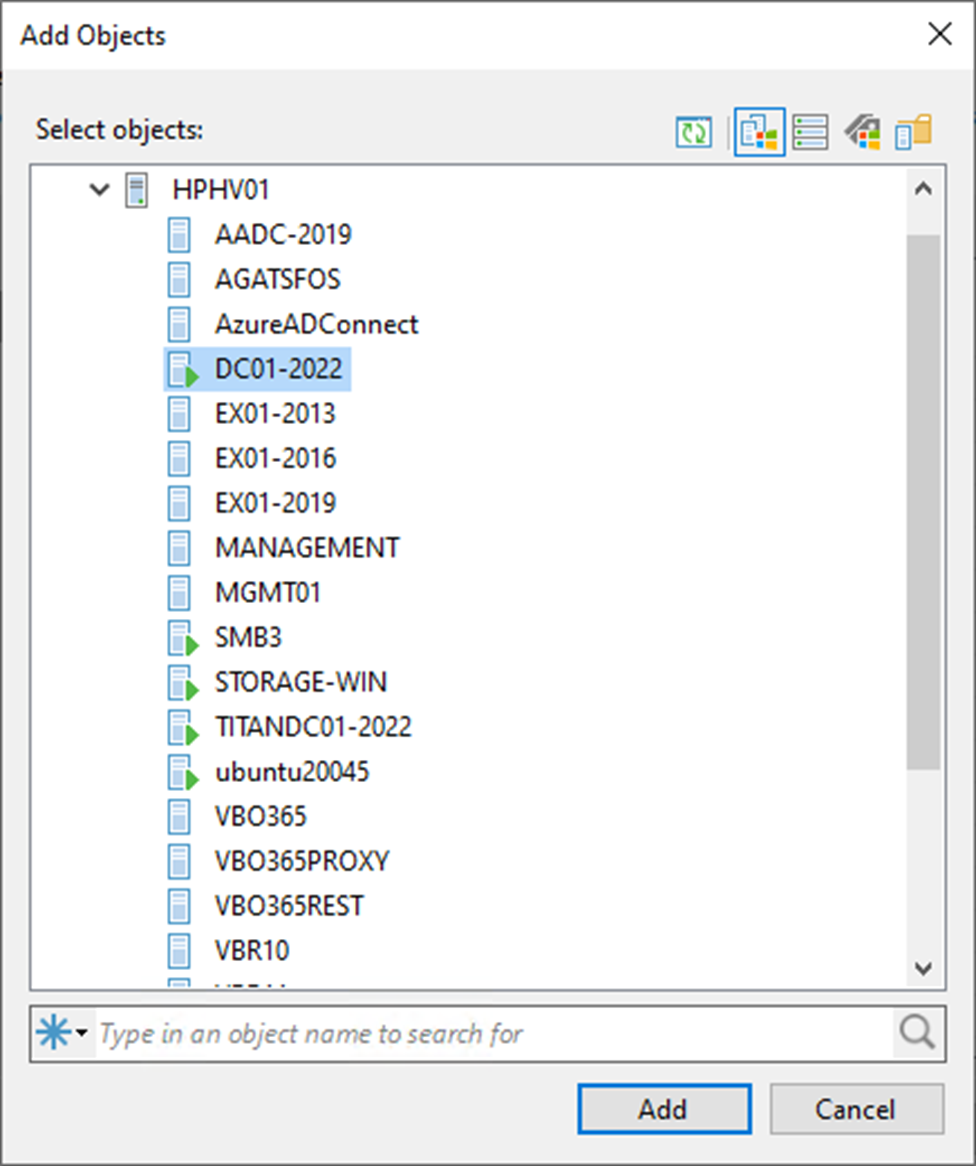
12. On the Add Objects page, Select the objects in the list and click Add.
13. On the Virtual machines page, click Source.
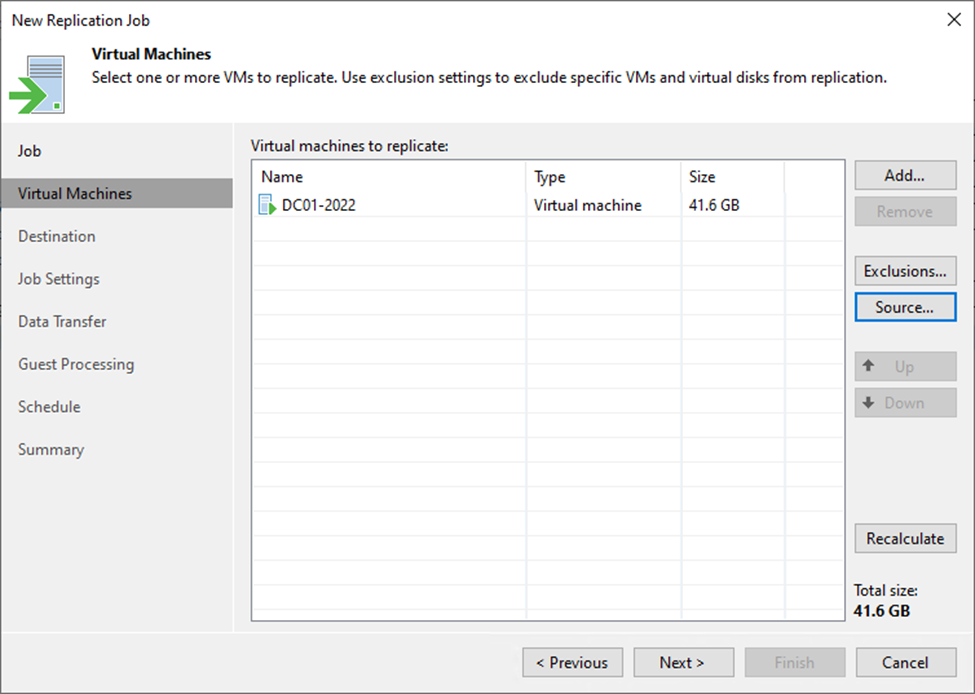
14. Select the From production storage (actual VM state) on the Source Repositories page. Veeam Replication will retrieve VM data from data stores connected to the source Microsoft Hyper-V host.
15. Select Form backup files (latest VM state available in backups) if required. Veeam Replication will read VM data from the backup chain already in the selected backup repository.
16. Click OK.
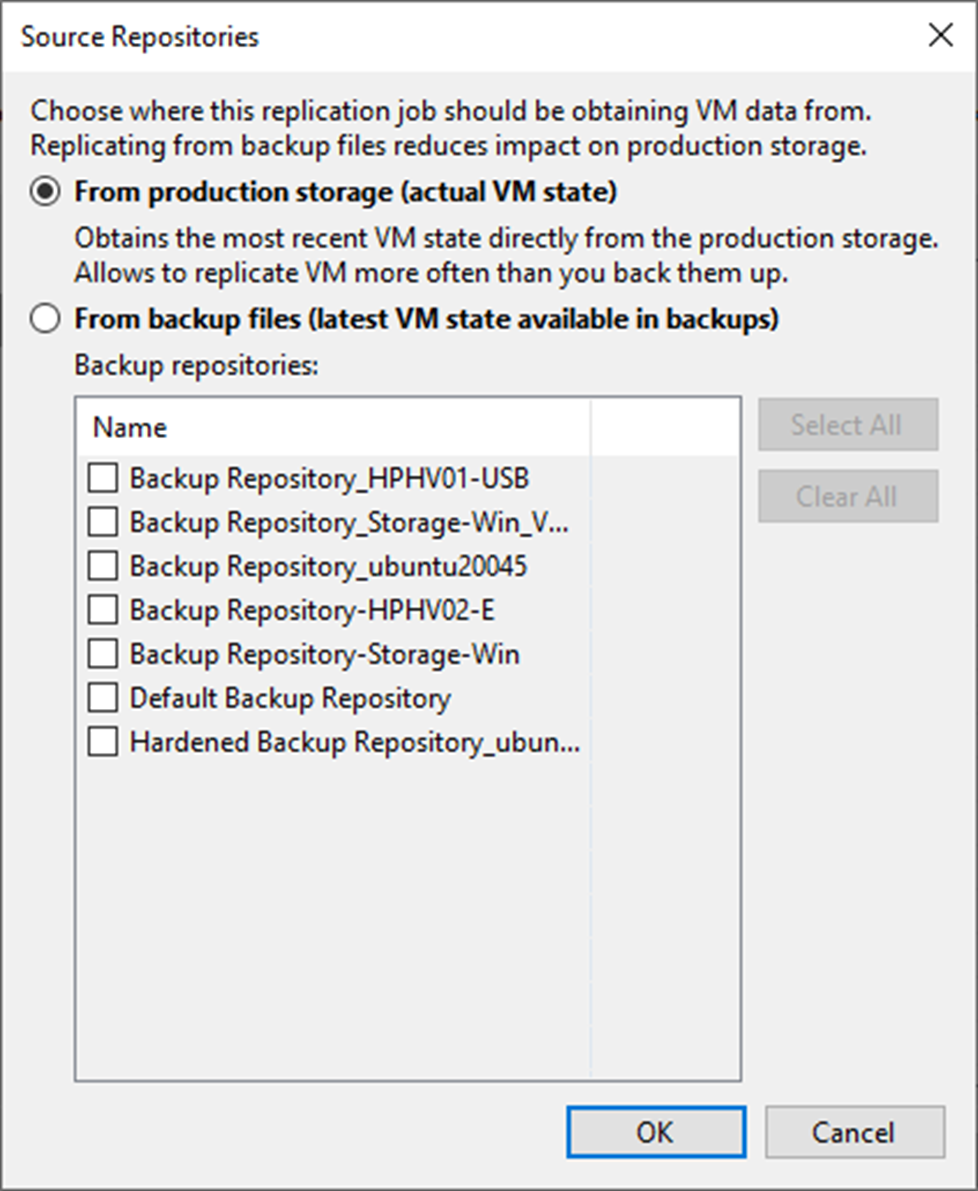
17. On the Virtual Machines page, click Next.
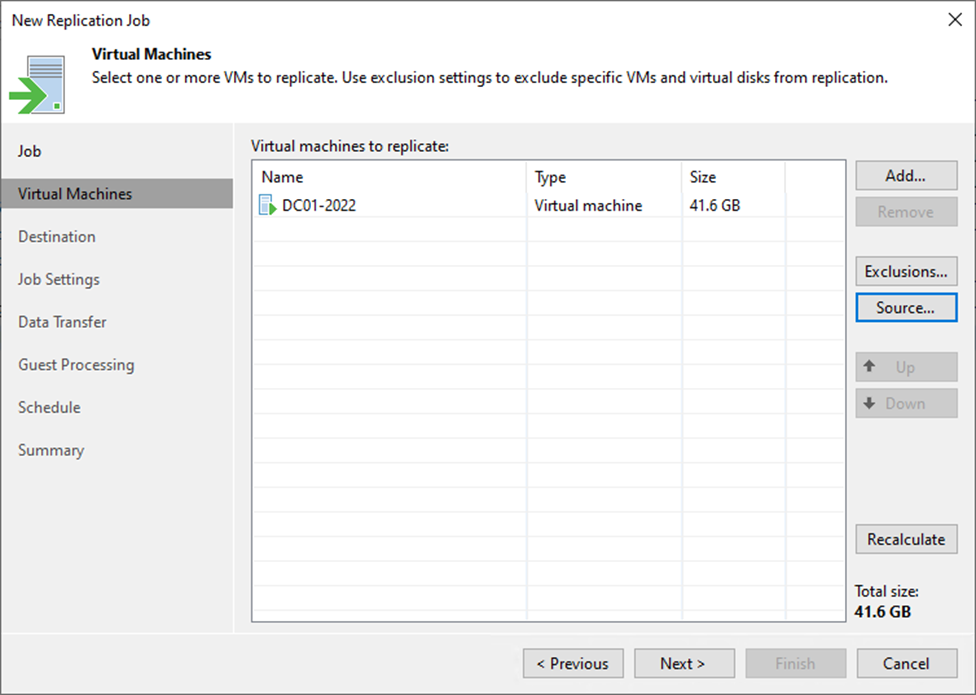
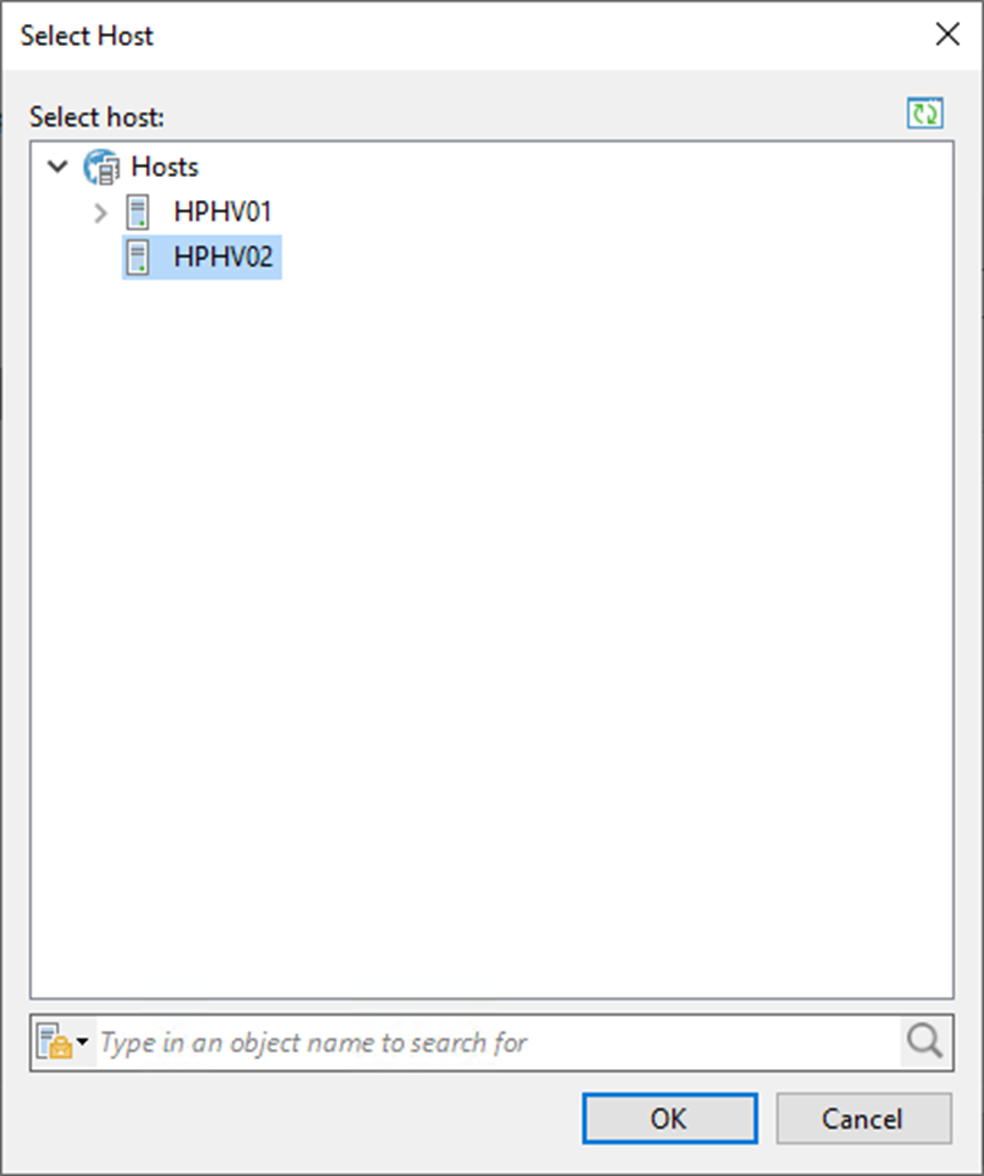
18. On the Destination page, click Choose in the Host or cluster session.
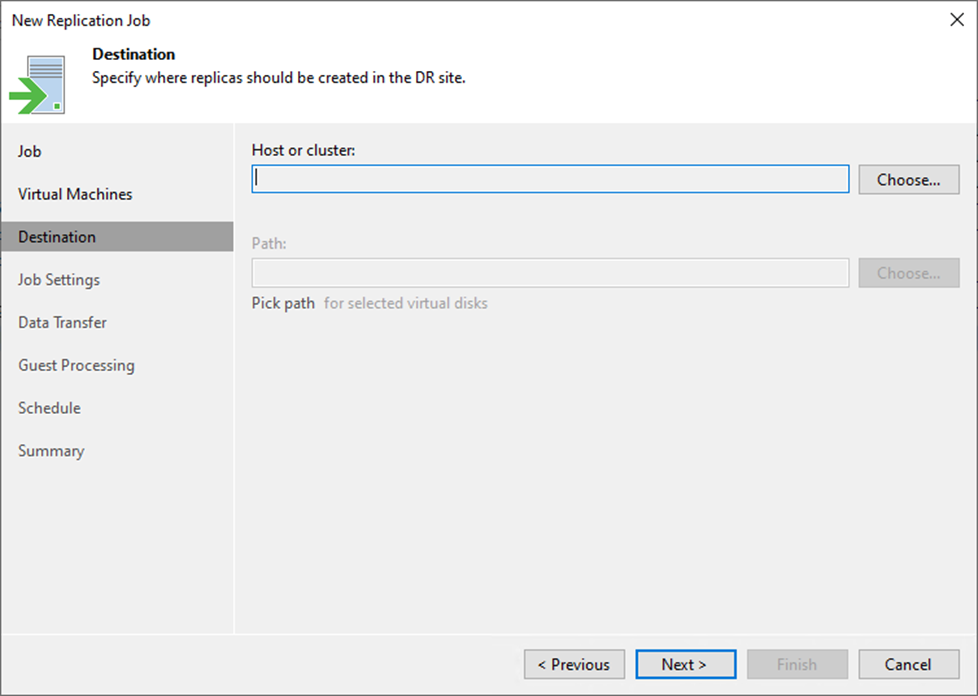
19. Select the destination host server on the Select Host page and click OK.
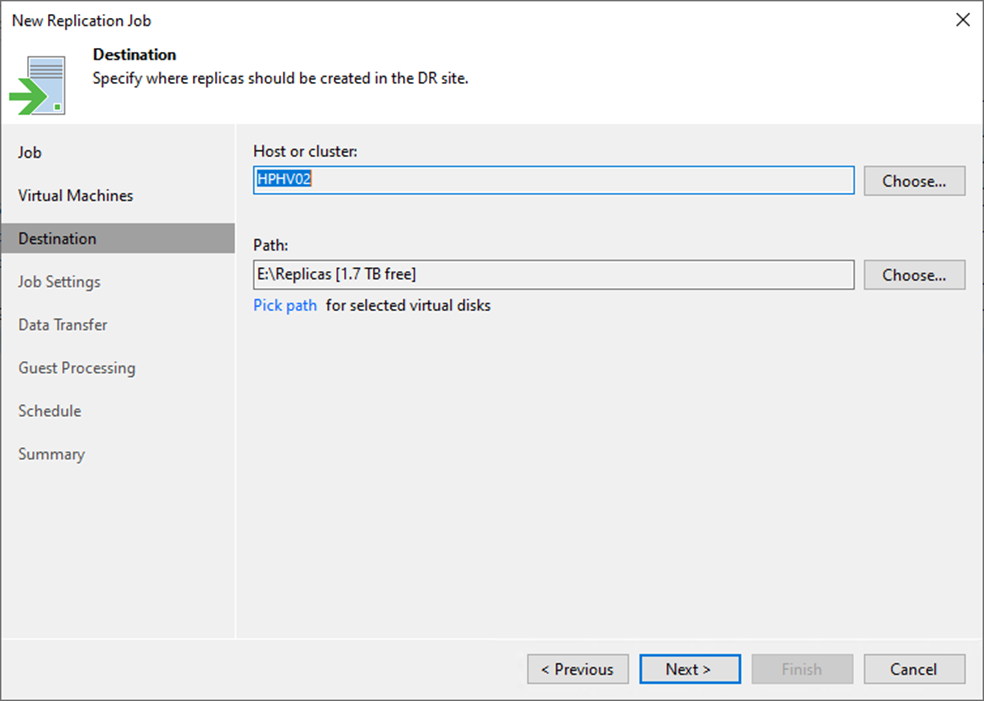
20. On the Destination page, click Choose in the Path session.
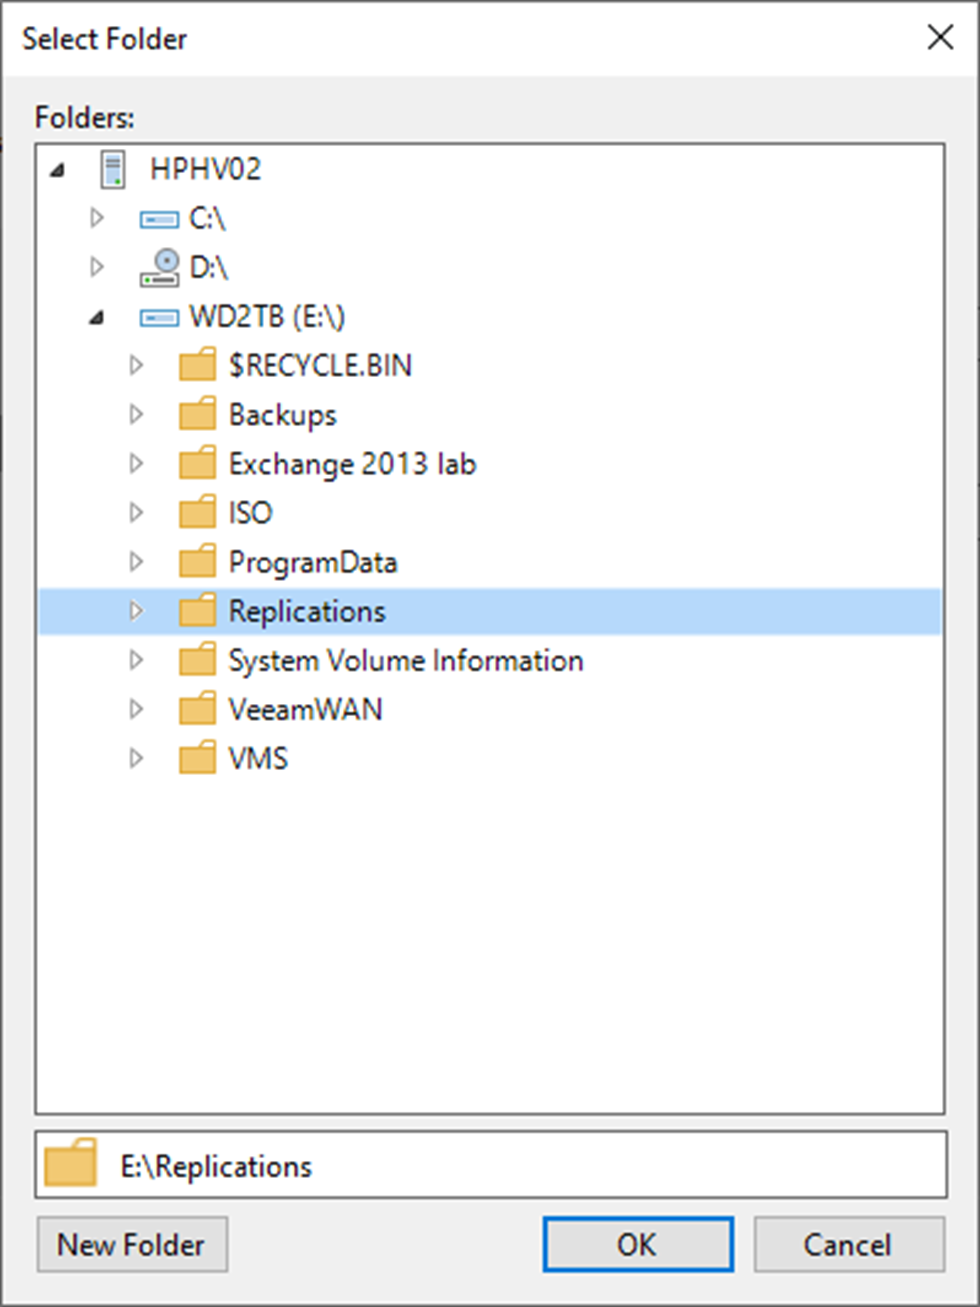
21. On the Folders page, specify a path to the folder where VM replica files must be stored, and click OK.
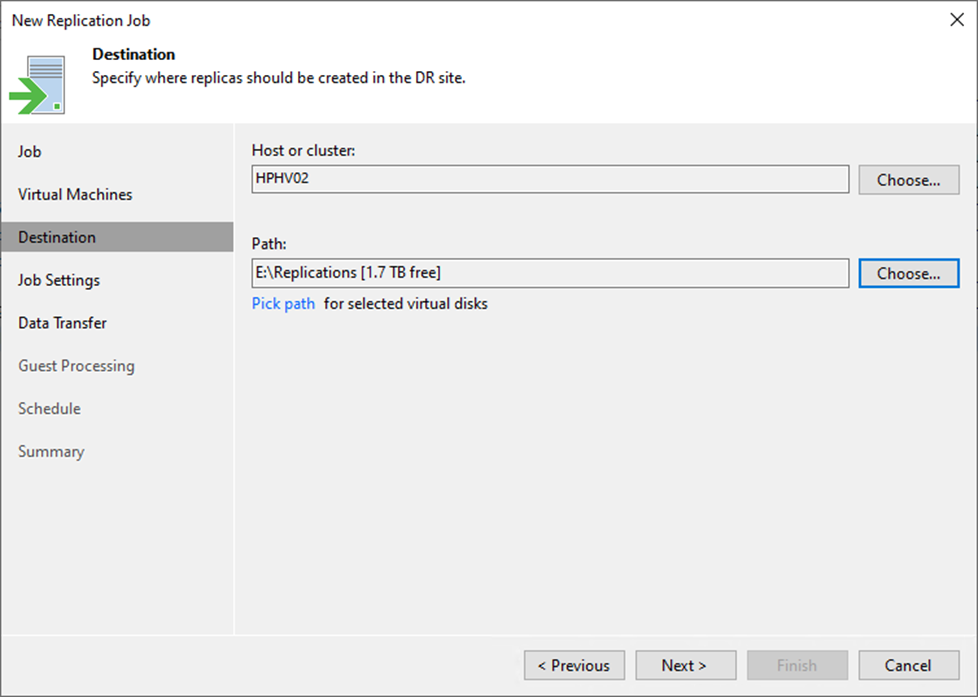
22. On the Destination page, click Next.
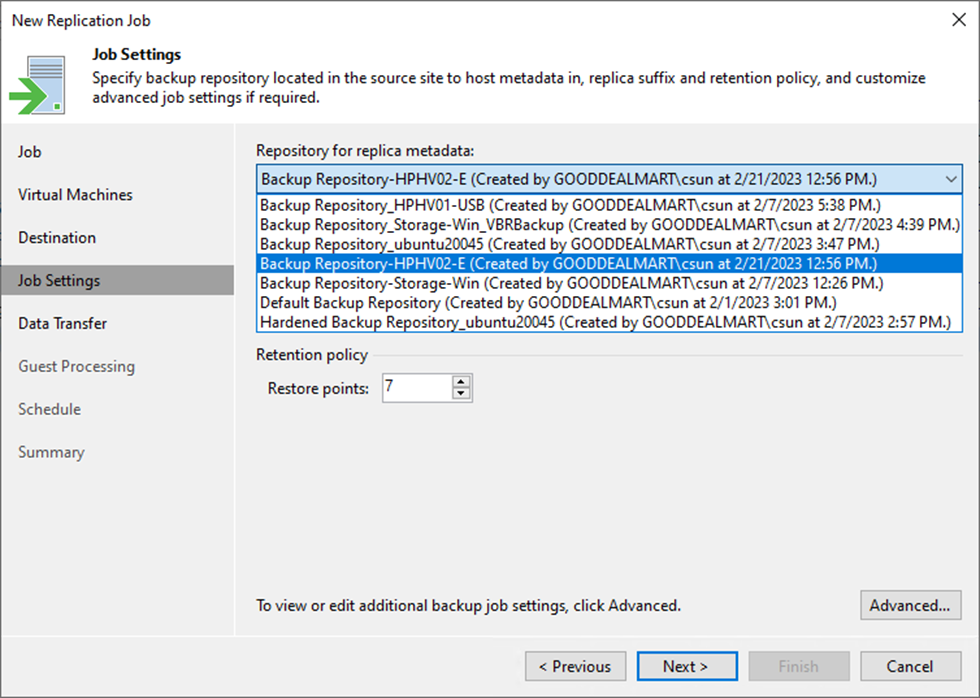
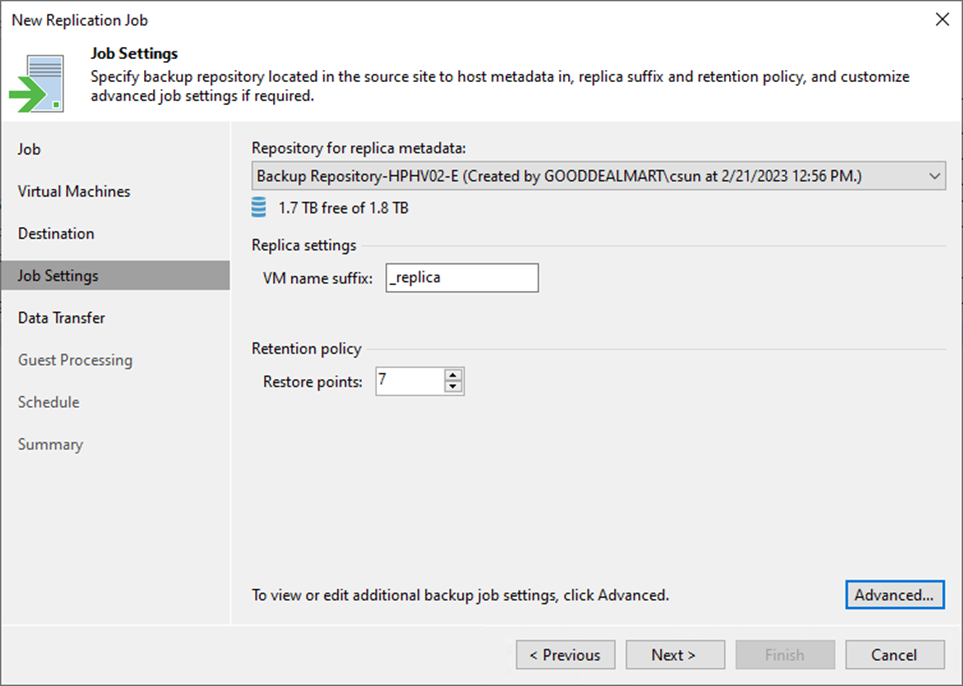
23. Select the Repository for metadata from the drop-down list on the Job Settings page.
Note:
- This setting must be specified only for snapshot replicas. Legacy replicas do not use a backup repository for storing metadata.
- You cannot store VM replica metadata on deduplicating storage appliances.
- You cannot store replica metadata in a scale-out backup repository.
24. Enter a suffix that will be appended to the original VM names in the Replica name suffix field.
25. Enter the number of restore points in the field.
26. Click Advanced.
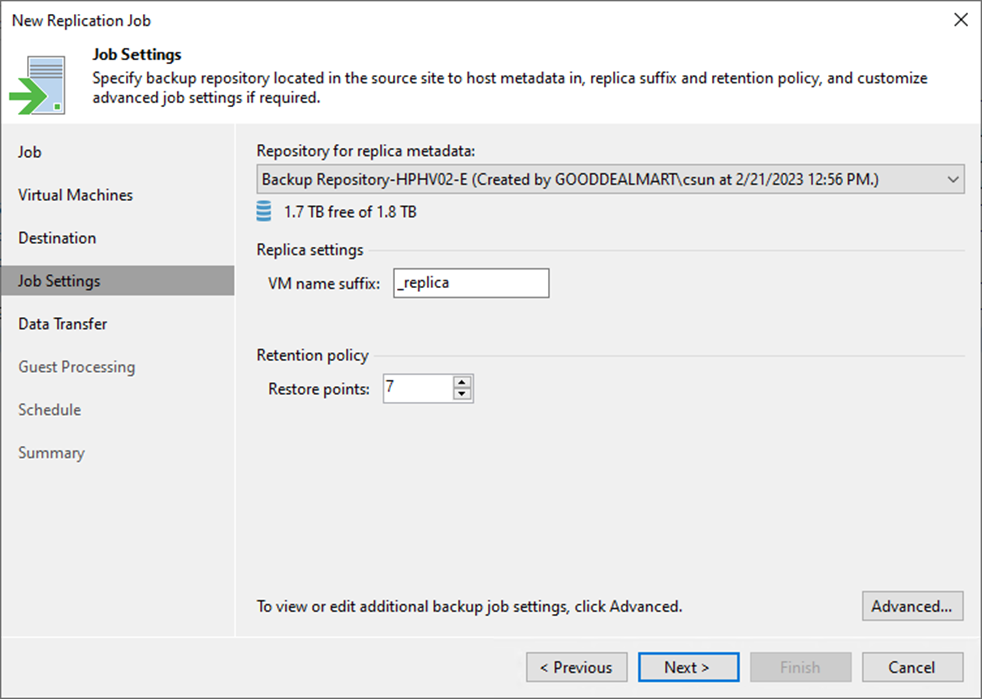
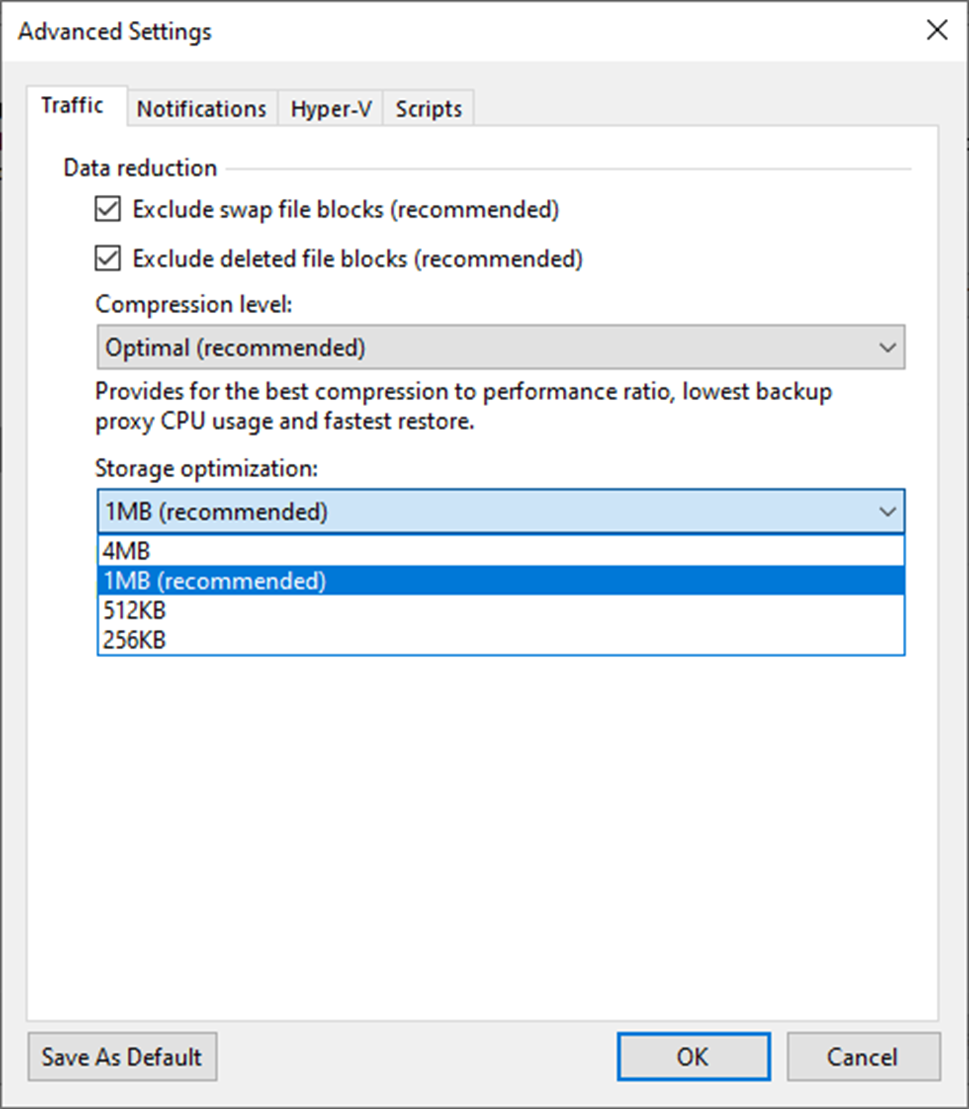
27. On Advanced Settings, click Traffic.
28. Select the Exclude swap file blocks checkbox (recommended).
29. Select the Exclude deleted file blocks (recommended) checkbox.
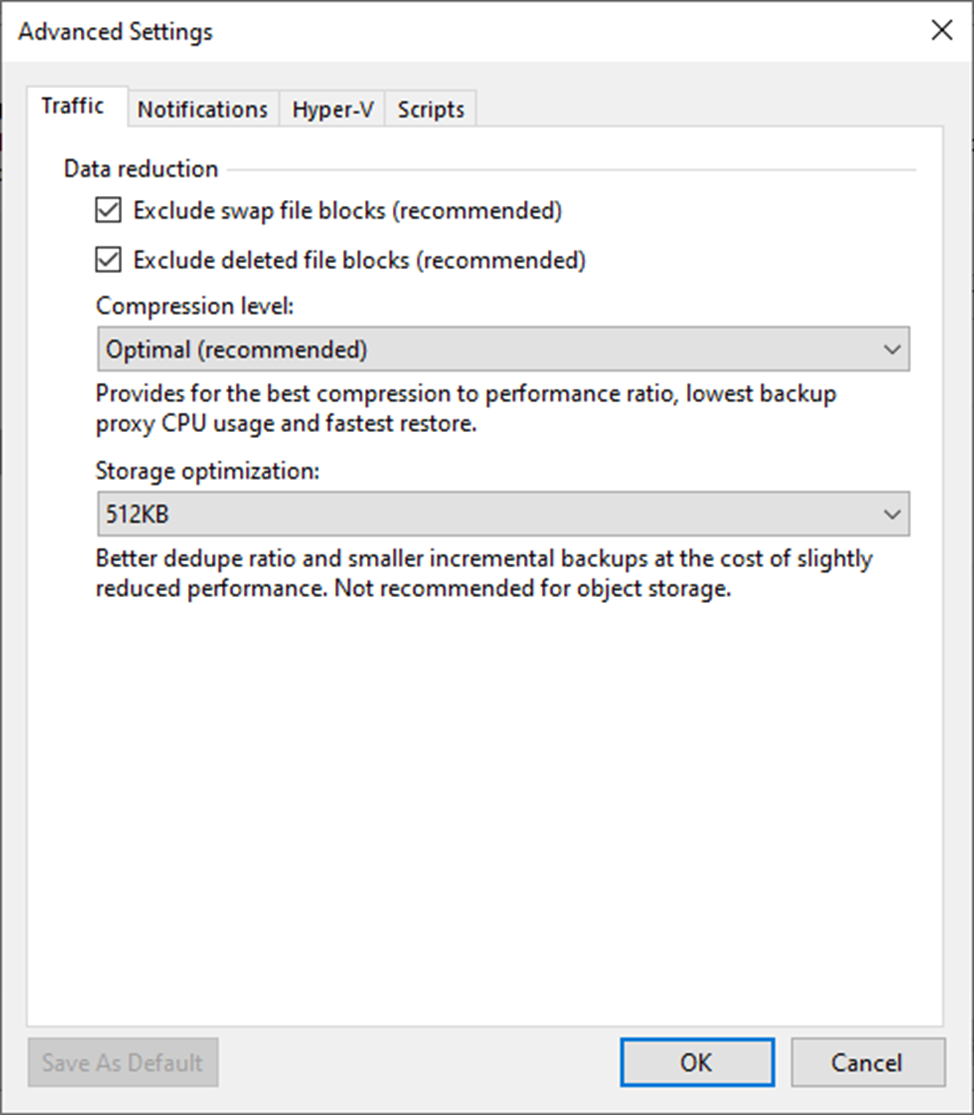
30. Select the compression level for replicas from the drop-down list.
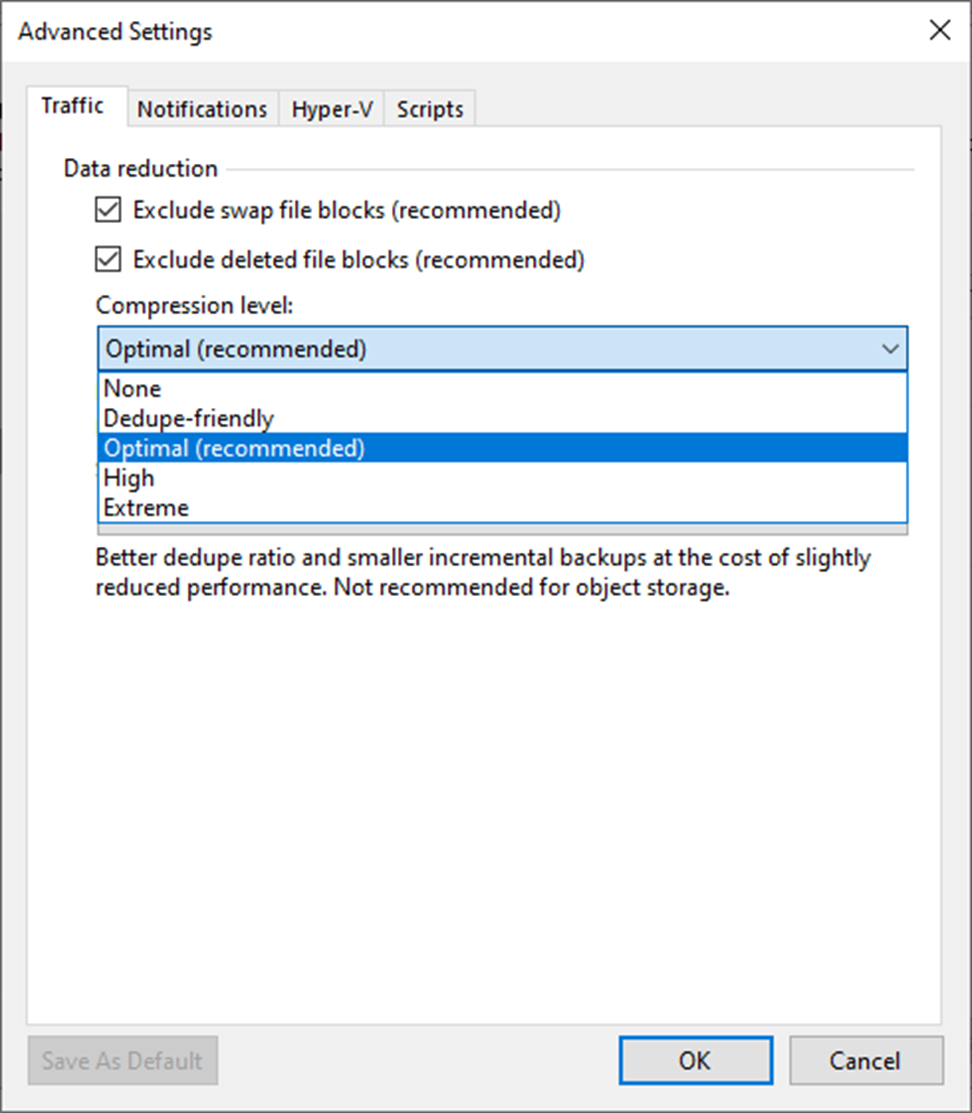
31. Select Storage optimization from the drop-down list.
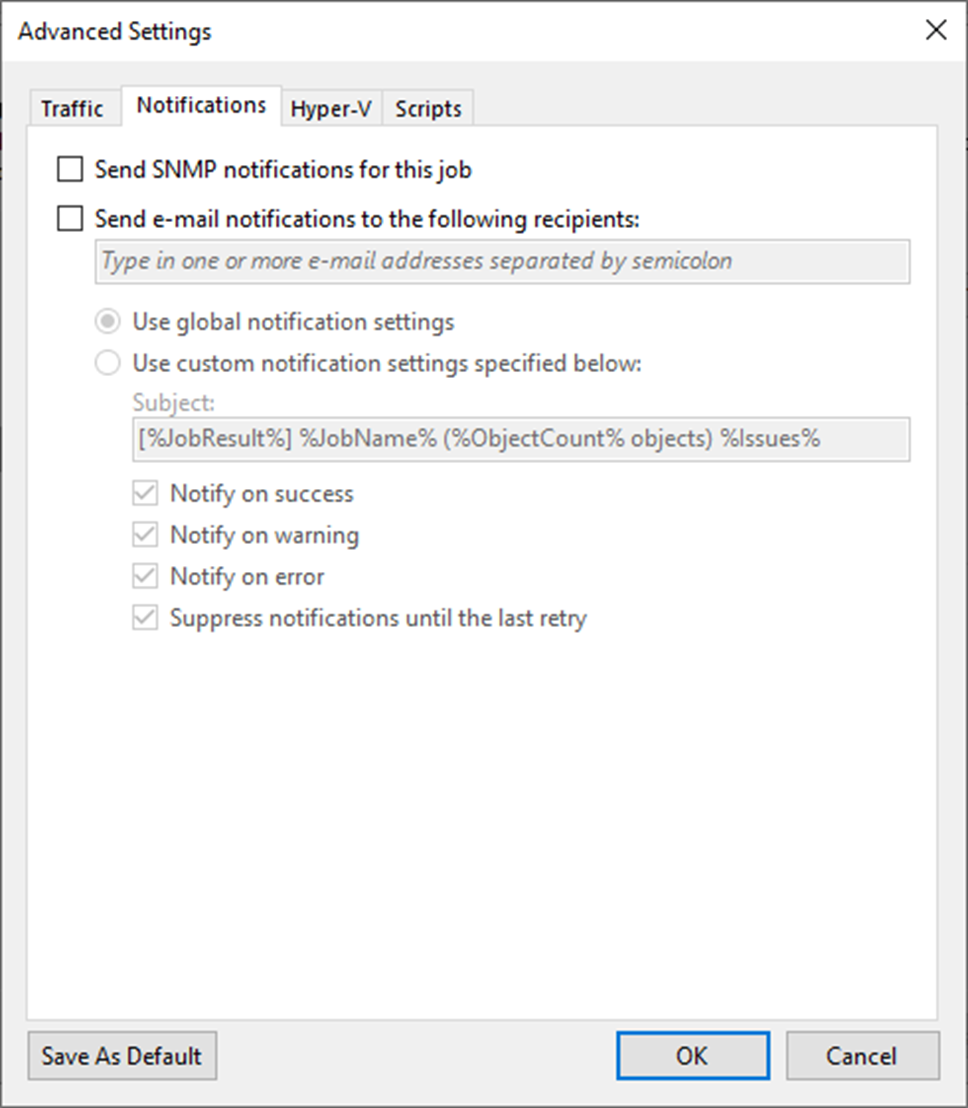
32. On the Advanced Settings, select Notifications.
33. Keep the default settings.
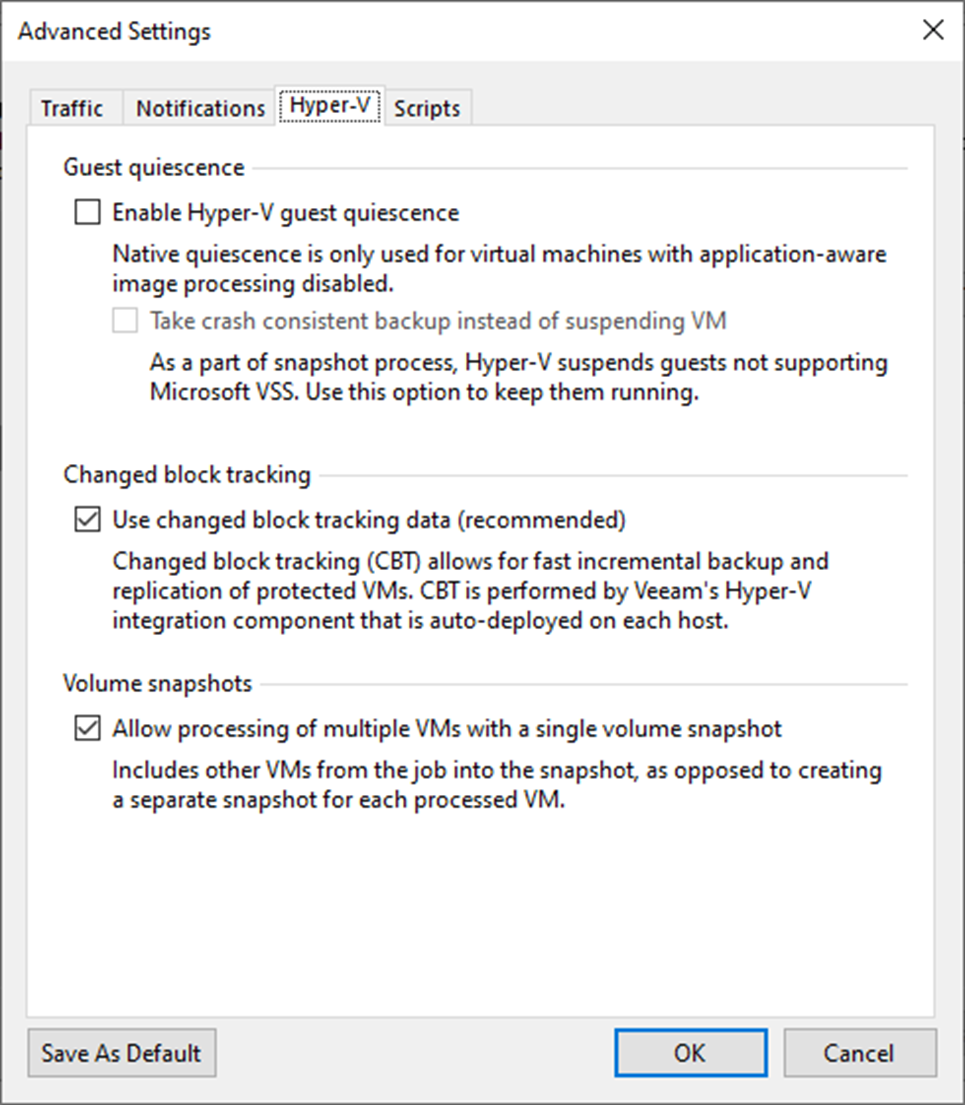
34. On the Advanced Settings, select Hyper-V.
35. Keep the default settings.
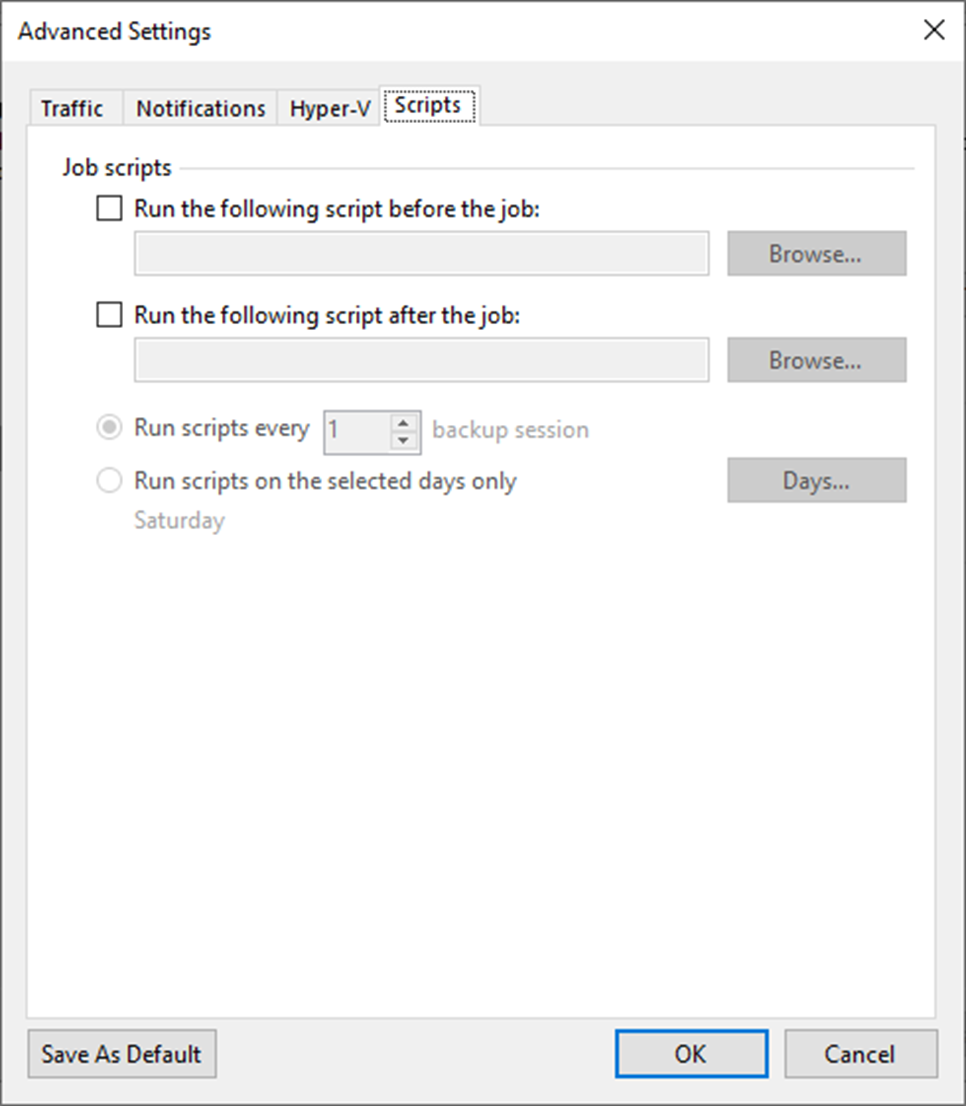
36. On the Advanced Settings page, click Scripts.
37. Keep the default settings and click OK.
38. On the Job Settings page, click Next.
39. Click Choose to specify Source Proxy on the Data Transfer page.
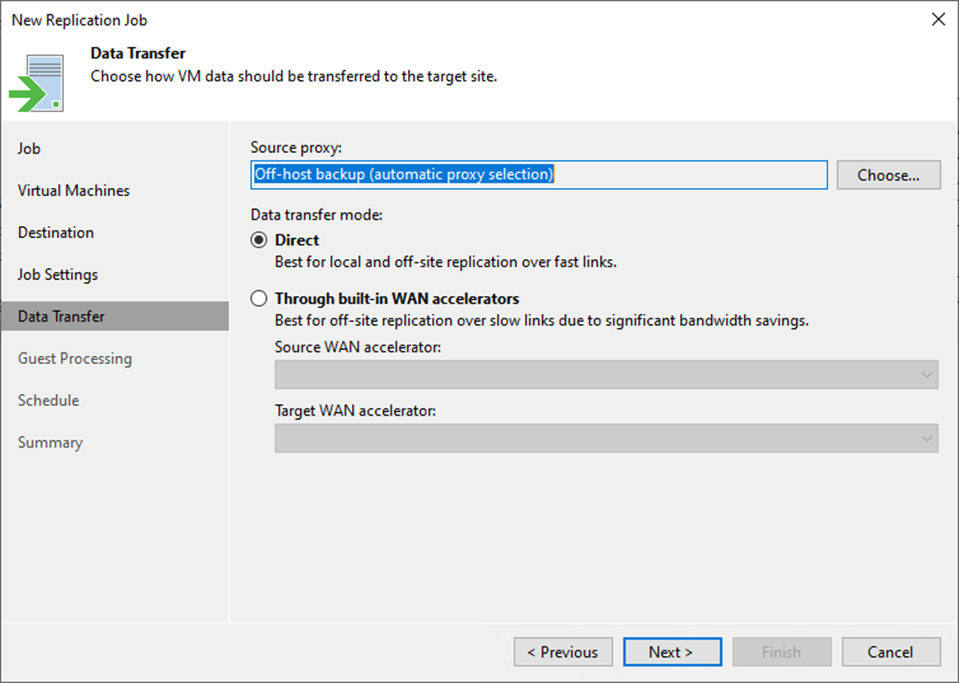
40. On the Backup Proxy page, keep the default settings.
41. Click OK.
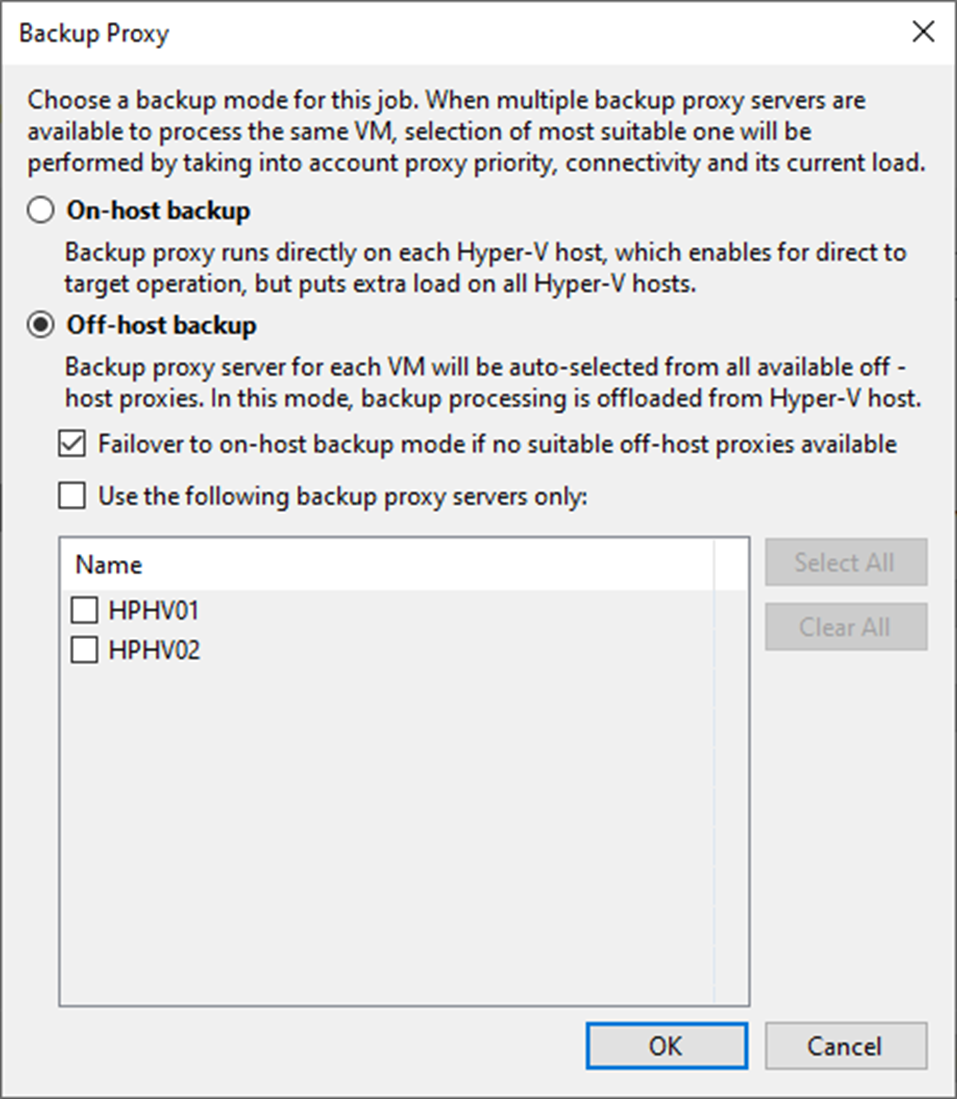
42. On the Data Transfer mode session, select Direct.
43. Click Next.
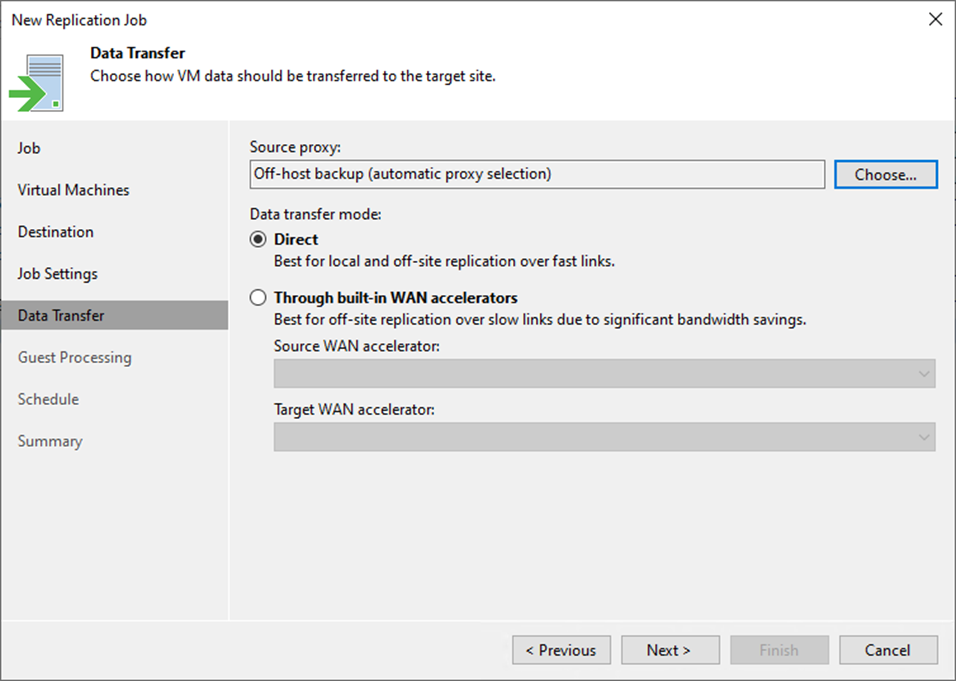
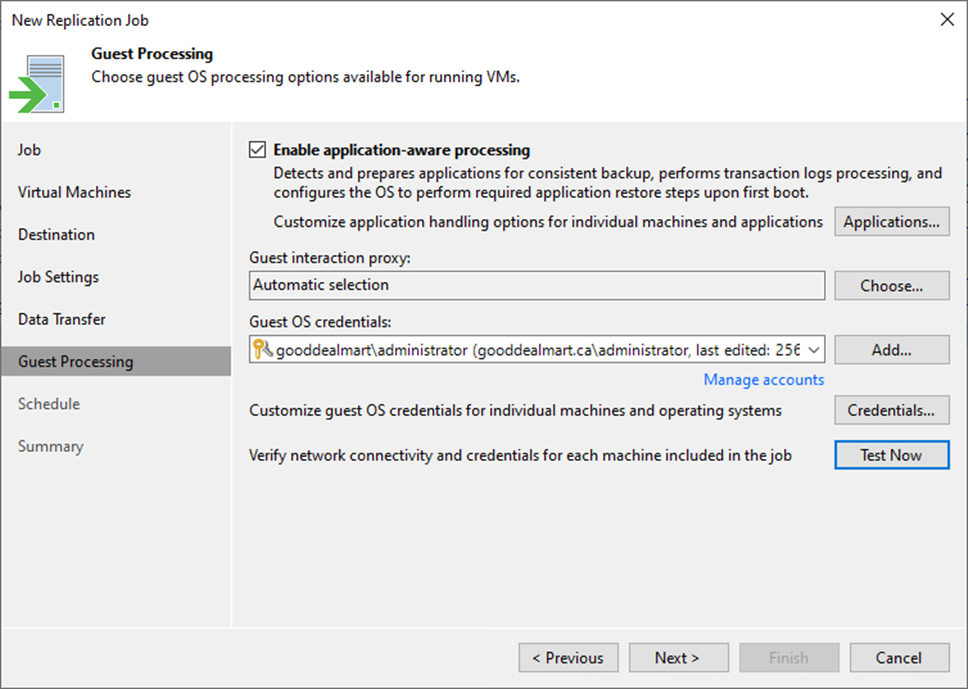
44. When you add VMs running VSS-aware applications to the backup job, you can enable application-aware processing to create a transactionally consistent backup. The transactionally consistent backup ensures that applications on VMs can be recovered without data loss.
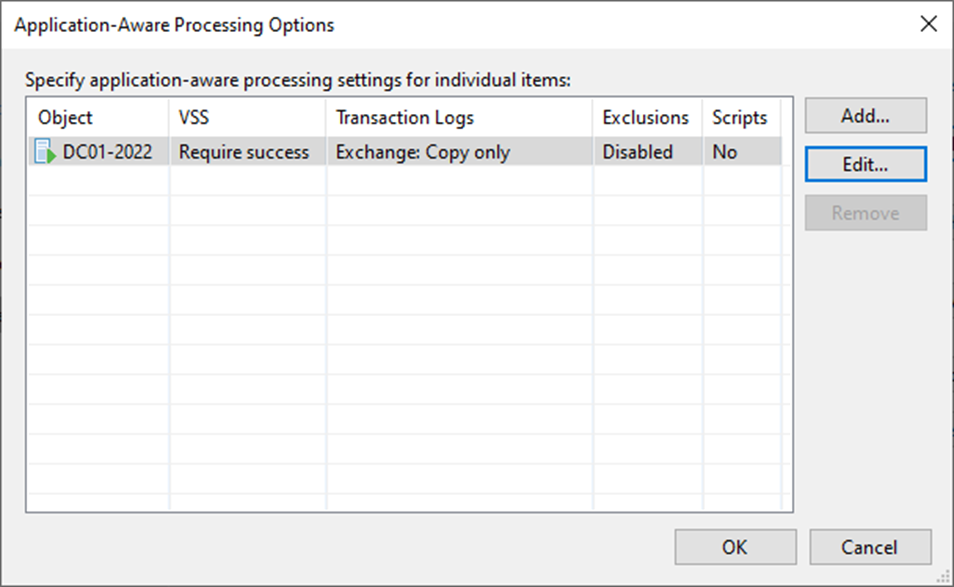
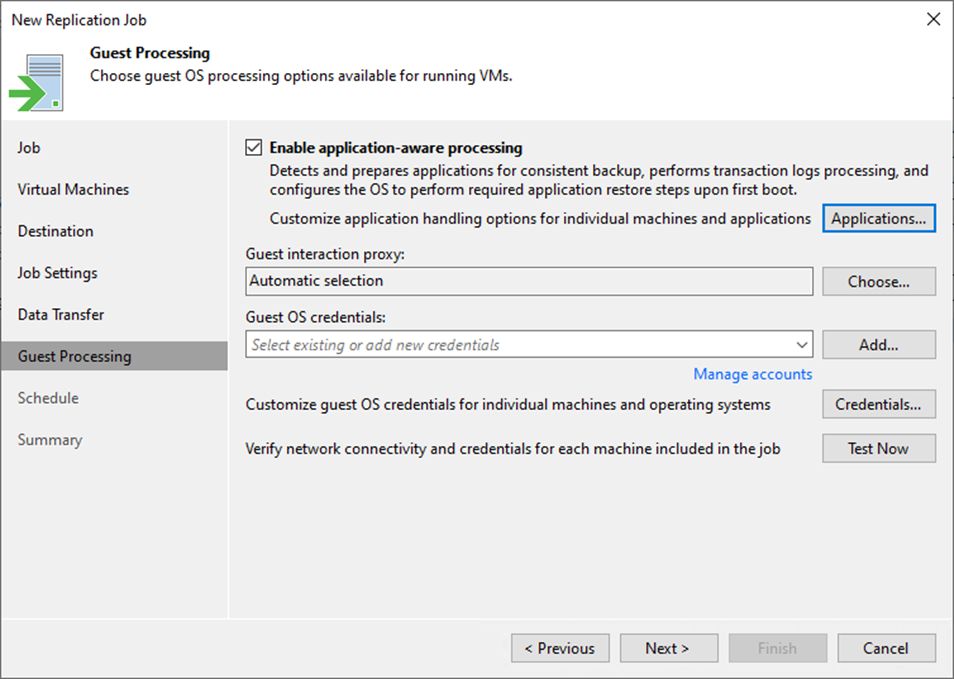
45. Select the Enable application-aware processing checkbox on the Guest Processing page and click Applications.
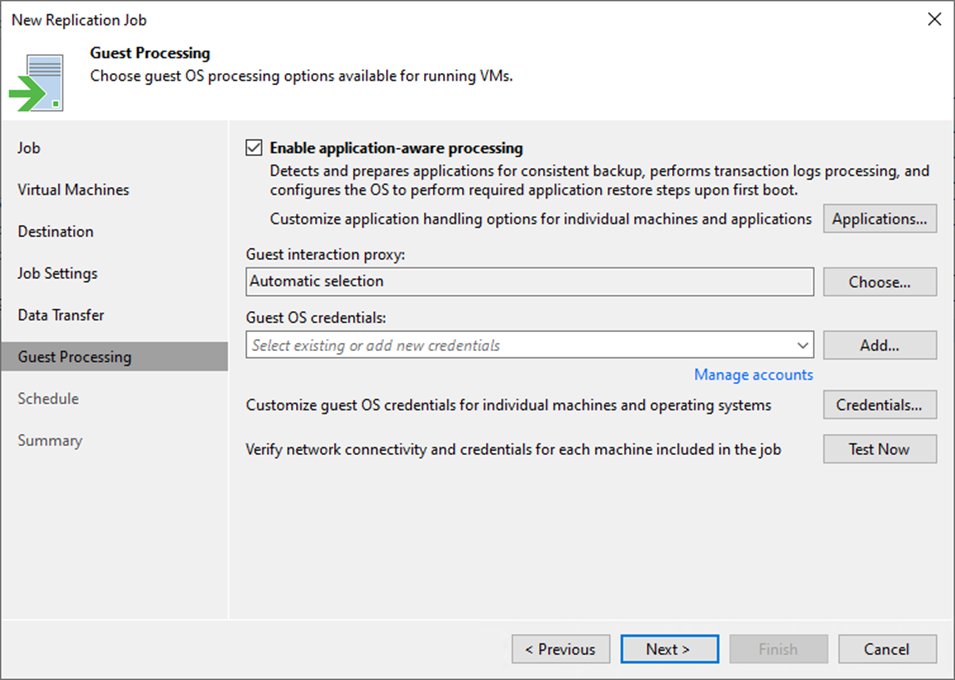
46. On the Application-Aware Processing Options page, select the Object, and click Edit.
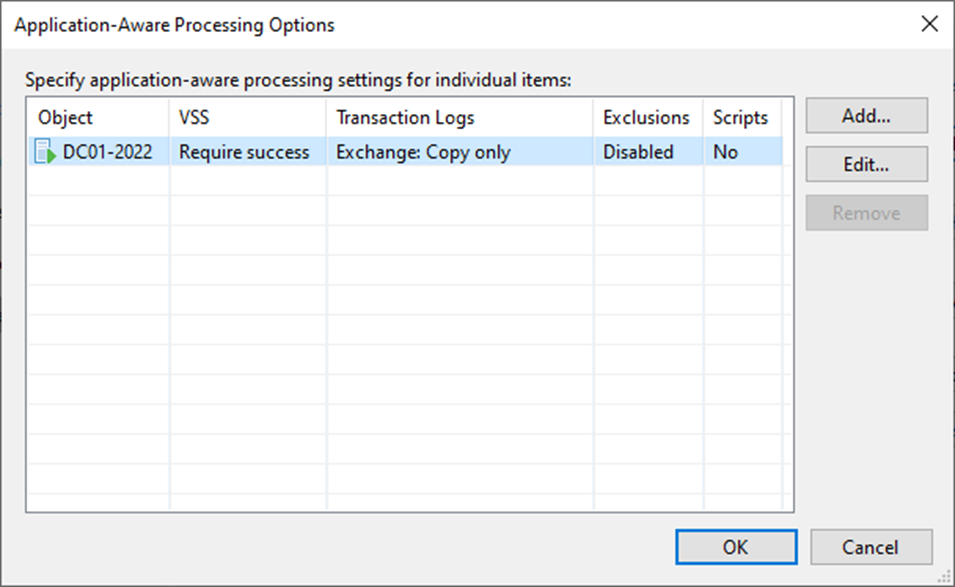
47. On the Processing Settings, click General.
48. Keep the default settings if the VM is not Microsoft Exchange, SQL and other application that rely on VSS.
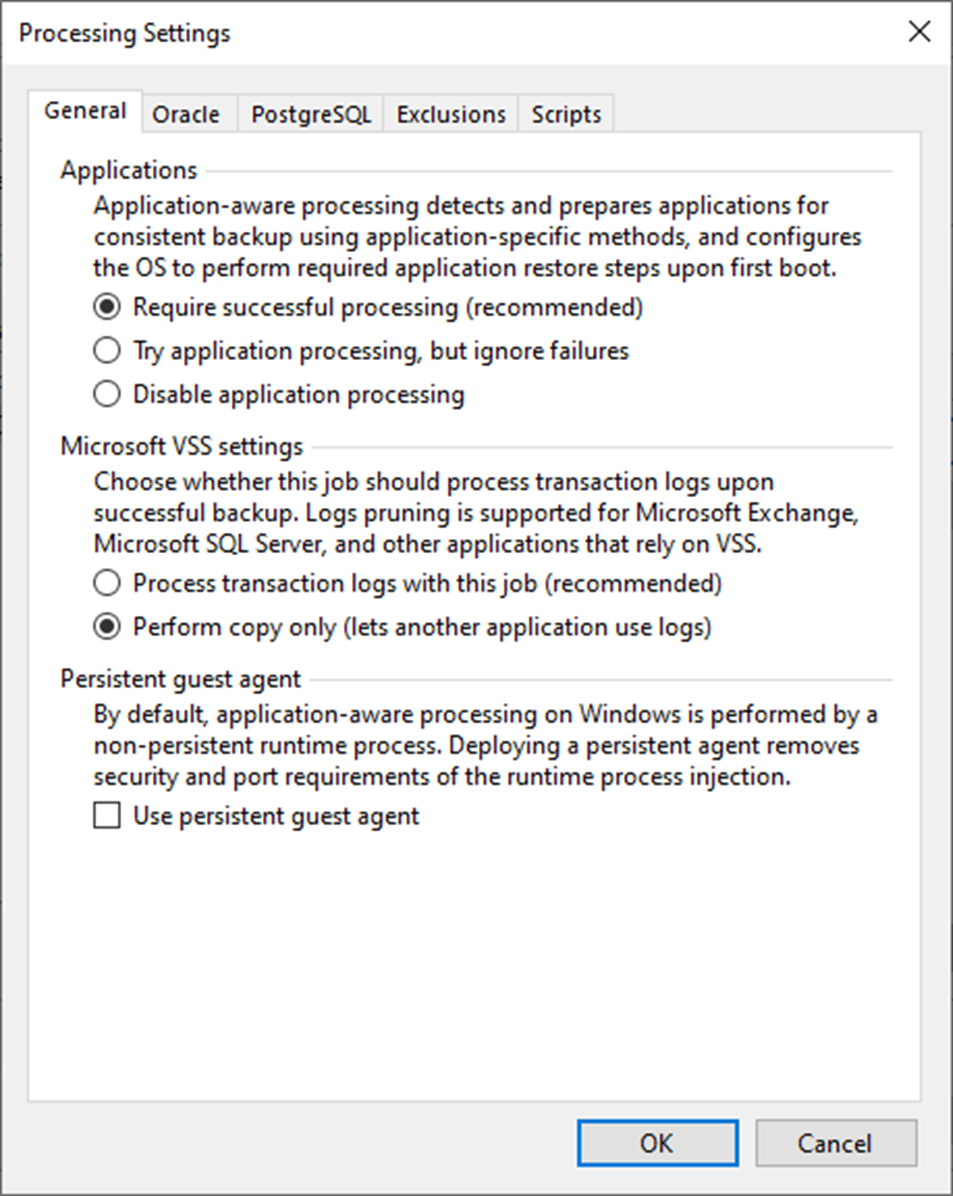
49. On the Processing Settings, click Oracle.
50. Keep the Default settings if the VM is not Oracle server.
51. On the Processing Settings, click PostgreSQL.
52. Keep the Default settings if the VM is not PostgreSQL server.
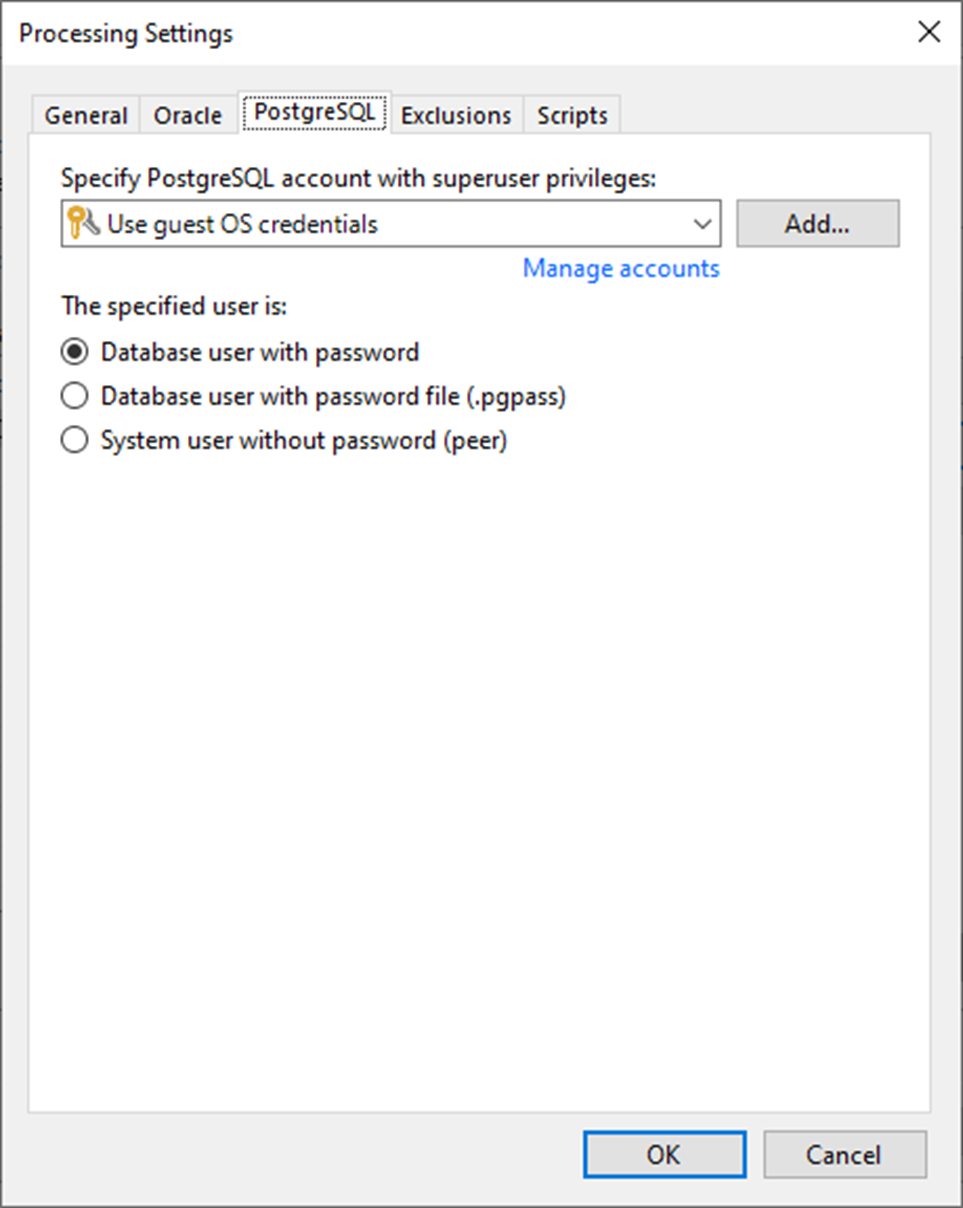
53. On the Processing Settings page, click Exclusions and keep the default settings.
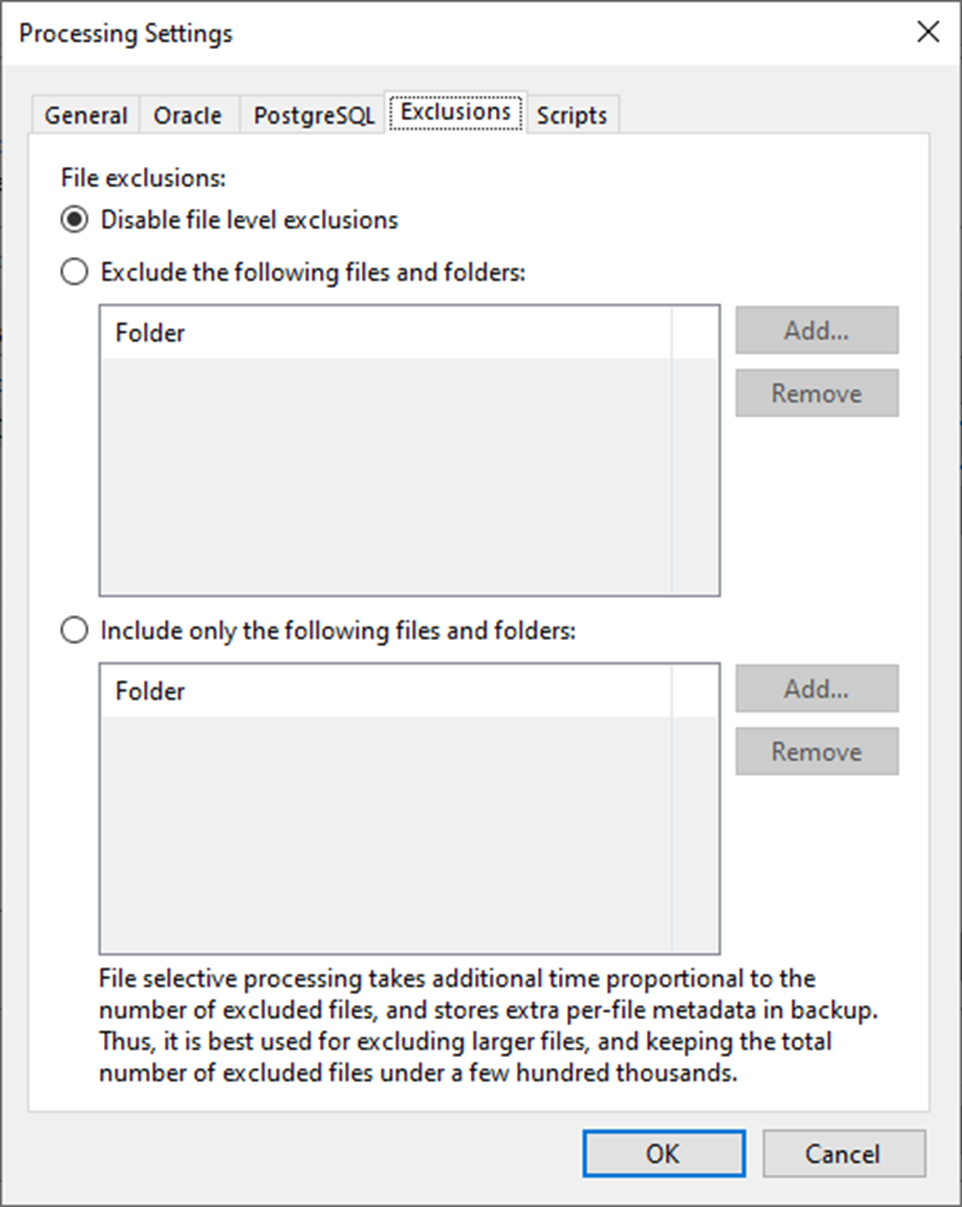
54. On the Processing Settings page, click Scripts.
55. Keep the default settings and click OK.
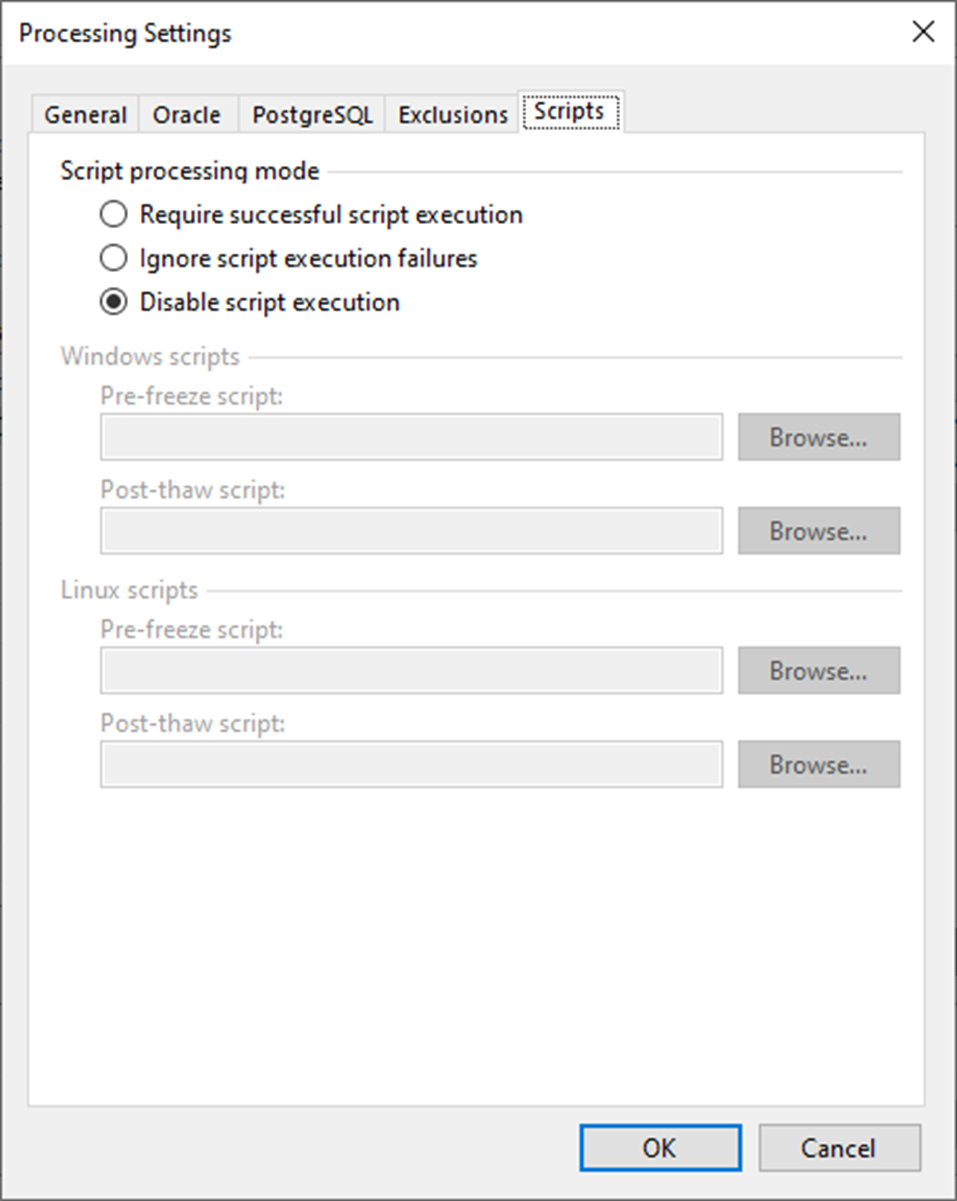
56. On the Application-Aware Processing Options page, click OK.
57. Click Choose on the Guest interaction proxy field on the Guest Processing page.
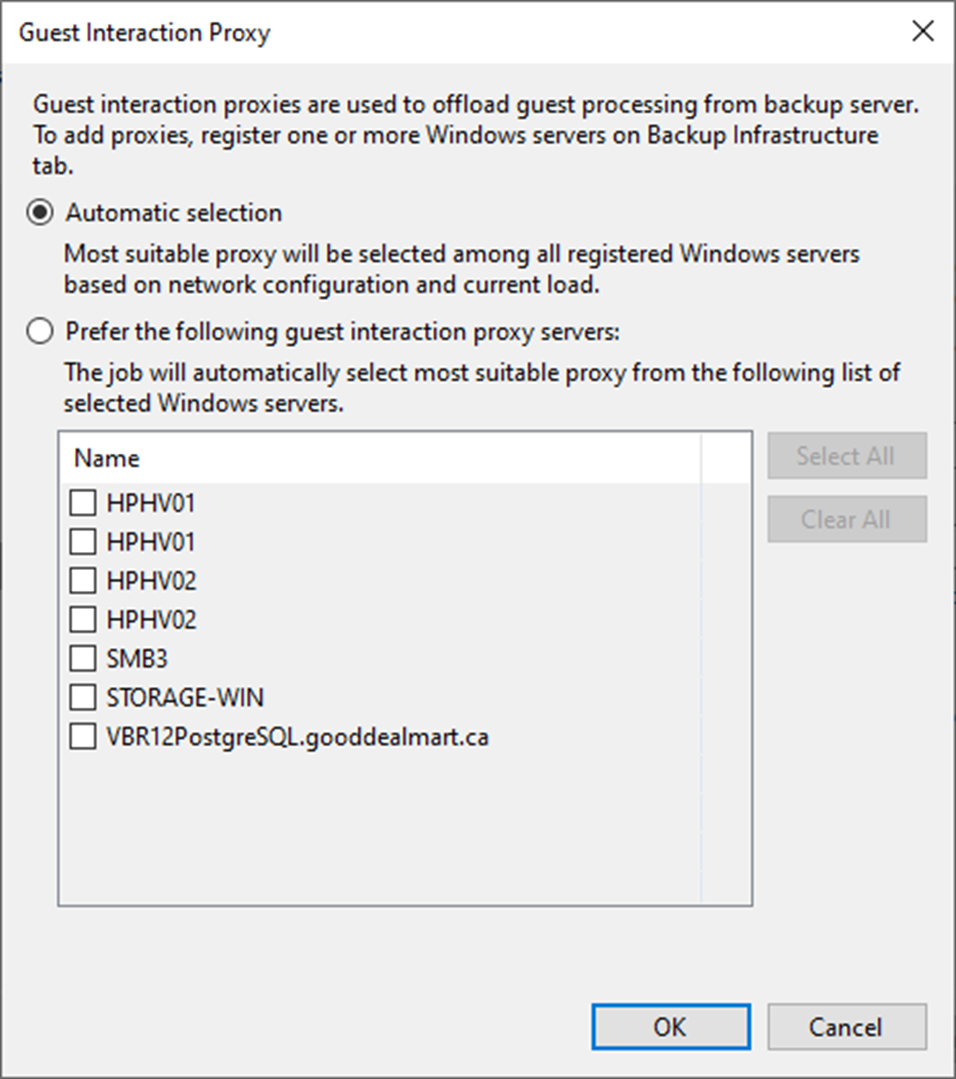
58. On the Guest Interaction Proxy page, you can keep the default setting to select Automatic selection to let Veeam Backup & Replication automatically select the guest interaction proxy.
59. Or select Prefer the following guest interaction proxy servers to explicitly define which servers will perform the guest interaction proxy role.
60. Click OK.
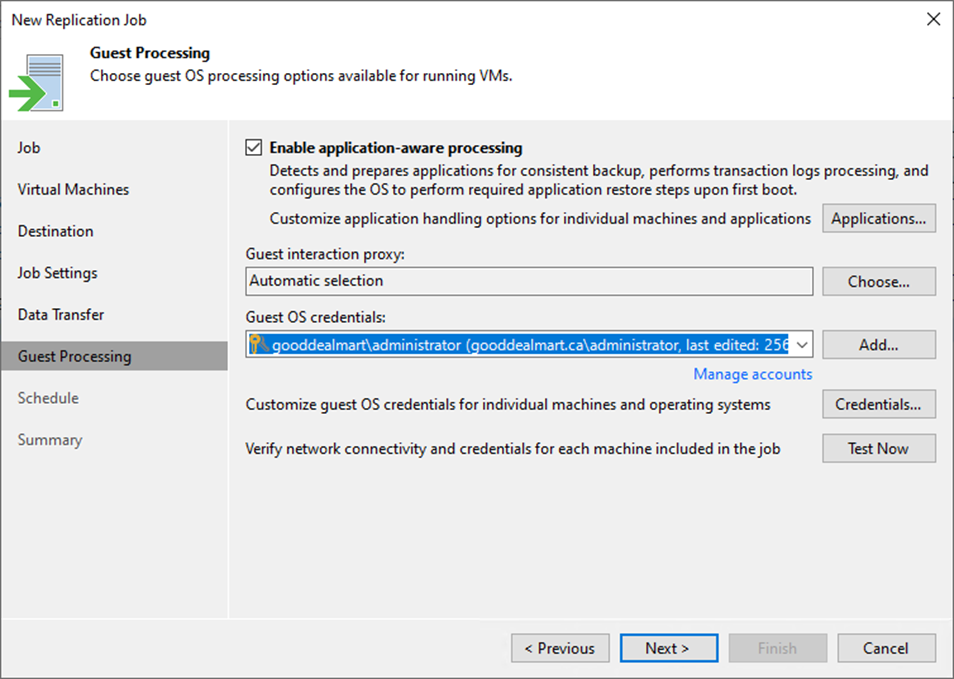
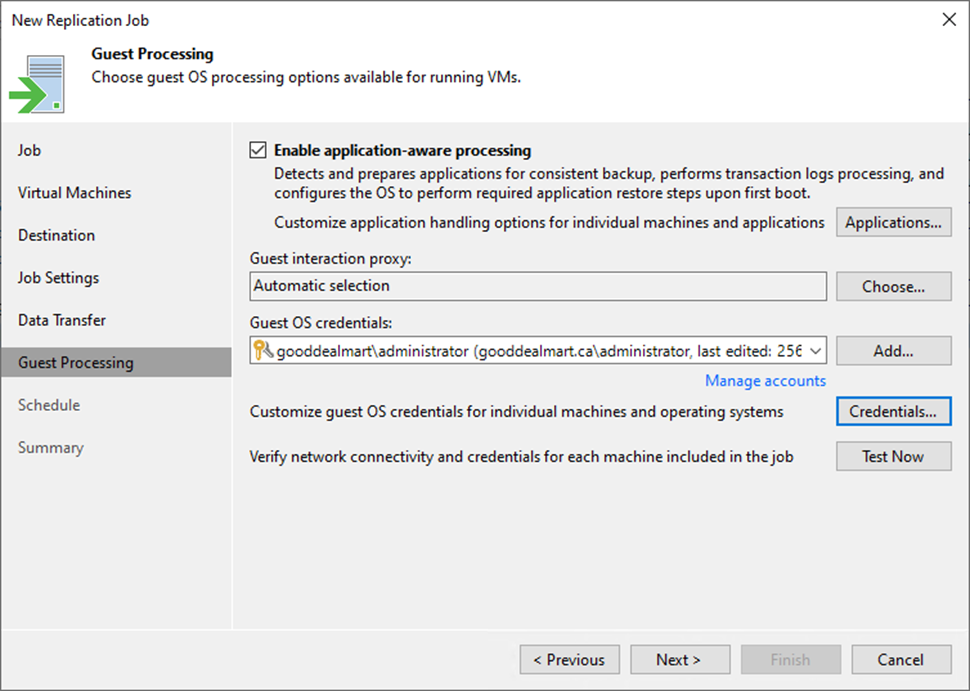
61. Choose a user account on the Guest Processing page with sufficient permissions from the Guest OS credentials drop-down list.
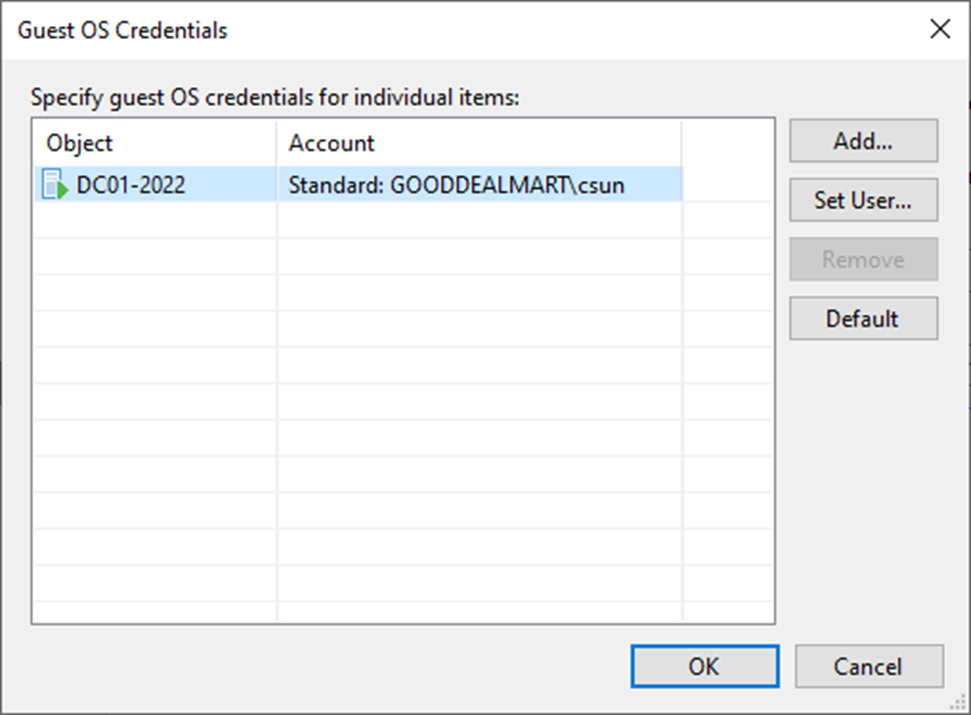
62. Click Credentials to Customize guest OS credentials for individual machines and operating systems.
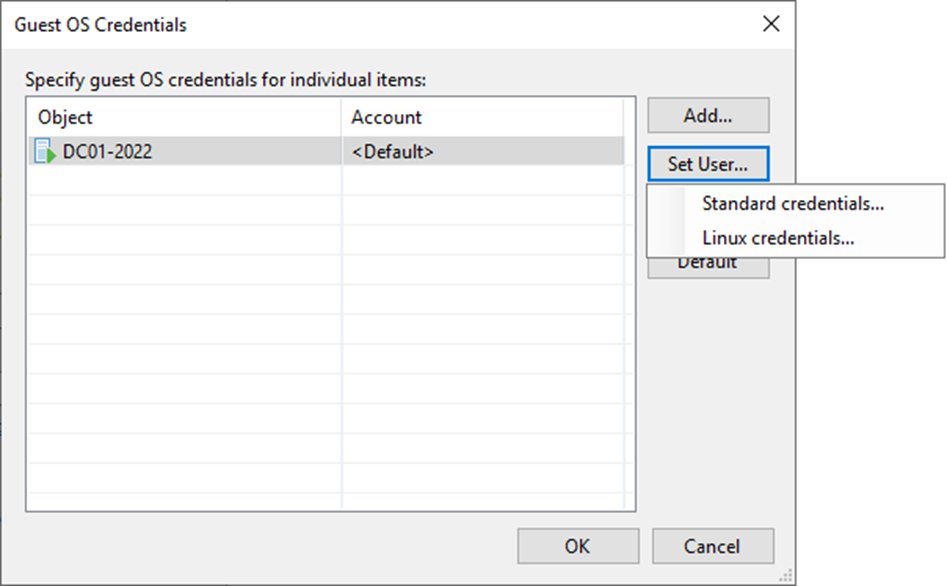
63. On the Guest OS Credentials page, select the VM, and click Set User.
64. Select Standard credentials.
65. Choose a user from the Credentials drop-down list and click OK.
66. Repeat the steps for each VM.
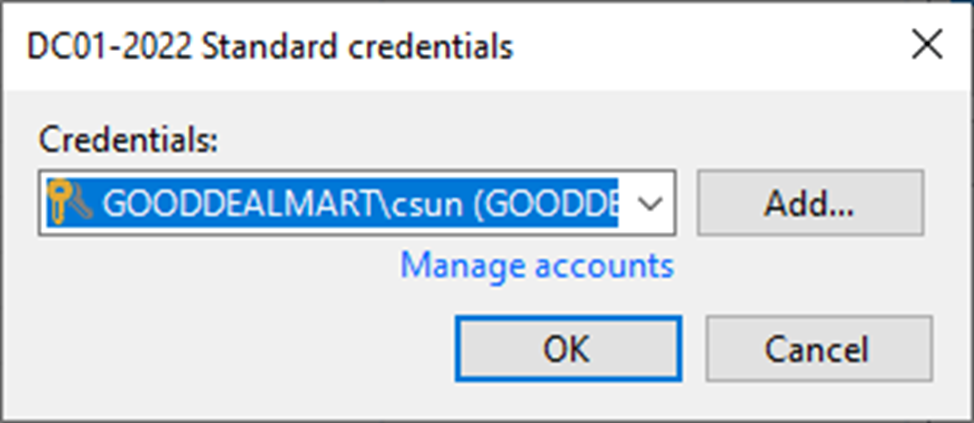
67. On the Guest OS Credentials page, click OK.
68. On the Guest Processing page, click Test Now.
69. On the Guest Credentials Test page, ensure each machine’s success.
70. Click Close.
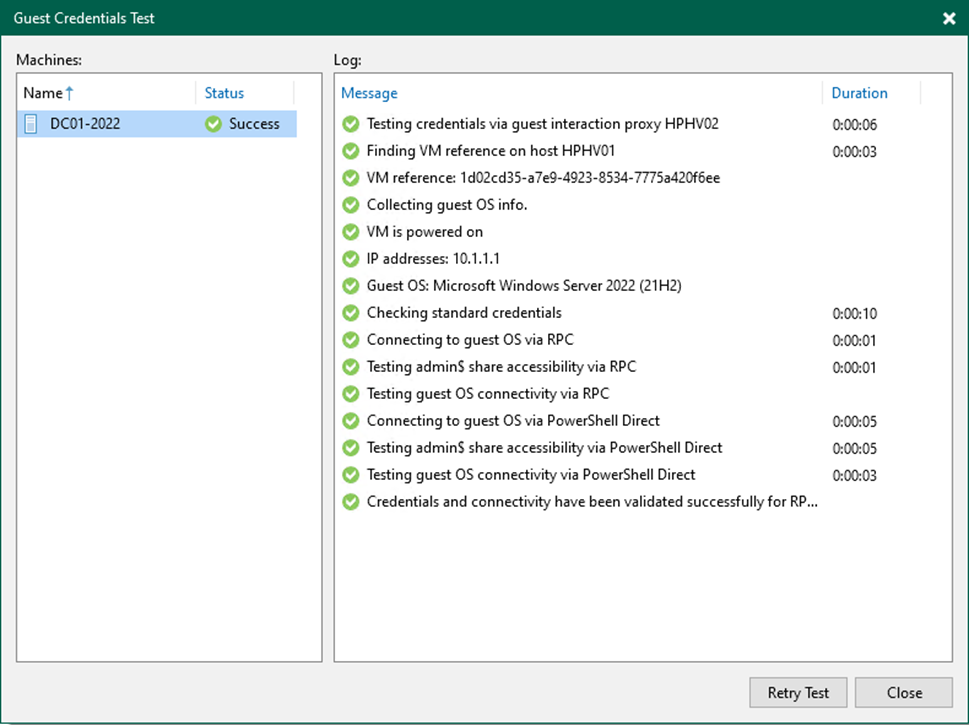
71. On the Guest Processing page, click Next.
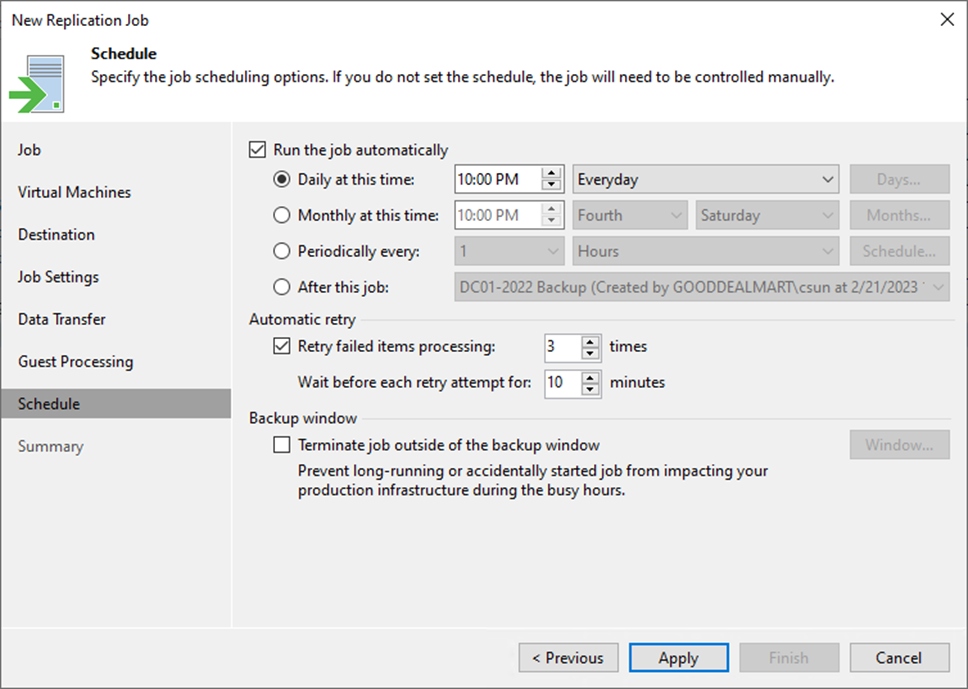
72. Select Run the job automatically on the Schedule page and select your specified schedule.
73. Define whether Veeam Backup & Replication should retry the backup job if it fails in the Automatic retry section.
74. Define the time interval the backup job must complete in the Backup window section. The backup window ensures that the job does not overlap with production hours and that there is no unnecessary overhead on the production environment.
75. Click Apply.
76. On the Summary page, click Finish.
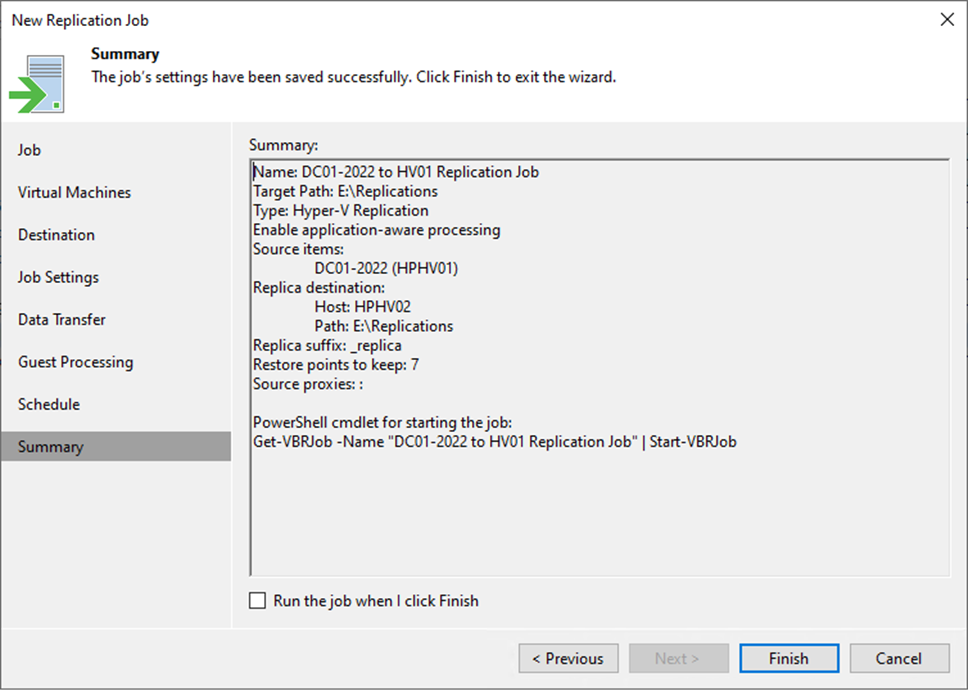
77. Verify the job has been added.

I hope you enjoy this post.
Cary Sun
Twitter: @SifuSun
Web Site: carysun.com
Blog Site: checkyourlogs.net
Blog Site: gooddealmart.com
Author: Cary Sun
Cary Sun has a wealth of knowledge and expertise in data center and deployment solutions. As a Principal Consultant, he likely works closely with clients to help them design, implement, and manage their data center infrastructure and deployment strategies.
With his background in data center solutions, Cary Sun may have experience in server and storage virtualization, network design and optimization, backup and disaster recovery planning, and security and compliance management. He holds CISCO CERTIFIED INTERNETWORK EXPERT (CCIE No.4531) from 1999. Cary is also a Microsoft Most Valuable Professional (MVP), Microsoft Azure MVP, Veeam Vanguard and Cisco Champion. He is a published author with several titles, including blogs on Checkyourlogs.net, and the author of many books.
Cary is a very active blogger at checkyourlogs.net and is permanently available online for questions from the community. His passion for technology is contagious, improving everyone around him at what they do.
Blog site: https://www.checkyourlogs.net
Web site: https://carysun.com
Blog site: https://gooddealmart.com
Twitter: @SifuSun
in: https://www.linkedin.com/in/sifusun/
Amazon Author: https://Amazon.com/author/carysun
