As we know, Microsoft Server 2019 has lot of features improved, also you may need a pilot test environment to test it with applications but don’t want to impact product. Don’t worry, today, I am going to show you how to create a Windows Server 2019 virtual machine at the Windows 10 laptop.
- Ensure that hardware virtualization support is turned on in the BIOS settings.
- Login to Windows 10.
-
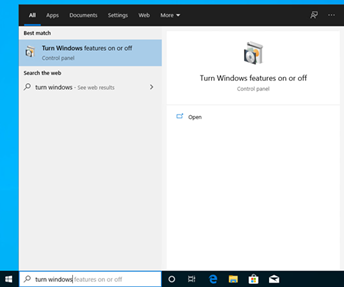
Click the search and type turn windows features on or off and select it.

-
On the Turn Windows features on or off page, select Hyper-V, click OK.

-
On the Windows Completed the requested changes page, click Restart now.

-
Login Windows 10, click Start, expand Windows Administrative Tools and select Hyper-V Manager.

-
On the V Manager page, select the windows 10 and click Virtual Switch Manager.

-
On the Virtual Switches page, select New Virtual network switch, select External for the virtual switch type, click Create Virtual Switch.

- On the Virtual Switch Properties page, type the name for the New Virtual Switch.
-
On the connect type, select External network, select your Network adapter card, select Allow management operating system to share this network adapter, click Apply.

-
On the Pending changes may disrupt network connectivity warning page, click Yes.

-
On the Virtual Switch Properties page, click OK.

-
On the Hyper-V Manager page, select the Windows 10, click New from Actions and then select Virtual Machine.

-
On the Before You Begin page, click Next.

-
On the Specify Name and Location page, type name for your Virtual Machine, and select folder for the location of VM, click Next.

-
On the Specify Generation page, select Generation 2 and click Next.

-
On the Assign Memory page, assign 4GB memory for the new VM, click Next.

-
On the Configure Networking page, select External Network for the Connection.

-
On the Connect Virtual Hard Disk page, keep the default settings, click Next.

-
On the Installation Options page, select Install and Operating system later, click Browse.

-
Select the Windows Server 2019 ISO file, click Open.

-
On the Installation Options page, click Next.

-
On the Completing the New Virtual Machine Wizard page, click Finish.

-
On the Hyper-V Manager page, right-click the new virtual machine (WDS2019) and select Connect.

-
On the virtual machine console, click Start.

-
Press any key to boot from DVD and start Install Windows Server 2019.

-
On the Language, Time and Keyboard settings page, click Next.

-
On the Install now page, click Install now.

-
On the Activate Windows page, click I don’t have a product key.

-
On the Select the operating system you want to install page, select Windows Server 2019 Standard (Desktop Experience), click Next.

-
On the Applicable notice and license terms page, select I accept the license terms, click Next.

-
On the Which type of installation do you want page, select Custom: Install Windows only (advanced).

-
On the Where do you want to install Windows page, click Next.

-
On the customize settings page, enter password for Administrator account, click Finish.

Hope you enjoy this post.
Cary Sun
Twitter: @SifuSun
Author: Cary Sun
Cary Sun has a wealth of knowledge and expertise in data center and deployment solutions. As a Principal Consultant, he likely works closely with clients to help them design, implement, and manage their data center infrastructure and deployment strategies.
With his background in data center solutions, Cary Sun may have experience in server and storage virtualization, network design and optimization, backup and disaster recovery planning, and security and compliance management. He holds CISCO CERTIFIED INTERNETWORK EXPERT (CCIE No.4531) from 1999. Cary is also a Microsoft Most Valuable Professional (MVP), Microsoft Azure MVP, Veeam Vanguard and Cisco Champion. He is a published author with several titles, including blogs on Checkyourlogs.net, and the author of many books.
Cary is a very active blogger at checkyourlogs.net and is permanently available online for questions from the community. His passion for technology is contagious, improving everyone around him at what they do.
Blog site: https://www.checkyourlogs.net
Web site: https://carysun.com
Blog site: https://gooddealmart.com
Twitter: @SifuSun
in: https://www.linkedin.com/in/sifusun/
Amazon Author: https://Amazon.com/author/carysun
