Today, I am going to show you how to step by step to install Microsoft SQL Server 2019 standard edition.
1.Create two domain user accounts as service accounts as follow:
svc_sql2019
svc_sql2019agent
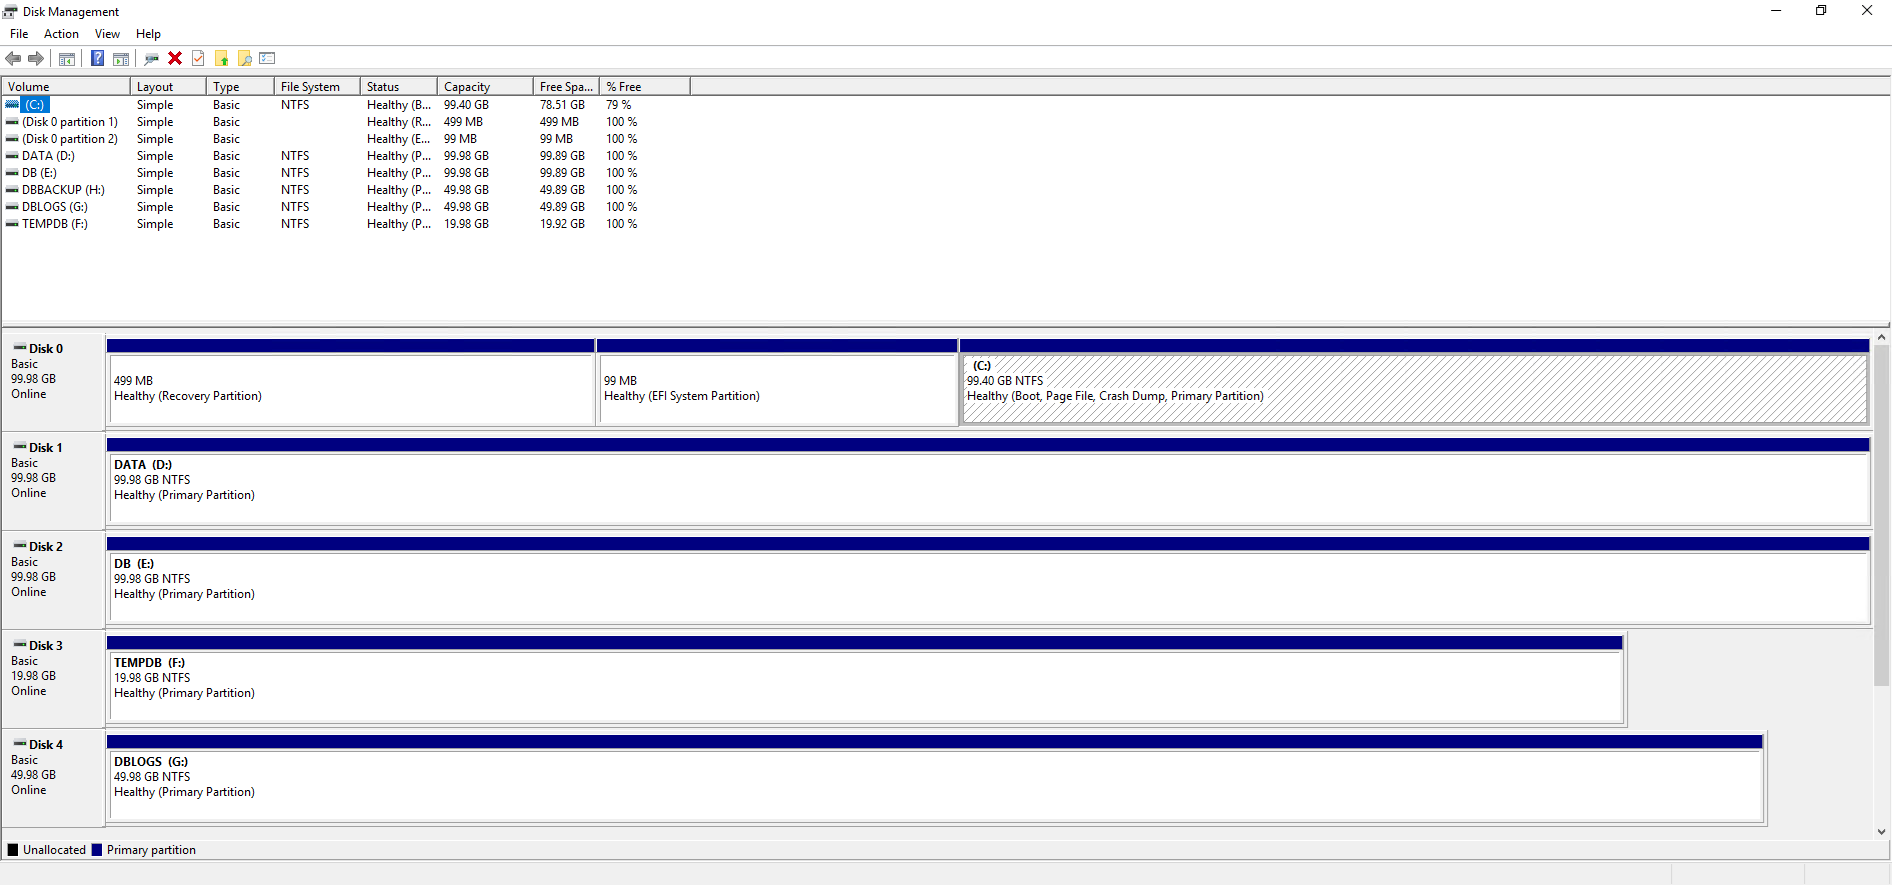
2.create disks as follow:
DB: 100GB NTFS 64K
TEMPDB:20GB NTFS 64K
DBLOGS:50GB NTFS 64K
DBBACKUP:50GB NTFS 50GB 64K
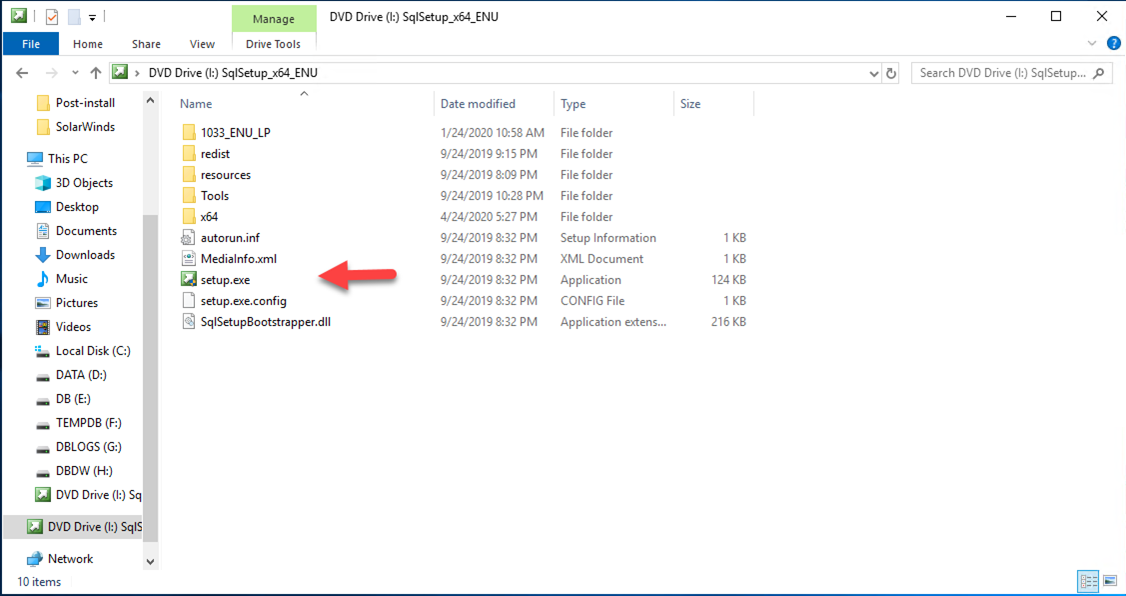
3.Mount the SQL Server installation media, double-click Setup.exe.
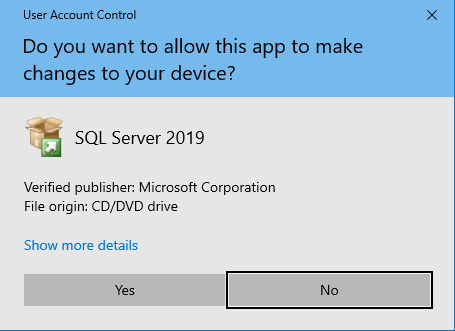
4.On the User Account Control page, click Yes.

5.On the SQL Server Installation Center page, select Installation.
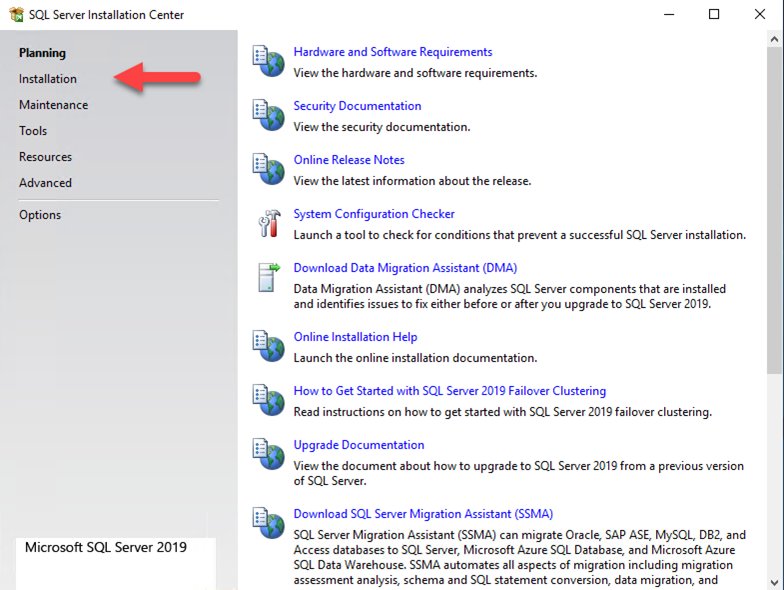
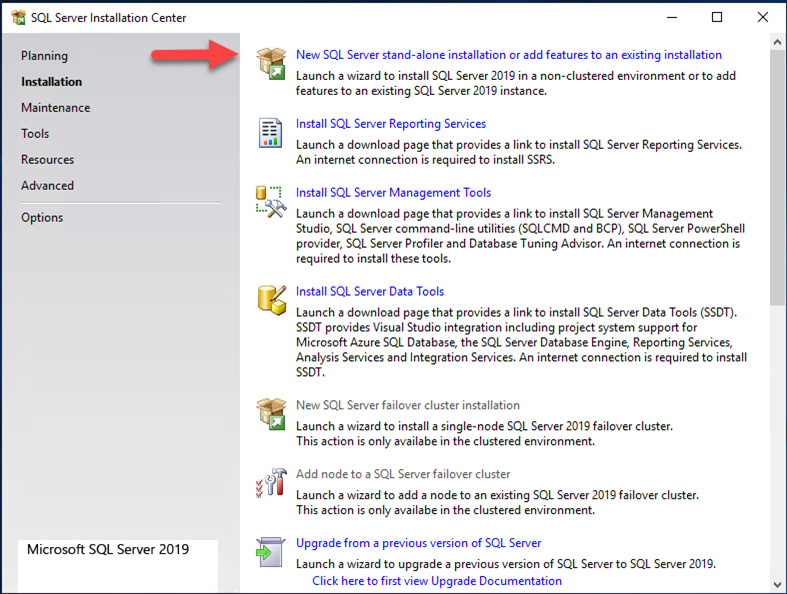
6.On the Installation page, select New SQL Server standalone installation or add features to an existing installation.
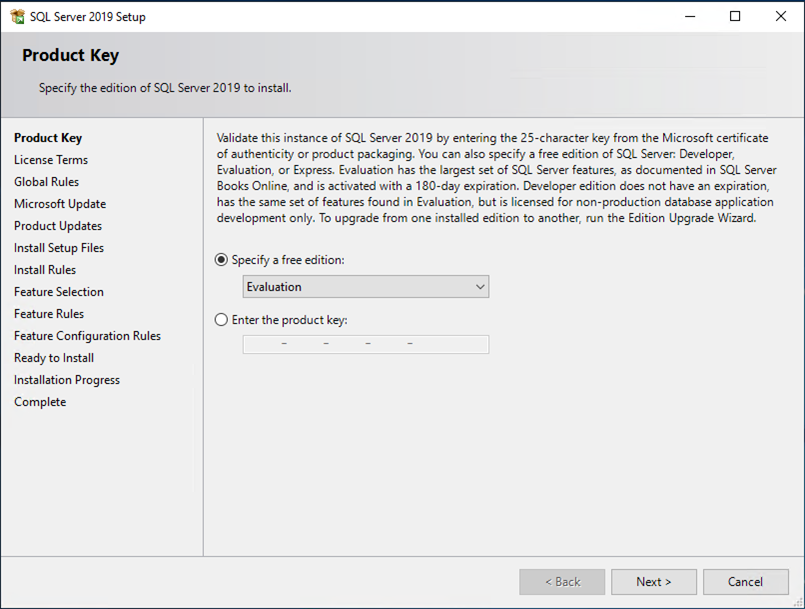
7.On the Product Key page, select Enter the product key, enter your product key, click Next.
If you don’t have product key yet, select Evaluation.
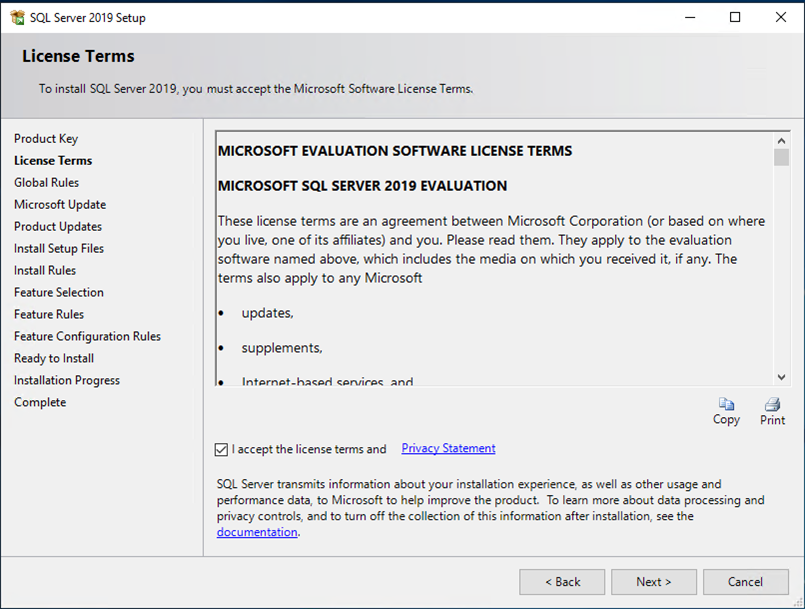
8.On the License Terms page, select the I accept the license terms and privacy statement, click Next.
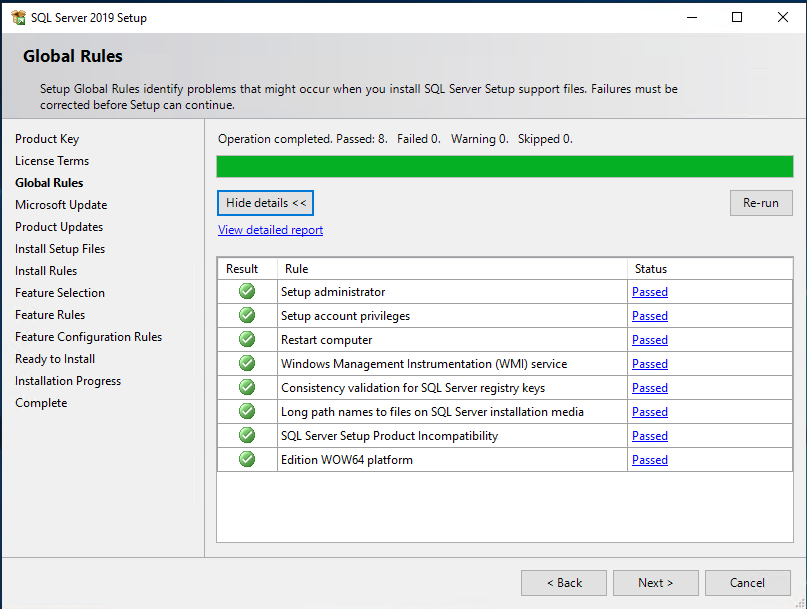
9.On the Global Rules page, make sure that there are no rule errors, click Next.
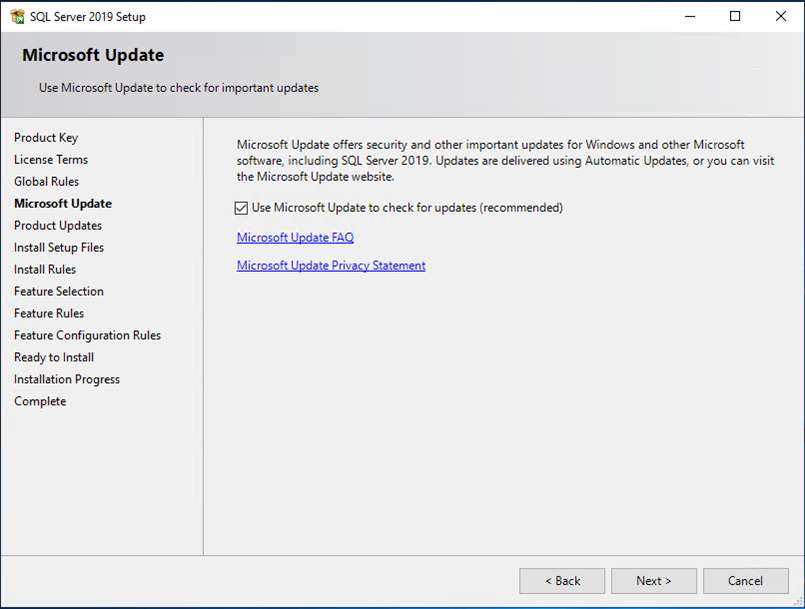
10.On the Microsoft Update page, select Use Microsoft Update to check for updates (recommended), click Next.
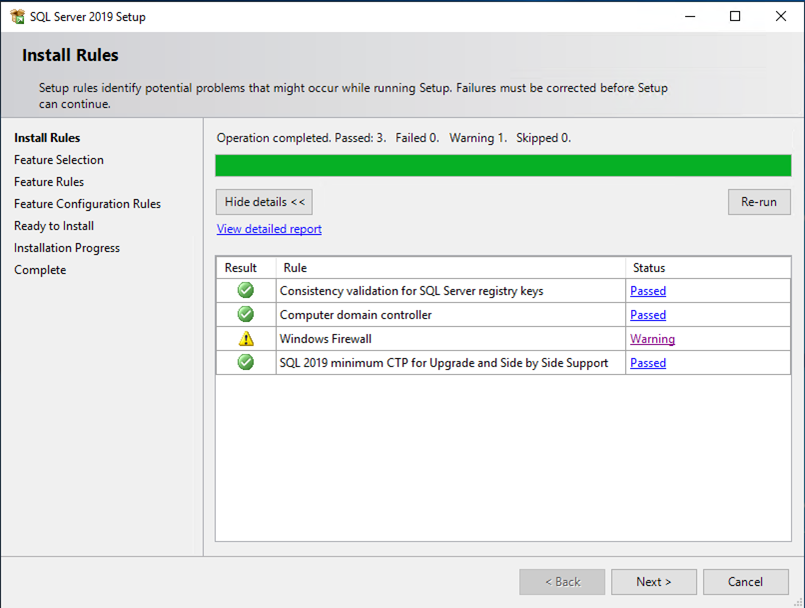
11.On the Install Rules page, Setup checks for potential problems that might occur while running Setup. If failures occur, select an item in the Status column for more information. Otherwise, select Next.
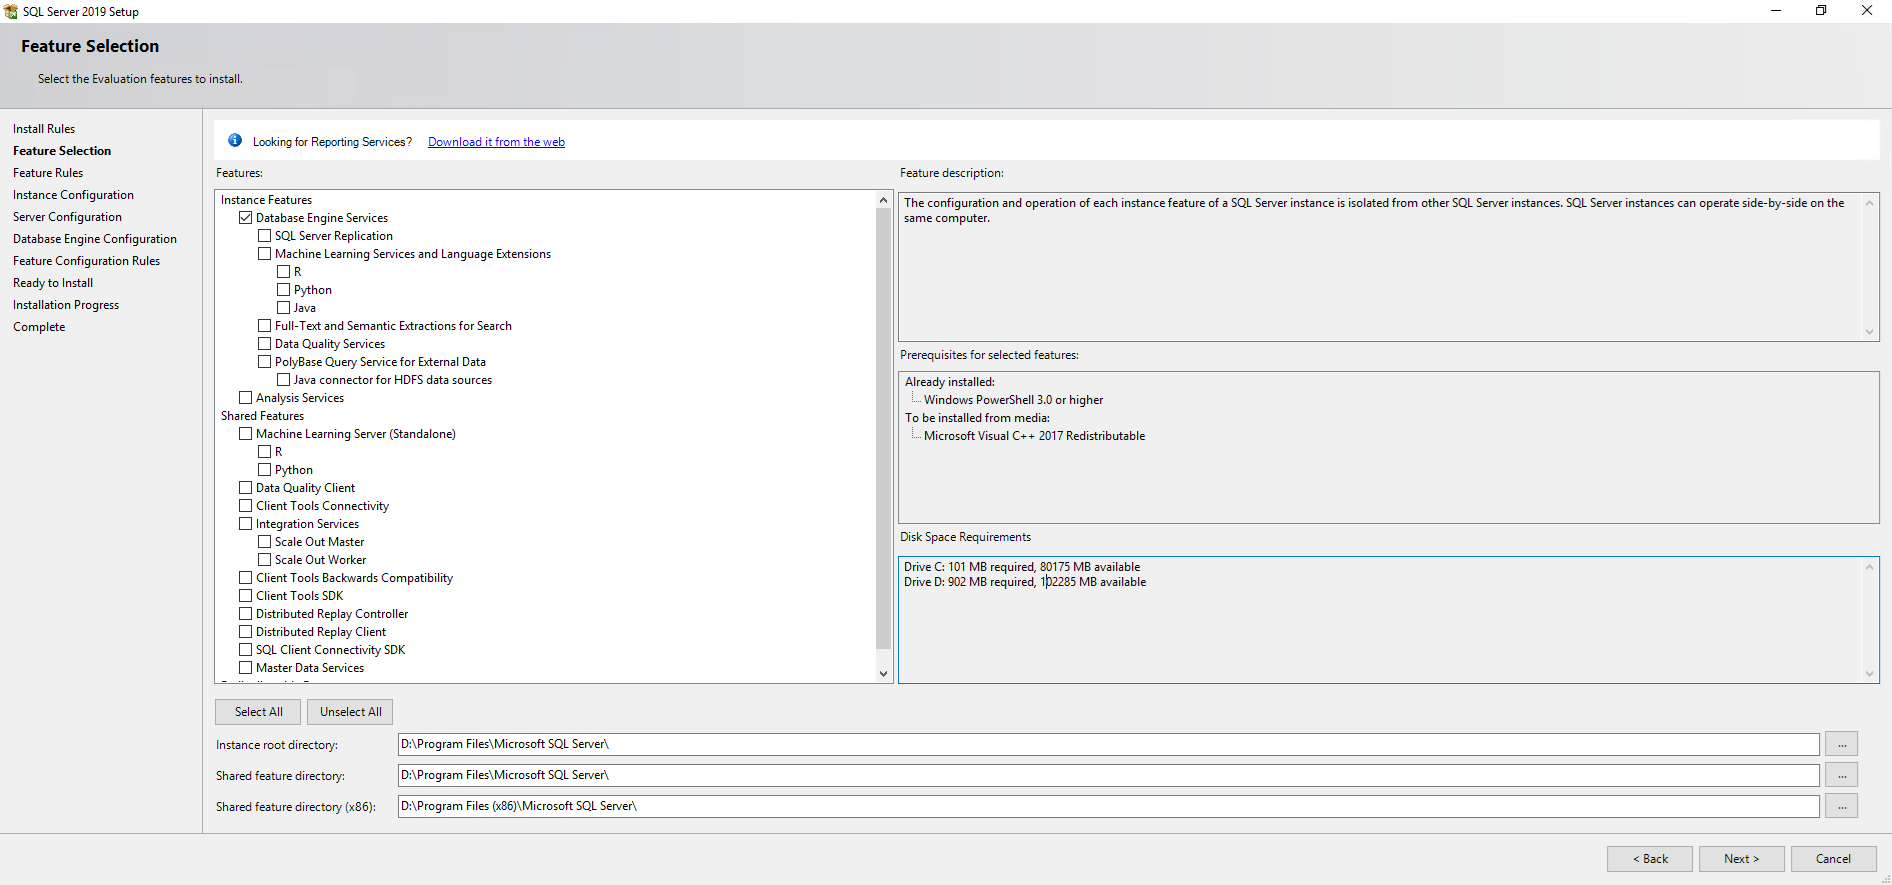
12. On the Feature Selection page, select the components for your installation. For example, to install a new instance of SQL Server Database Engine, select Database Engine Services.
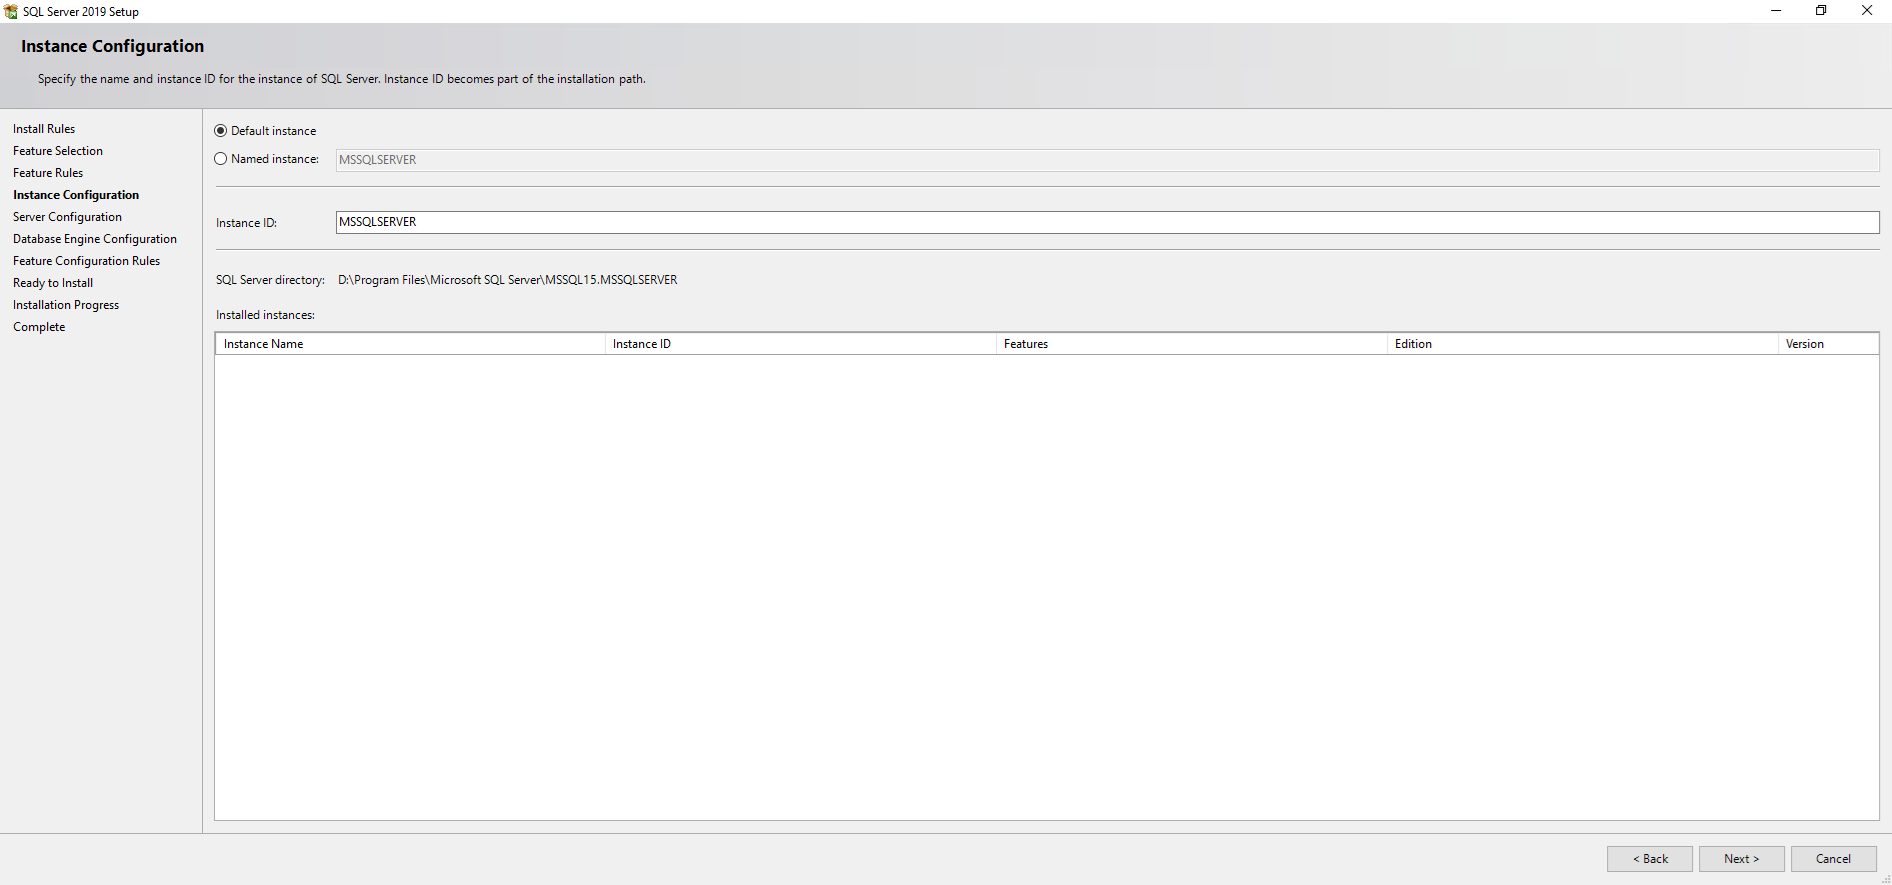
13. On the Instance Configuration page, specify whether to install a default instance or a named instance.
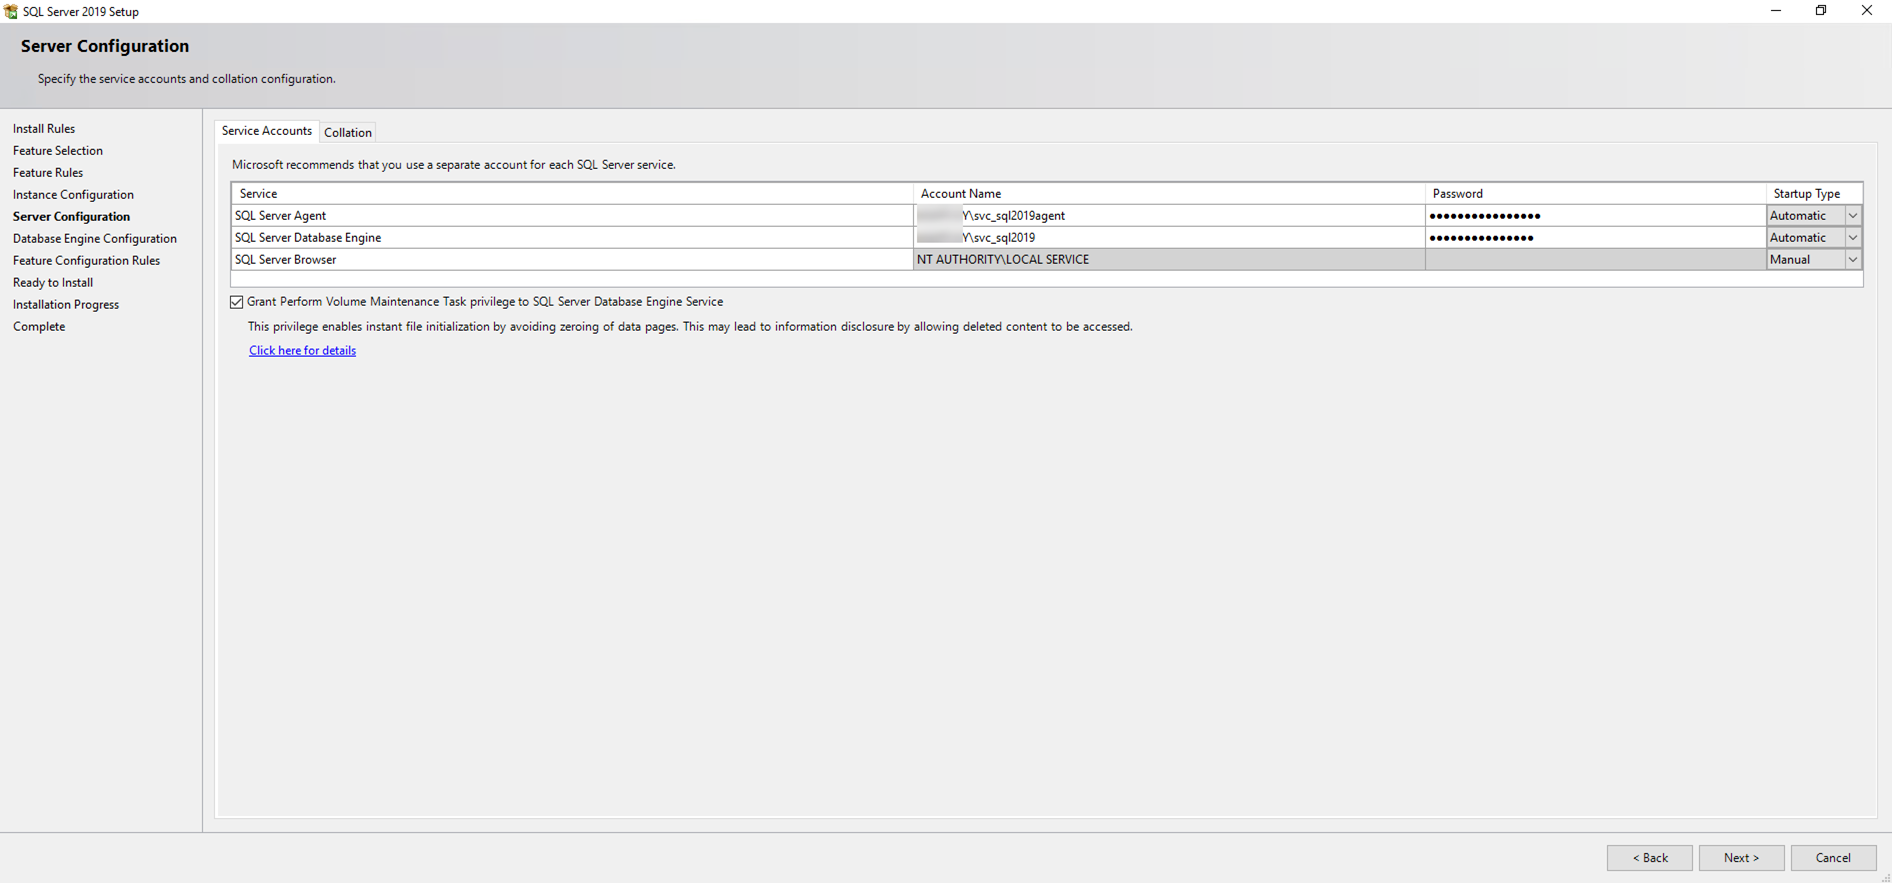
14.On the Server Configuration page, select Service Accounts, enter those we created accounts previsouly, select Grant Perform Volume Maintenance Task privilege to SQL Server Database Engine Service.
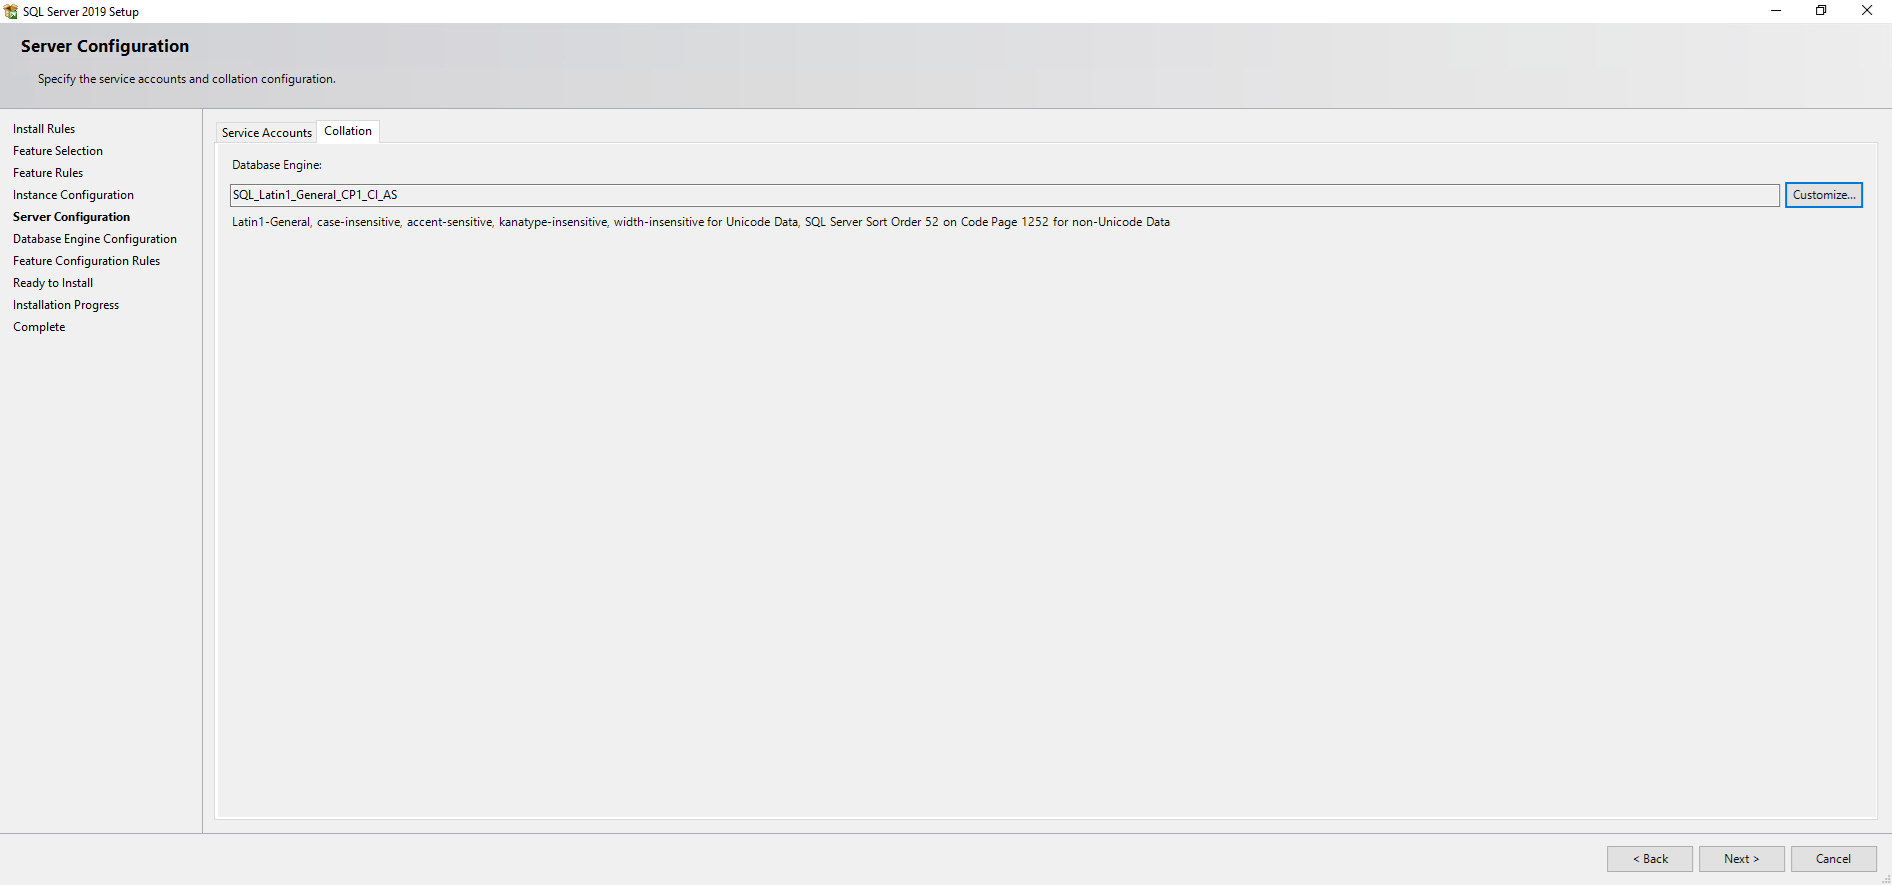
15. On the Server Configuration page, select Collation, select SQL_Latin1_General_CP1_CI_AS as Database Engine, click Next.
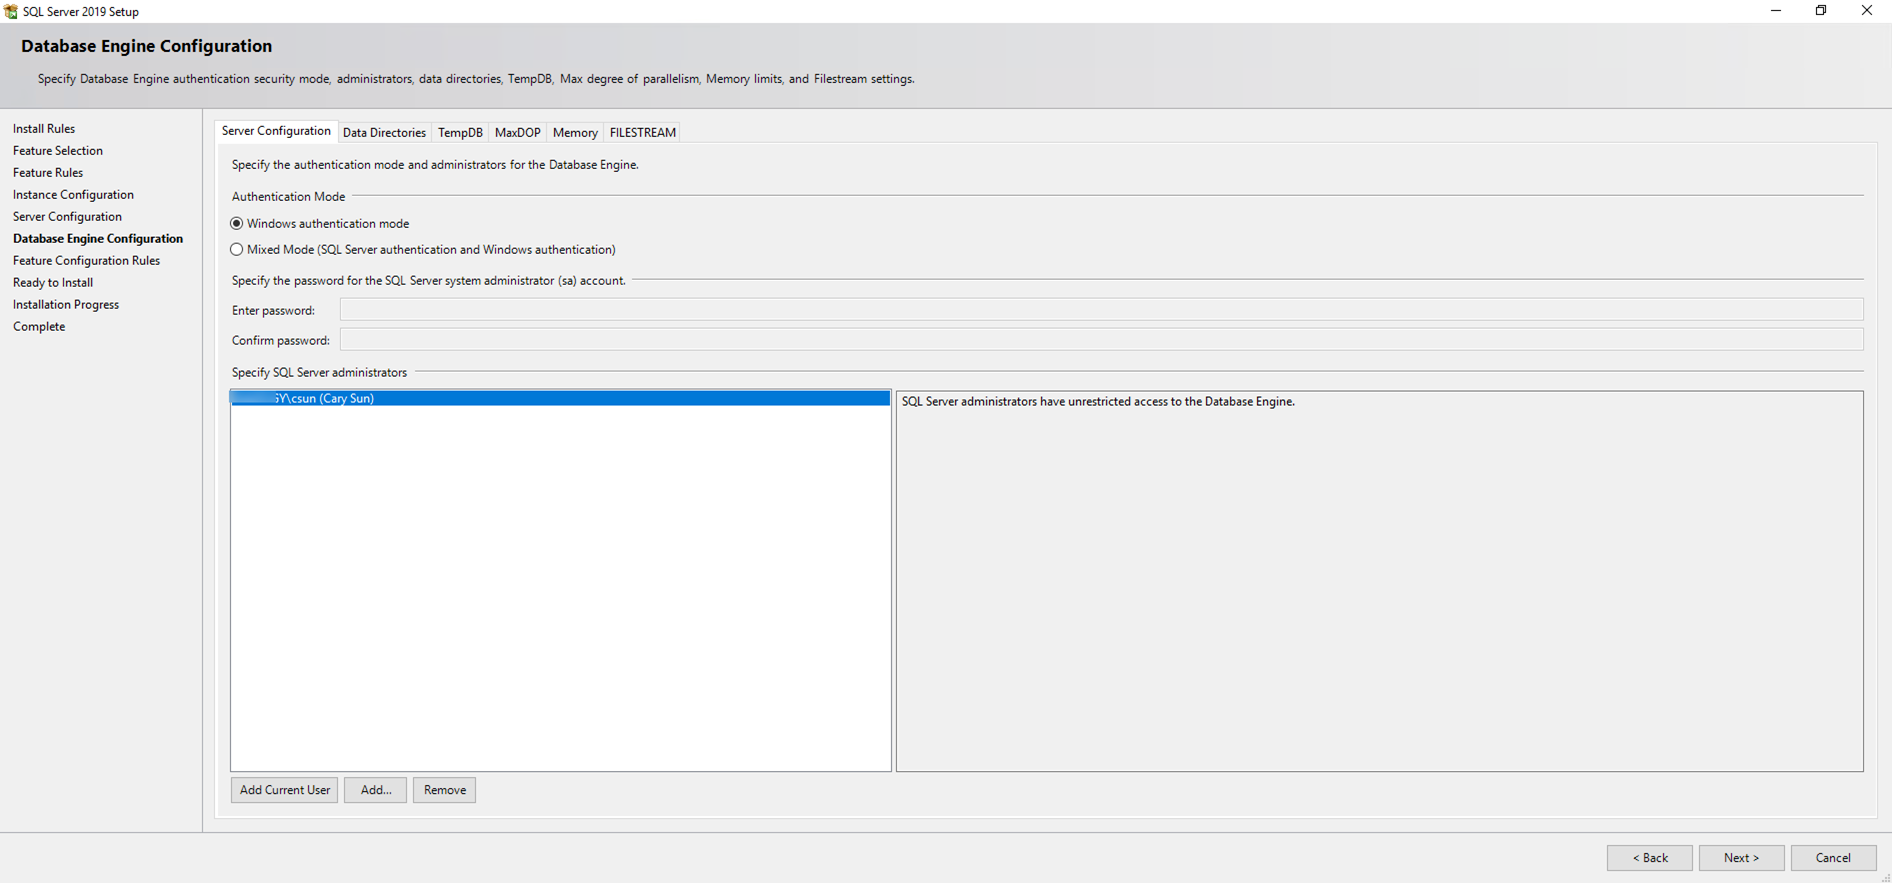
16.On the Database Engine Configuration page, select Server Configuration, select Windows authentication mode as Authentication Mode, click Add Current User as SQL Server administrators, you also can use Add function to add more users as SQL Server administrators, click Next.
17. On the Database Engine Configuration page, select Data Directories, change those directories as follow:
Data root directory: D:\Program Files\Microsoft SQL Server
User database directory: E:\DB
User database log directory: G:\DBLOGS
Backup directory: H:\DBBACKUP
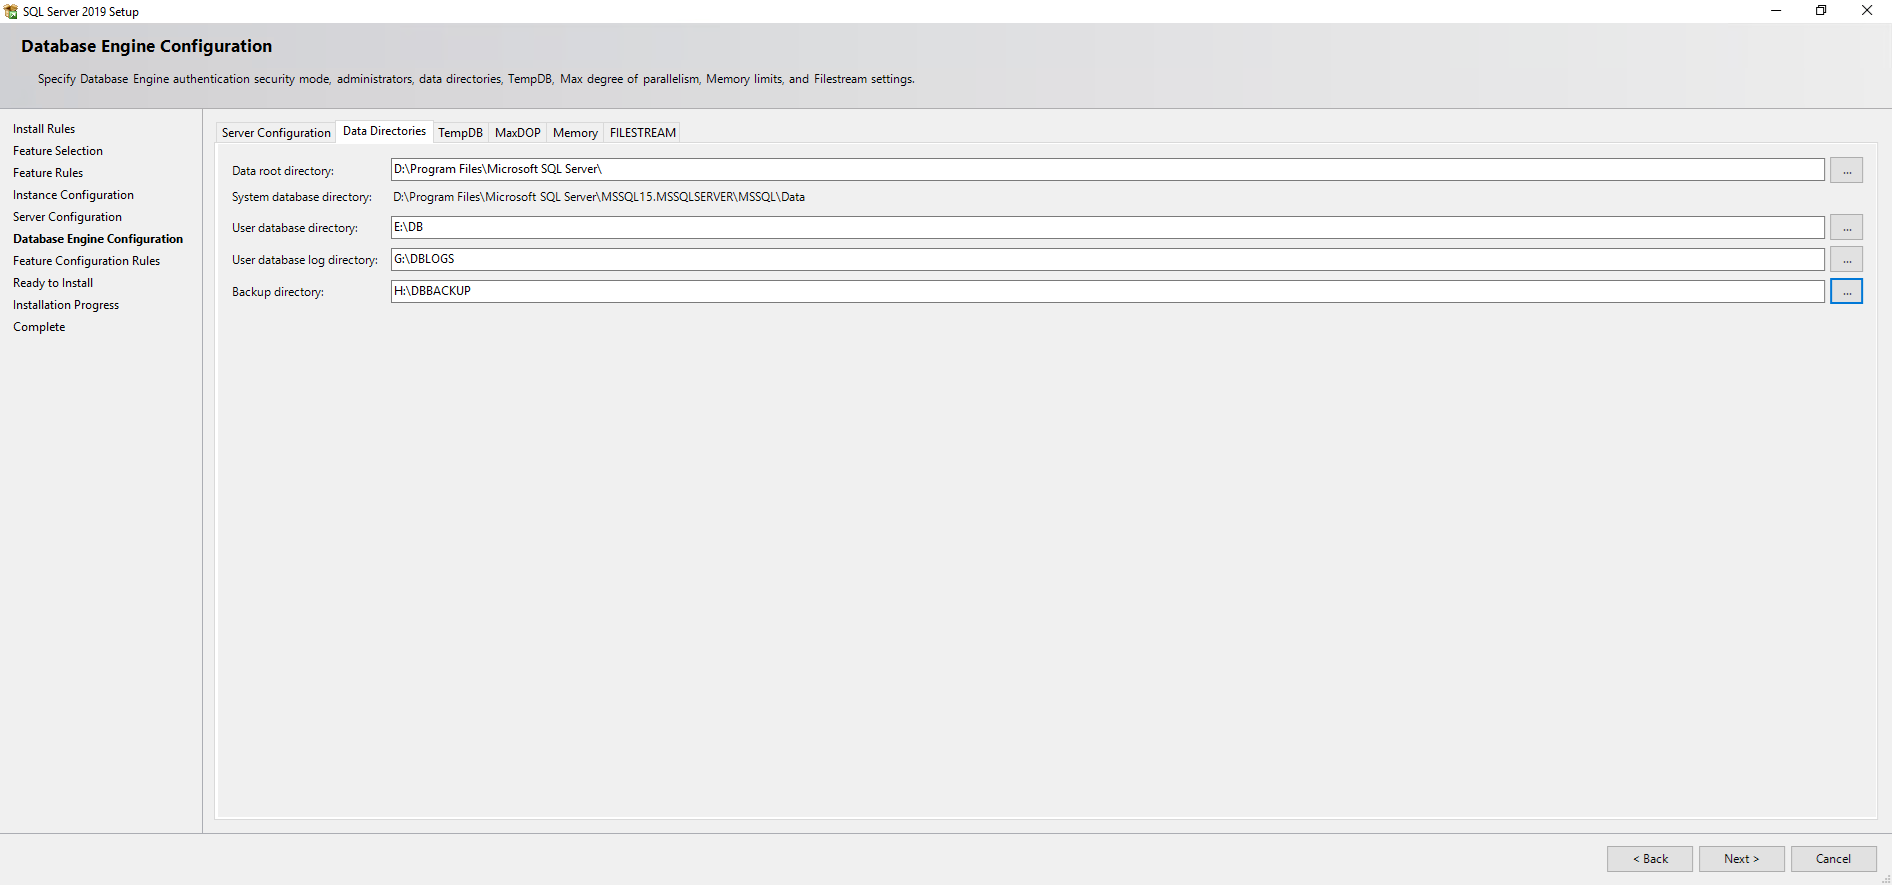
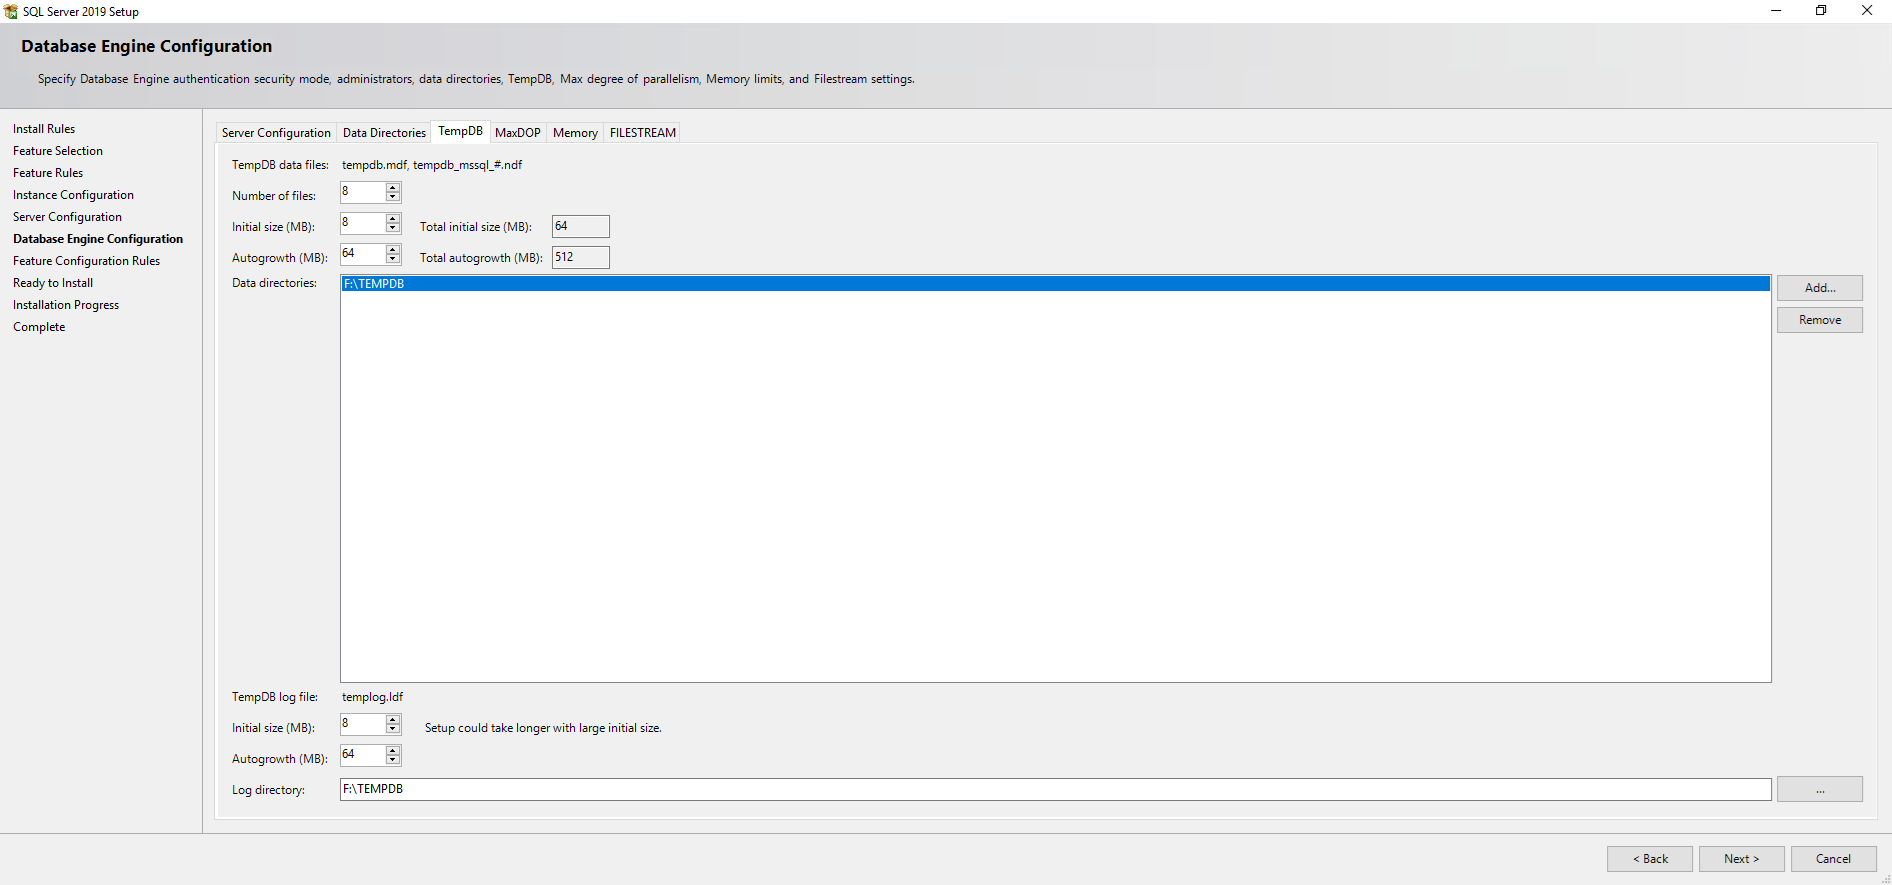
18. On the Database Engine Configuration page, select TempDB, change the Data directories and log directory to F:\TEMPDB.
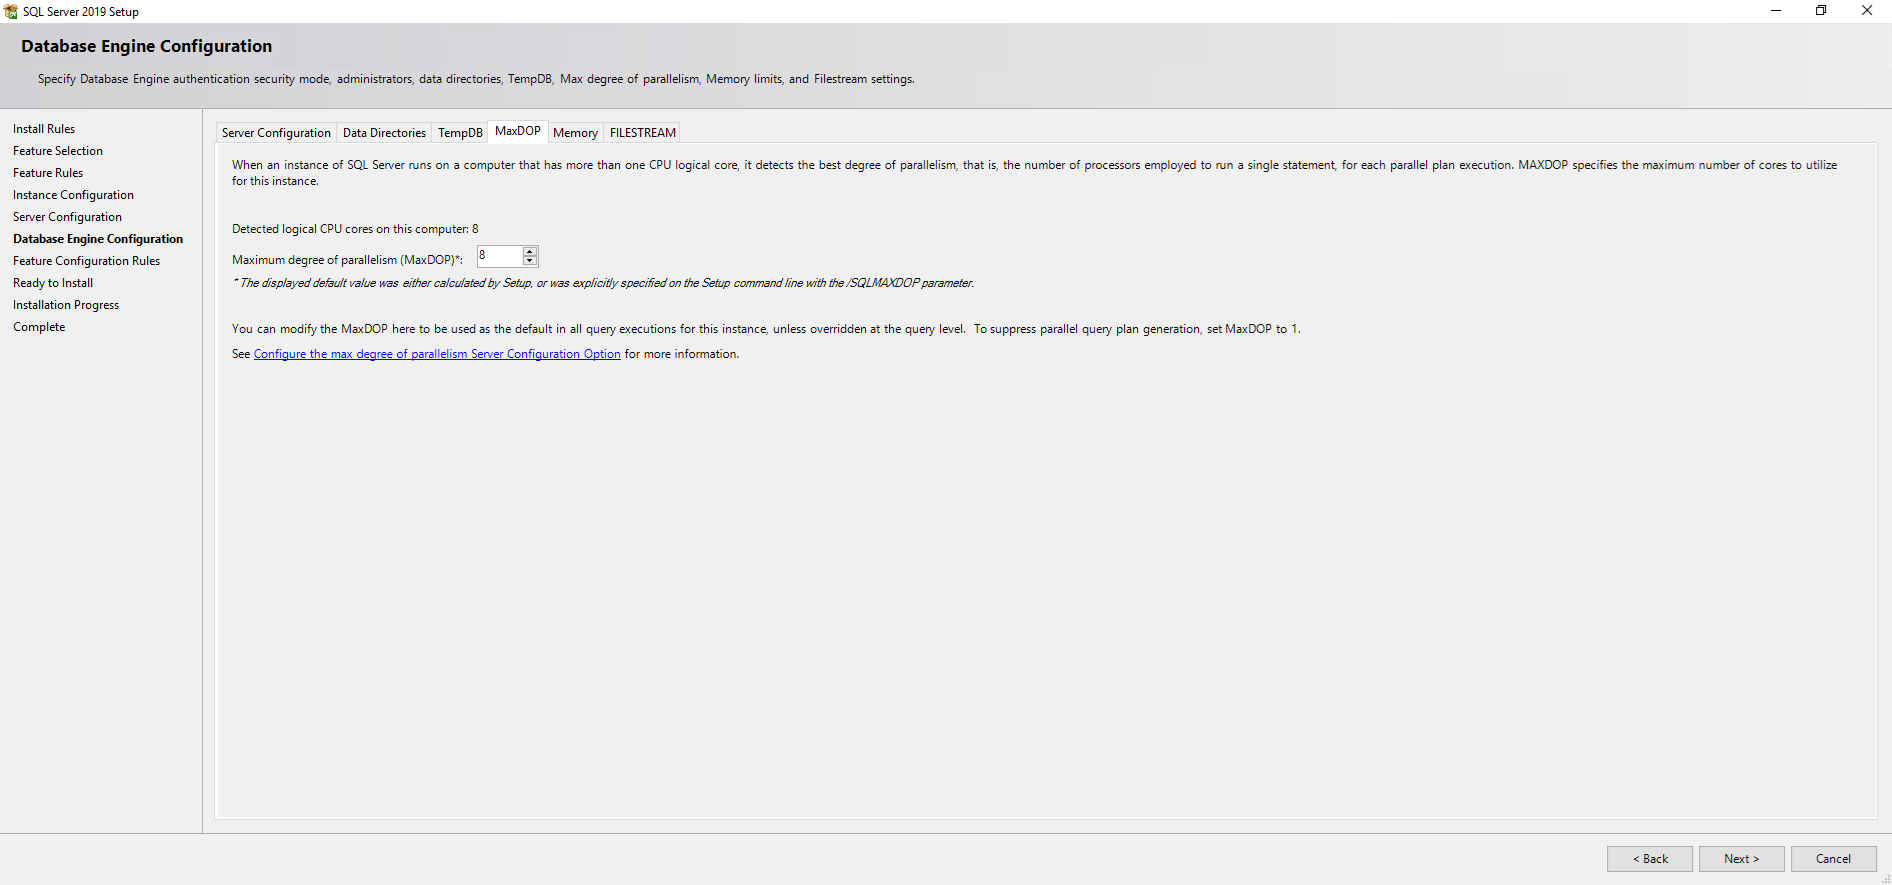
19. On the Database Engine Configuration page, select MaxDB, this setting determines how many processors a single statement can use during execution. The recommended value is automatically calculated during installation.
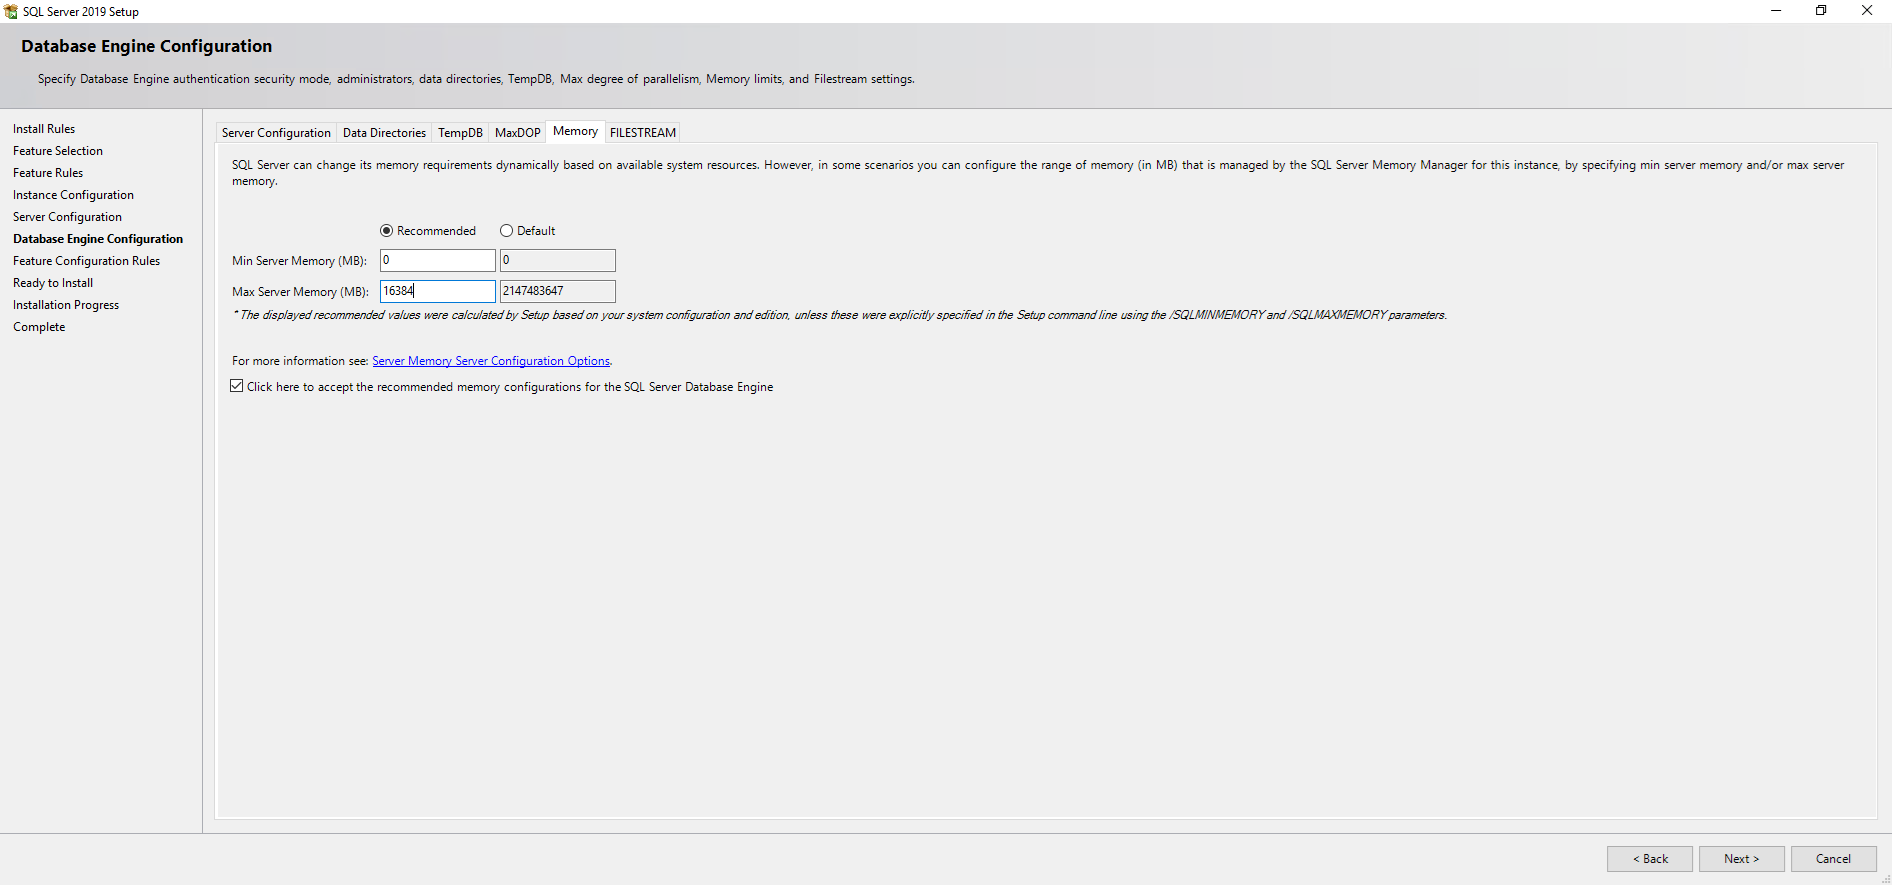
20. On the Database Engine Configuration page, select Memory, select Recommended and enter the specify the min server memory and max server memory values that this instance of SQL Server will use after startup, in my case, Min server memory:0 Max server memory:16384. Select Click here to accept the recommended memory configurations for the SQL Server Database Engine.
21. On the Database Engine Configuration page, select Memory, select FILESTREAM, FILESTREAM integrates the SQL Server Database Engine with an NTFS file system by storing varbinary (max) binary large object (BLOB) data as files in the file system. Transact-SQL statements can insert, update, query, search, and back up FILESTREAM data. Microsoft Win32 file-system interfaces provide streaming access to the data, in my case, I will keep the default settings, click Next.
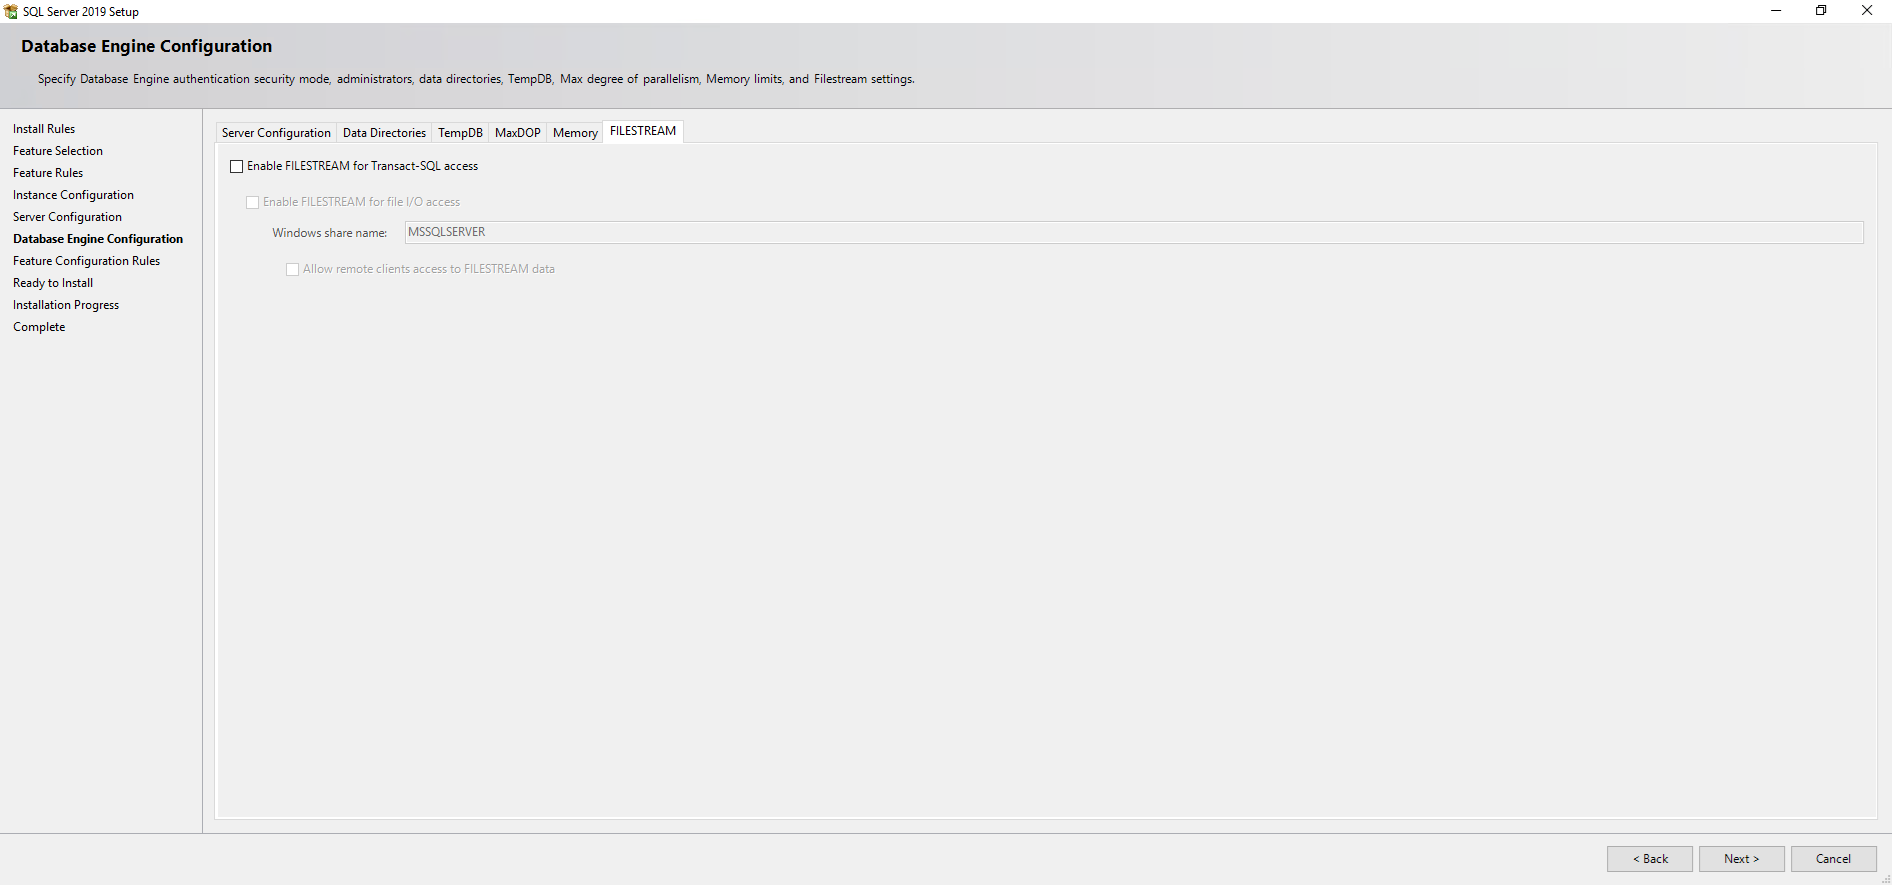
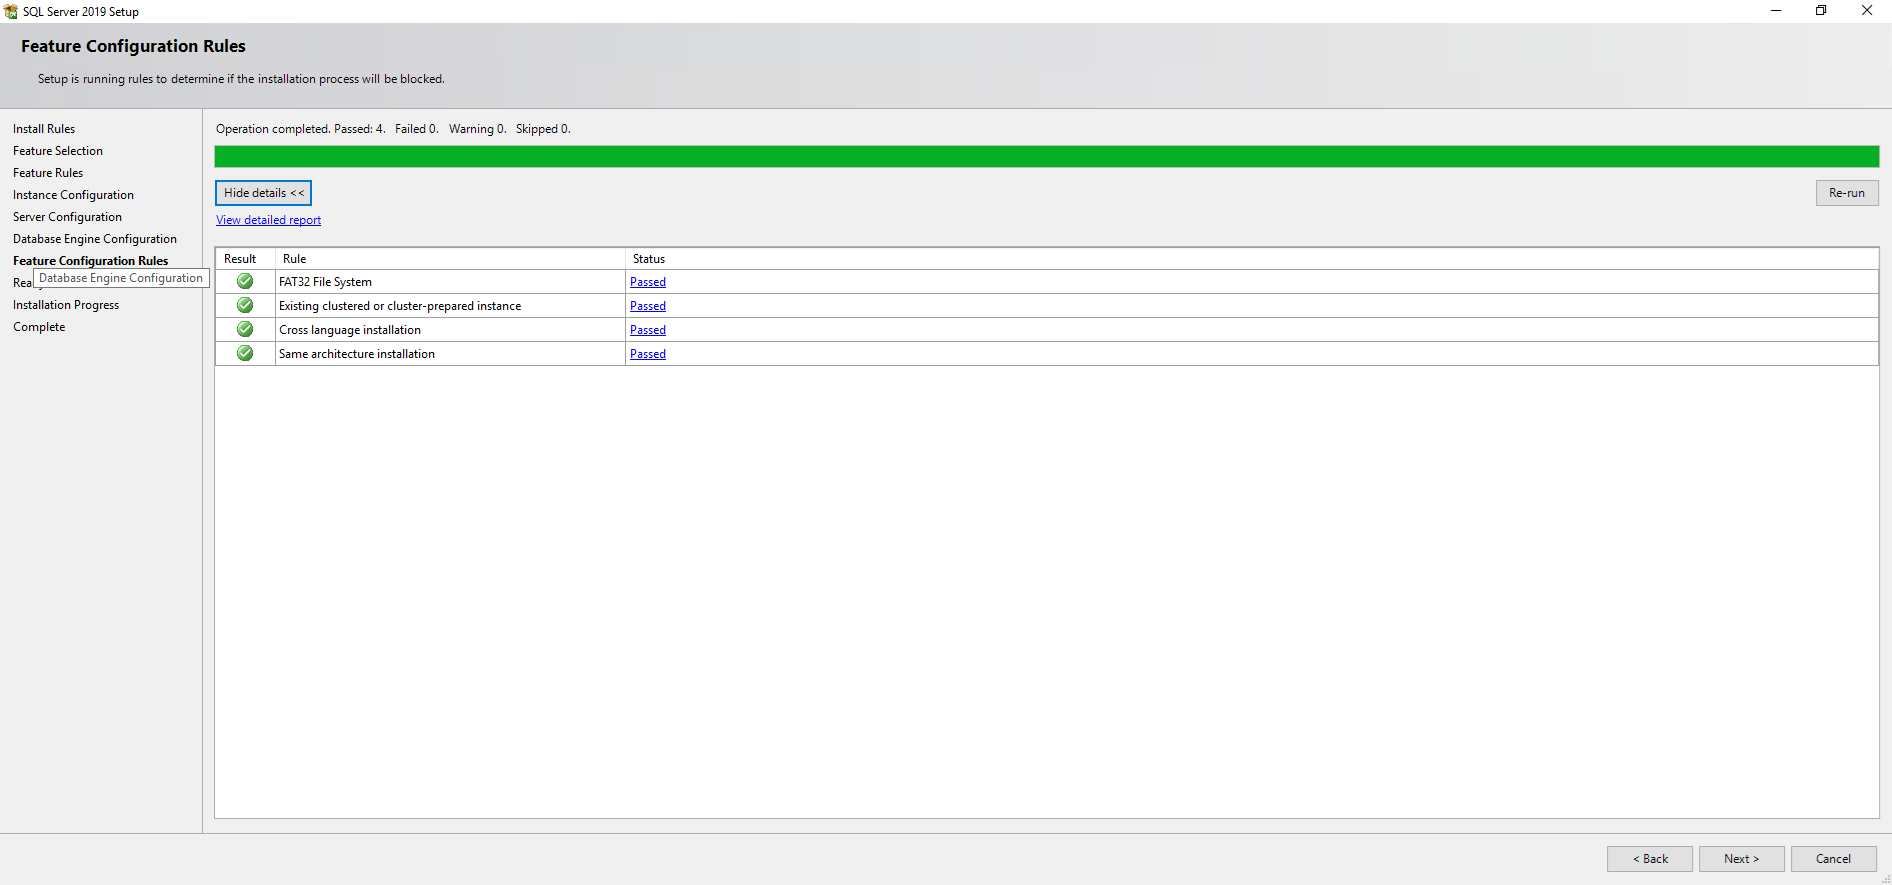
22.On the Feature Configuration Rules page, Setup checks for potential problems that might occur while running Setup. If failures occur, select an item in the Status column for more information. Otherwise, select Next.
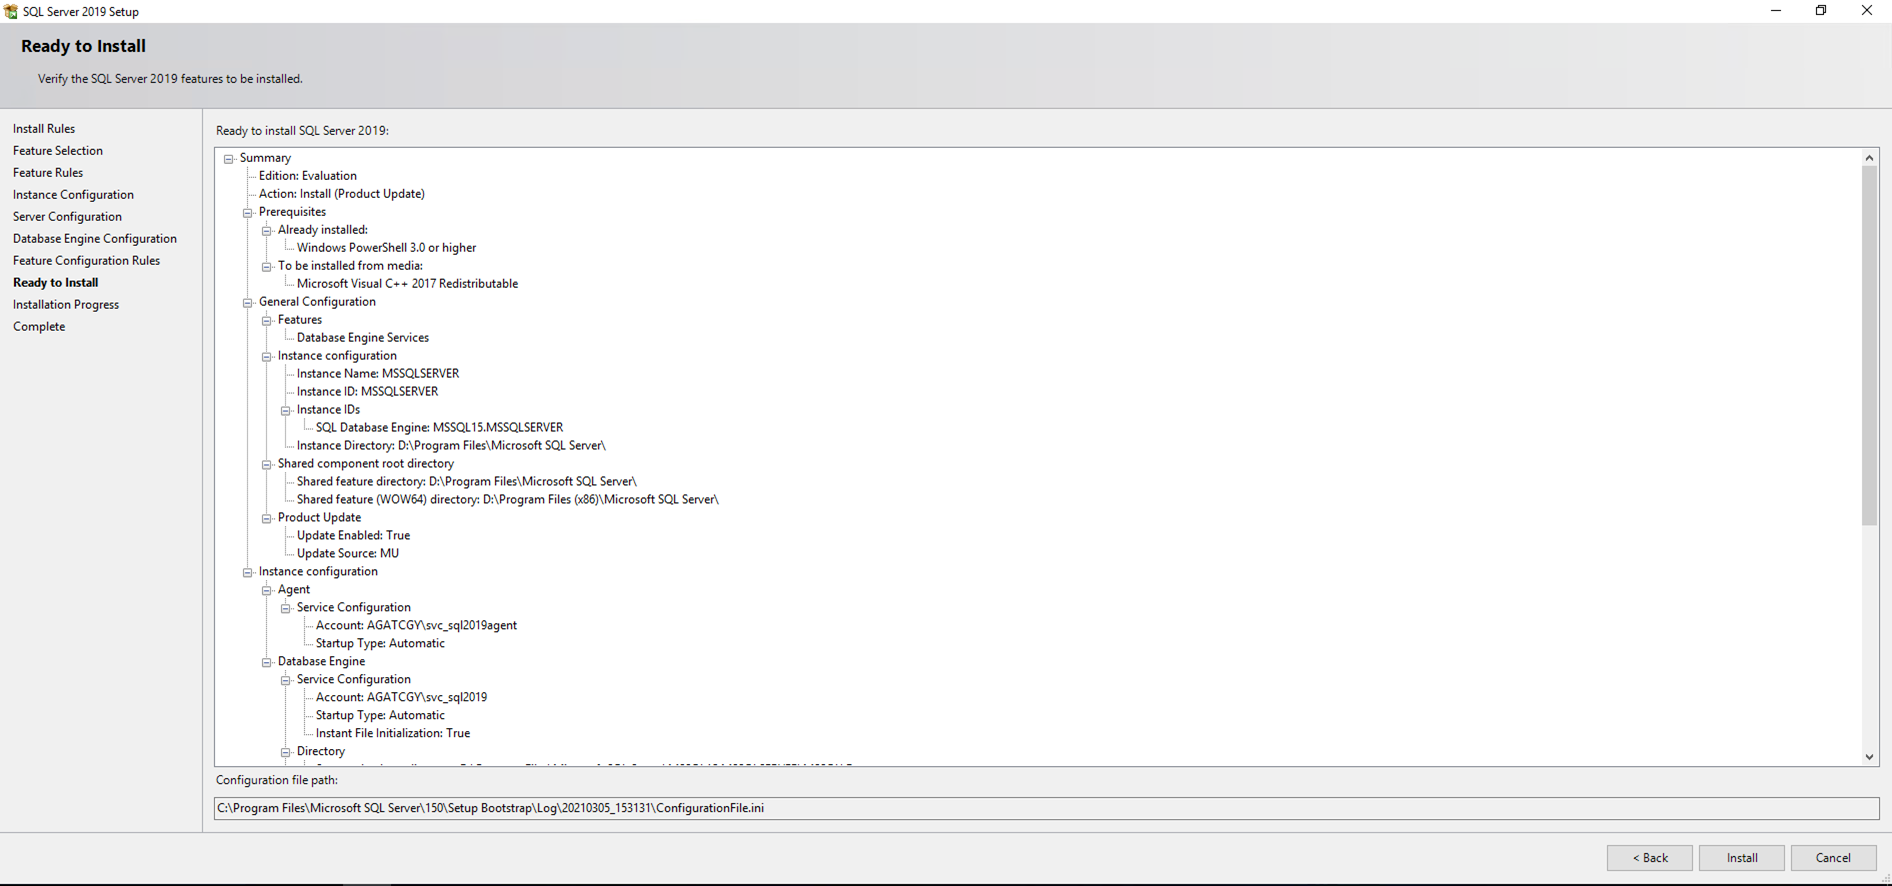
23.On the Ready to Install page, click Install after review settings.
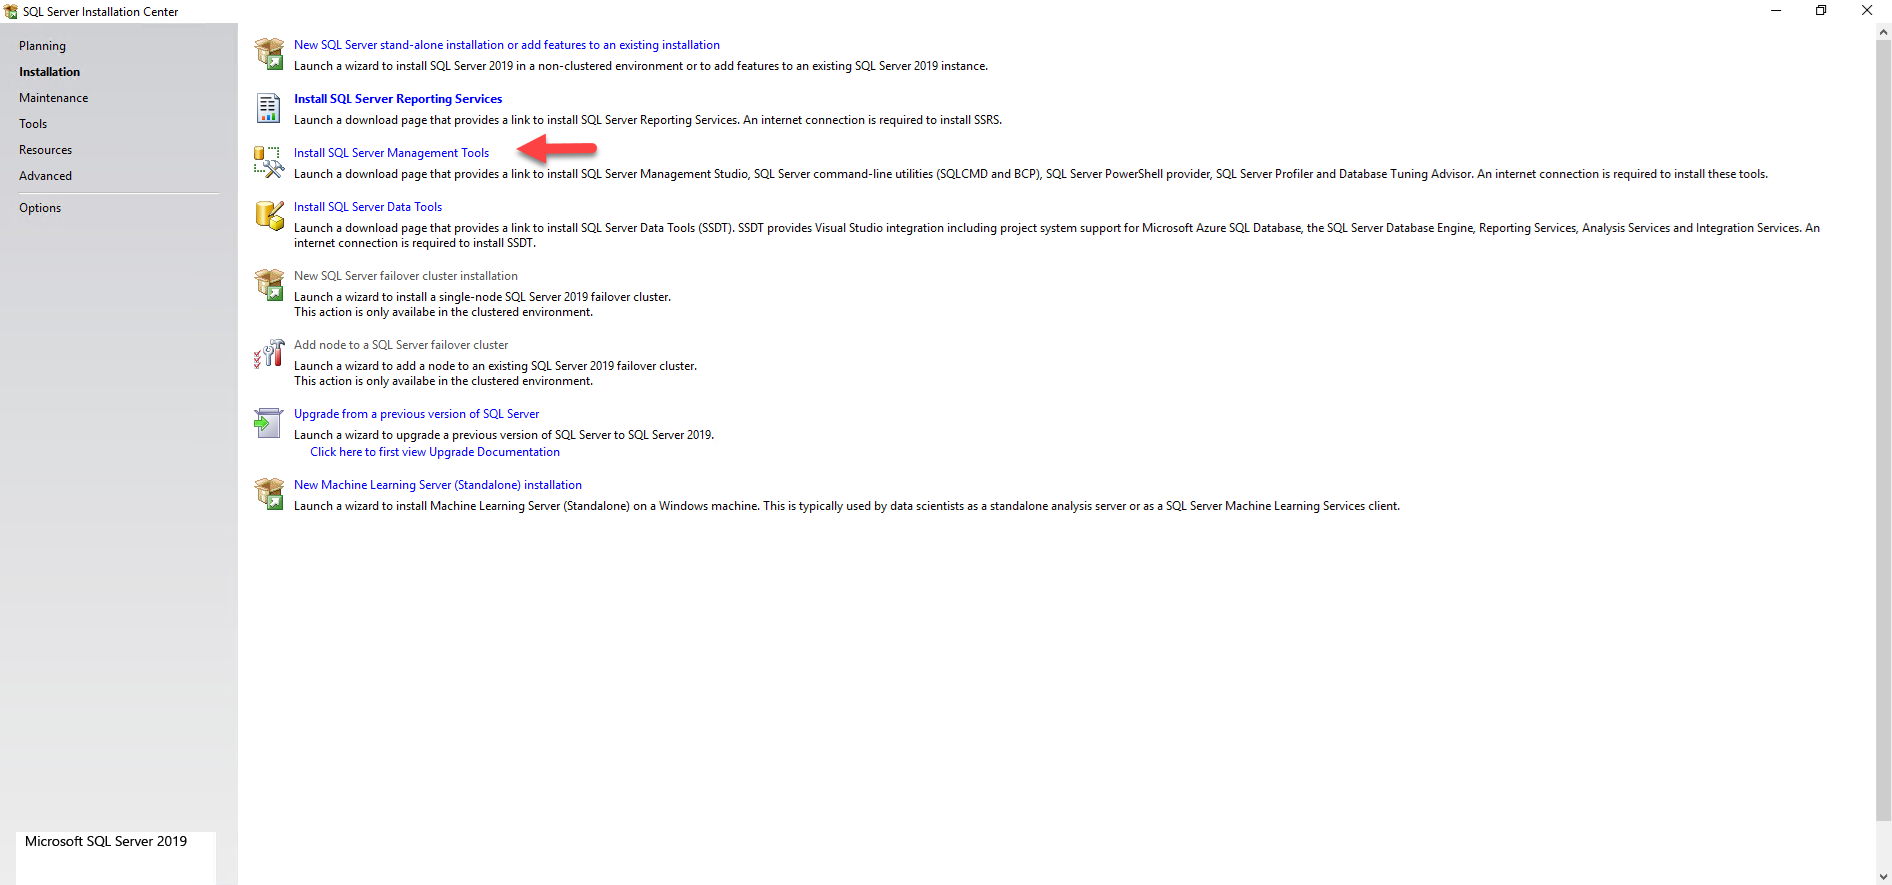
24. After installation, the Complete page provides a link to the summary log file for the installation and other important notes, click Close.
Hope you enjoy this post.
Cary Sun
Twitter: @SifuSun
Web Site: carysun.com
Blog Site: checkyourlogs.net
Blog Site: gooddealmart.com
Author: Cary Sun
Cary Sun has a wealth of knowledge and expertise in data center and deployment solutions. As a Principal Consultant, he likely works closely with clients to help them design, implement, and manage their data center infrastructure and deployment strategies.
With his background in data center solutions, Cary Sun may have experience in server and storage virtualization, network design and optimization, backup and disaster recovery planning, and security and compliance management. He holds CISCO CERTIFIED INTERNETWORK EXPERT (CCIE No.4531) from 1999. Cary is also a Microsoft Most Valuable Professional (MVP), Microsoft Azure MVP, Veeam Vanguard and Cisco Champion. He is a published author with several titles, including blogs on Checkyourlogs.net, and the author of many books.
Cary is a very active blogger at checkyourlogs.net and is permanently available online for questions from the community. His passion for technology is contagious, improving everyone around him at what they do.
Blog site: https://www.checkyourlogs.net
Web site: https://carysun.com
Blog site: https://gooddealmart.com
Twitter: @SifuSun
in: https://www.linkedin.com/in/sifusun/
Amazon Author: https://Amazon.com/author/carysun
