Multi-factor authentication (MFA) is supported by Veeam Backup & Replication for additional user verification. A one-time password (OTP) generated in the mobile authenticator application is a secondary verification method. With login and password credentials, it creates a more secure environment and keeps user accounts safe.
MFA has the following requirements and limitations:
- Users can only manage MFA with the Veeam Backup Administrator role.
- Veeam Backup & Replication Community Edition does not support MFA.
- Veeam Backup Enterprise Manager does not natively support MFA.
- User groups are not supported. You can enable MFA only for user accounts.
- MFA works only for interactive login.
- Push notifications for mobile devices are not supported. Only the mobile authenticator application provides an OTP code.
1. Login to the Veeam Backup and replication manager server.
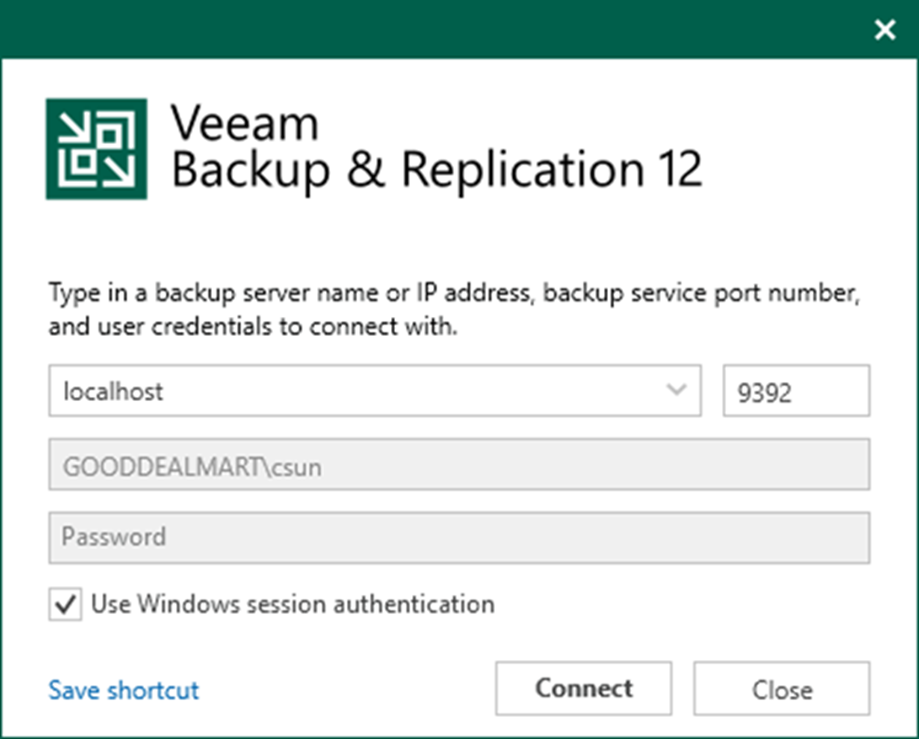
2. Open the Veeam Backup & Replication Console and click Connect.
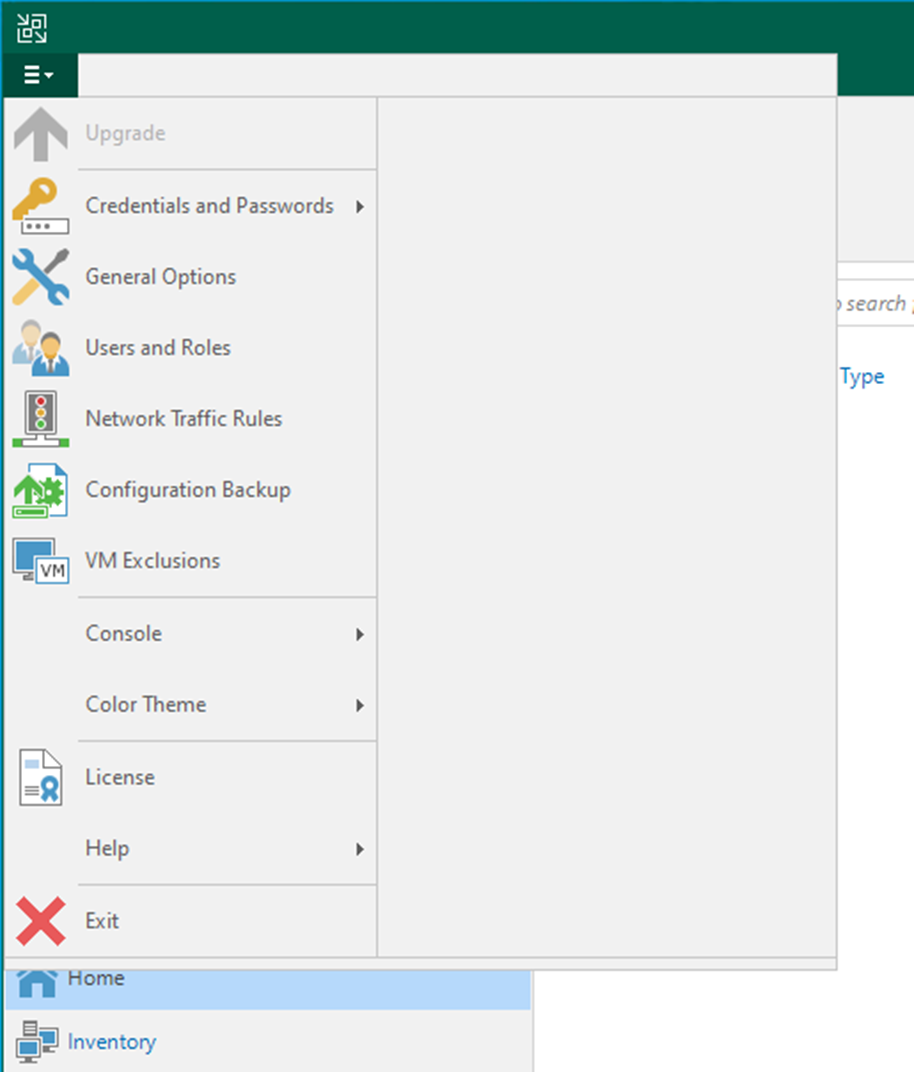
3. Select Users and Roles from the main menu.
4. Click Add on the Security page.

5. On the Add user page, click Browse in the User or group field.
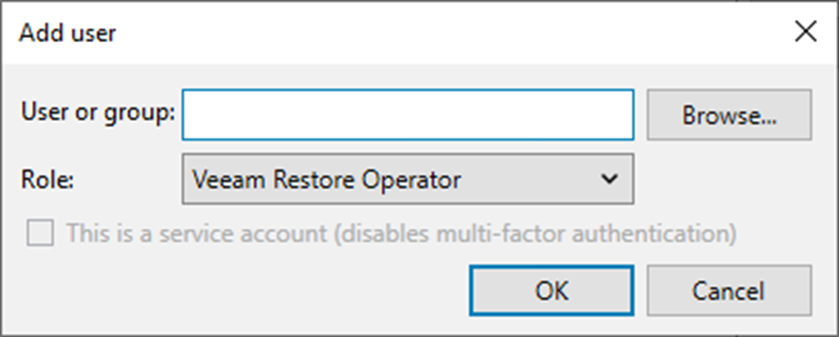
6. Enter a username on the Select User, Computer, or Group page and click Check Names.
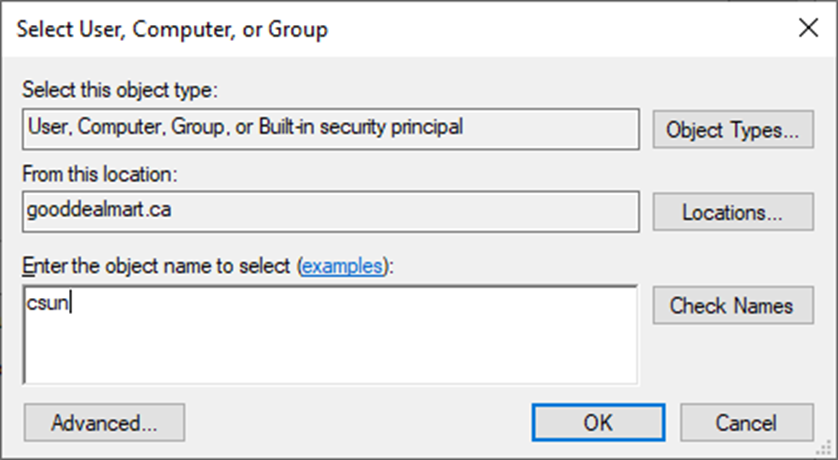
7. Click OK on the Select User, Computer, or Group page.
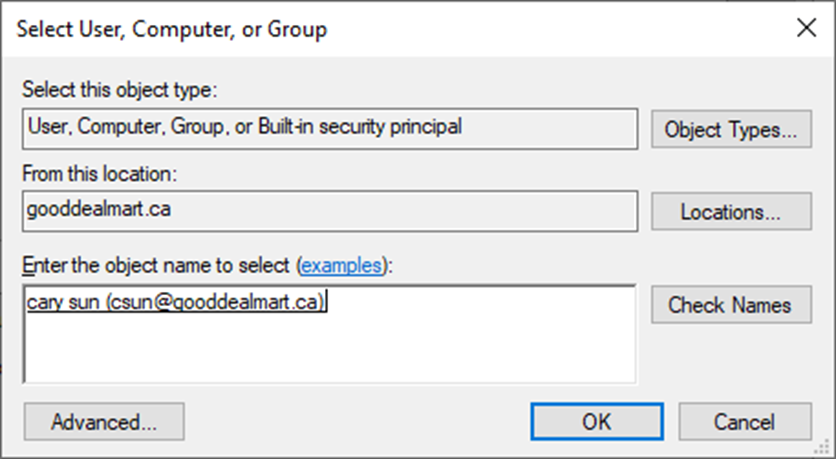
8. Select a role from the Role drop-down list on the Add user page and click OK.
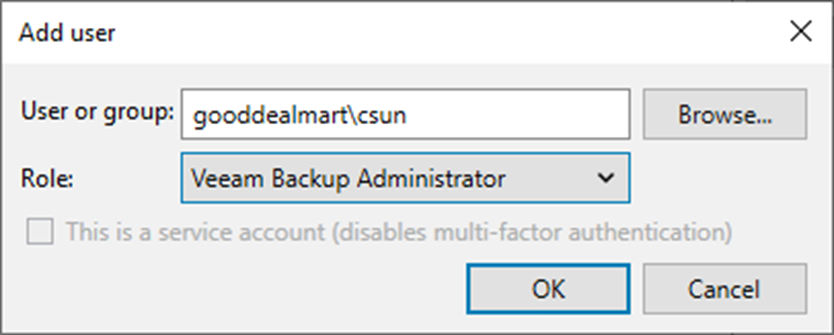
9. On the Security page, select the Administrators group and click Remove.
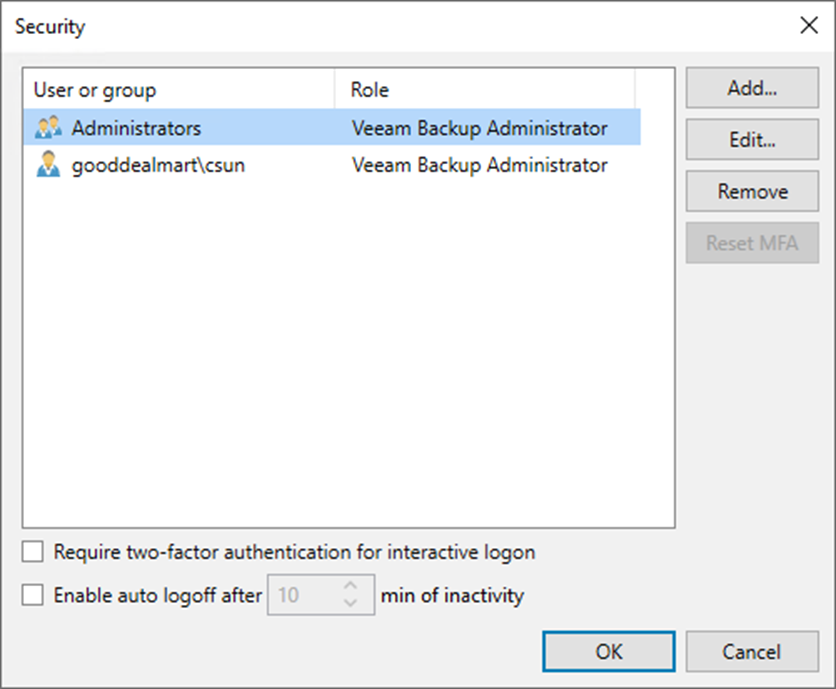
10. Select the new user.
11. Select the Require two-factor authentication for interactive Log in checkbox.
12. Select Enable auto logoff after a period min of inactivity.
13. Click OK.
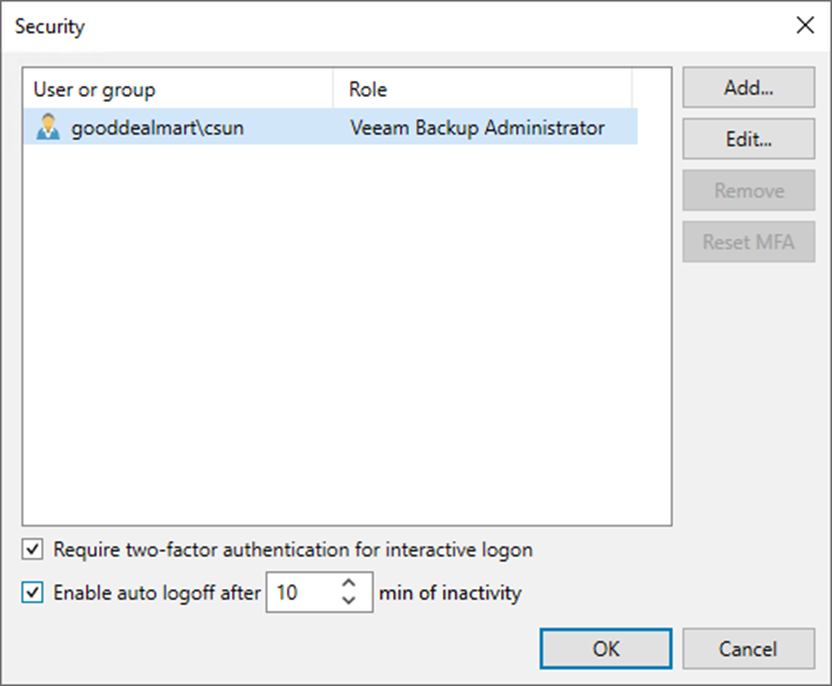
14. Please remove all unsupported security groups from the list if the error message pops up.
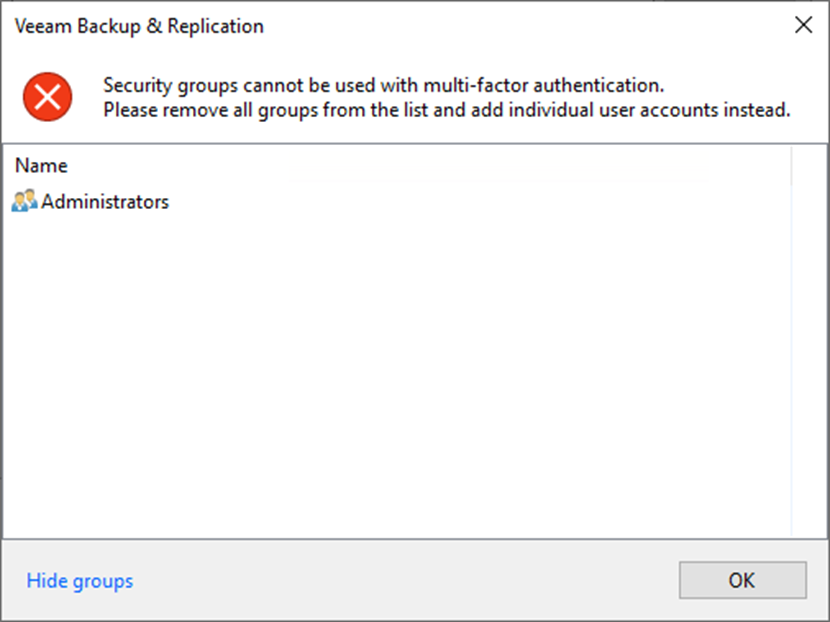
15. Close Veeam Backup and Replication console and reopen it.
16. Enter the username and password on the Veeam Backup & Replication 12 page.
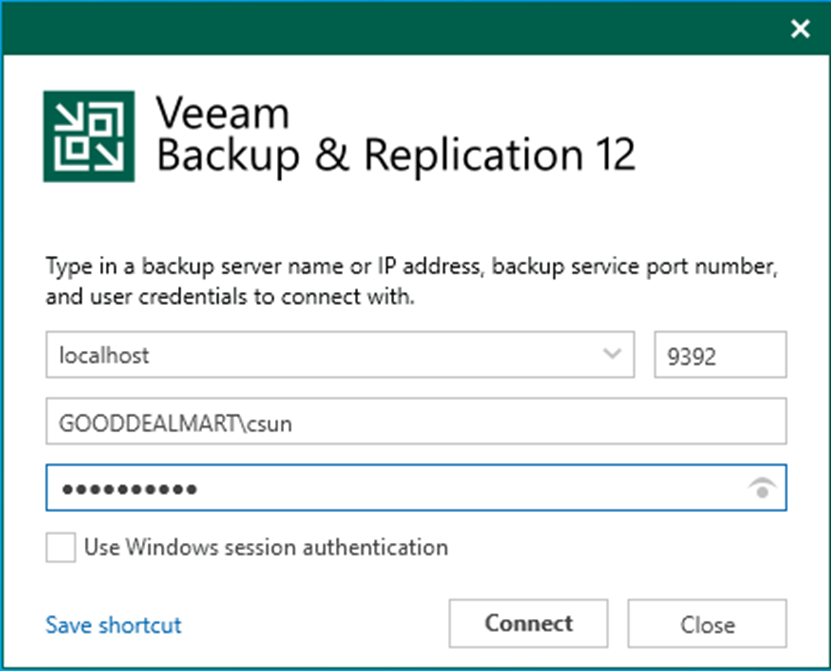
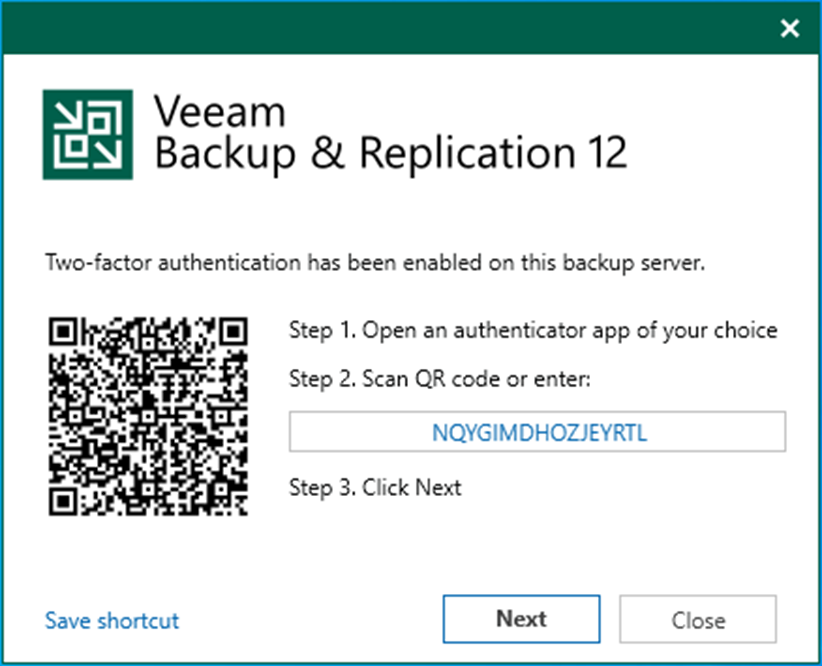
17. Open an Authentication APP from your device and select Add (+).
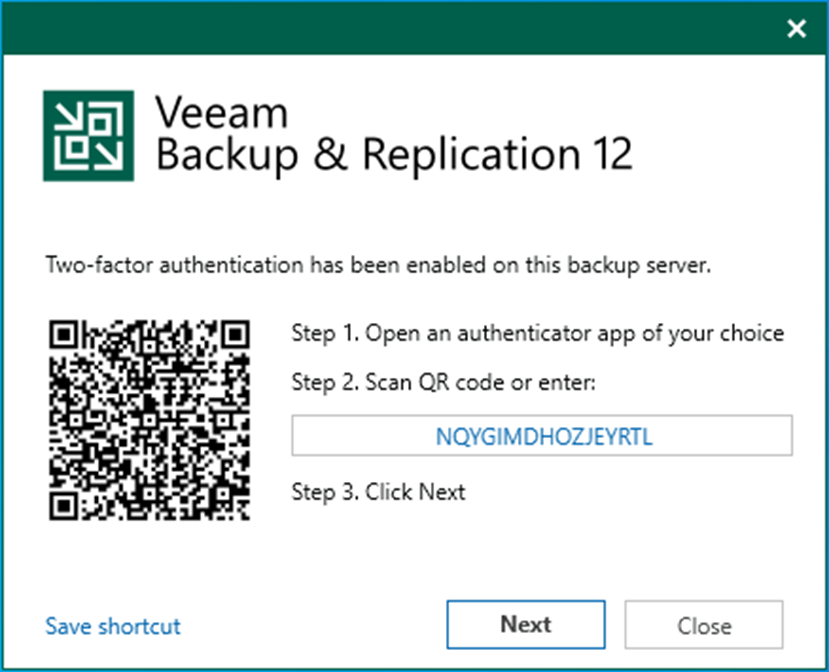
18. Scan the QR code or enter the code.
Note:
I have tried Microsoft and google authentication apps.
19. Ensure the account add to your device successfully.
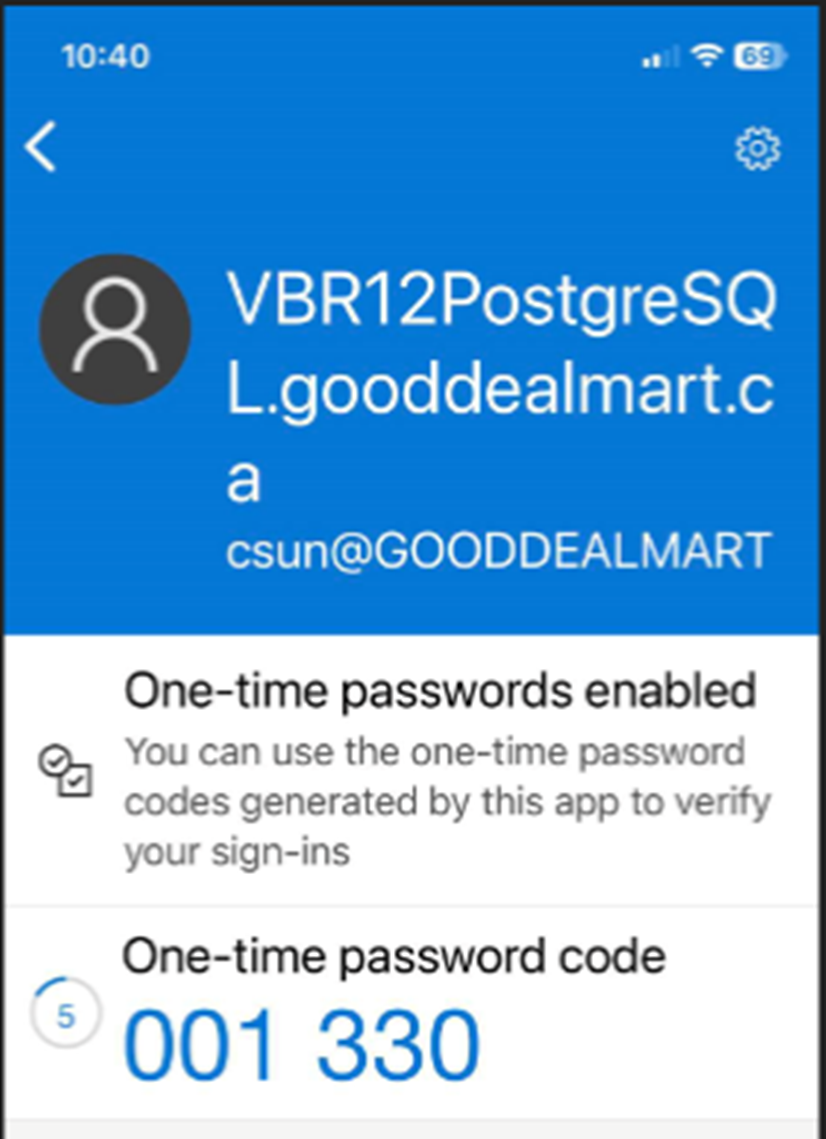
20. Click Next on the Two-factor authentication enabled on this backup server page.

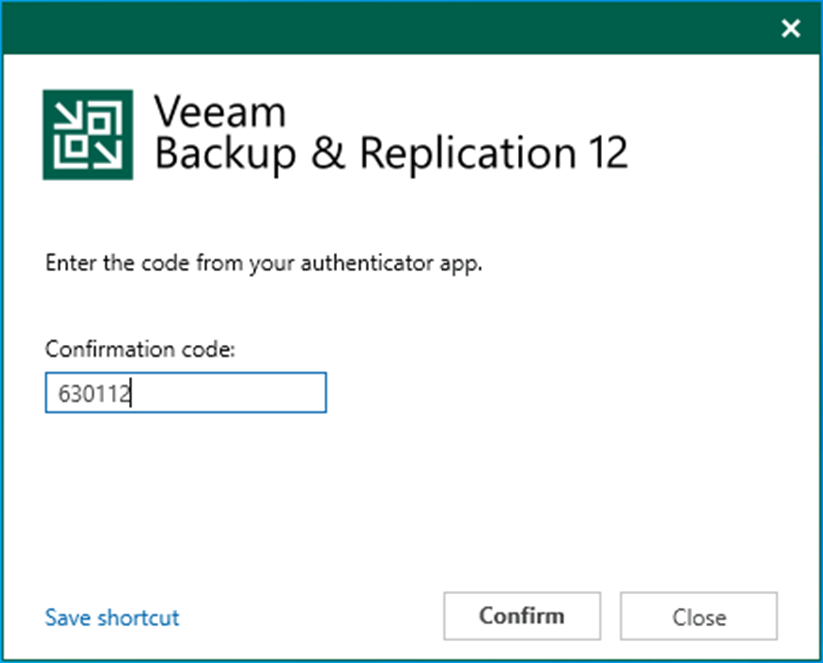
21. Enter the one-time password code in the Confirmation code field and click Confirm.
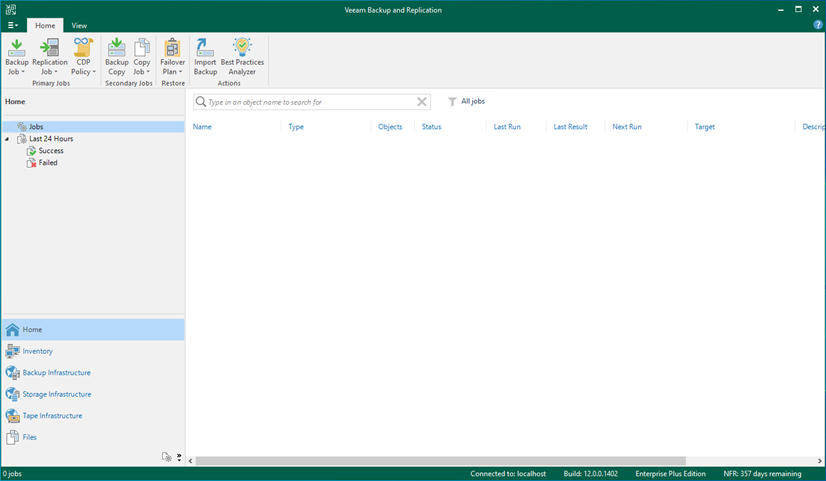
22. Ensure that the open Veeam Backup and Replication console is successful.
I hope you enjoy this post.
Cary Sun
Twitter: @SifuSun
Web Site: carysun.com
Blog Site: checkyourlogs.net
Blog Site: gooddealmart.com
Author: Cary Sun
Cary Sun has a wealth of knowledge and expertise in data center and deployment solutions. As a Principal Consultant, he likely works closely with clients to help them design, implement, and manage their data center infrastructure and deployment strategies.
With his background in data center solutions, Cary Sun may have experience in server and storage virtualization, network design and optimization, backup and disaster recovery planning, and security and compliance management. He holds CISCO CERTIFIED INTERNETWORK EXPERT (CCIE No.4531) from 1999. Cary is also a Microsoft Most Valuable Professional (MVP), Microsoft Azure MVP, Veeam Vanguard and Cisco Champion. He is a published author with several titles, including blogs on Checkyourlogs.net, and the author of many books.
Cary is a very active blogger at checkyourlogs.net and is permanently available online for questions from the community. His passion for technology is contagious, improving everyone around him at what they do.
Blog site: https://www.checkyourlogs.net
Web site: https://carysun.com
Blog site: https://gooddealmart.com
Twitter: @SifuSun
in: https://www.linkedin.com/in/sifusun/
Amazon Author: https://Amazon.com/author/carysun
