Today, I am going to show you how to demote the domain controller from virtual machine of Azure.
1.Sign in Azure portal.
2. In Search resources, service, and docs (G+/), type Virtual Machine.
3.Select Virtual Machine from the Services.

4.On the Virtual Machine page, click the virtual machine, in my case is AZDC01.

5.On the domain controller Virtual Machine page, click Connect, select RDP.

6.On the RDP page, click Download RDP file.
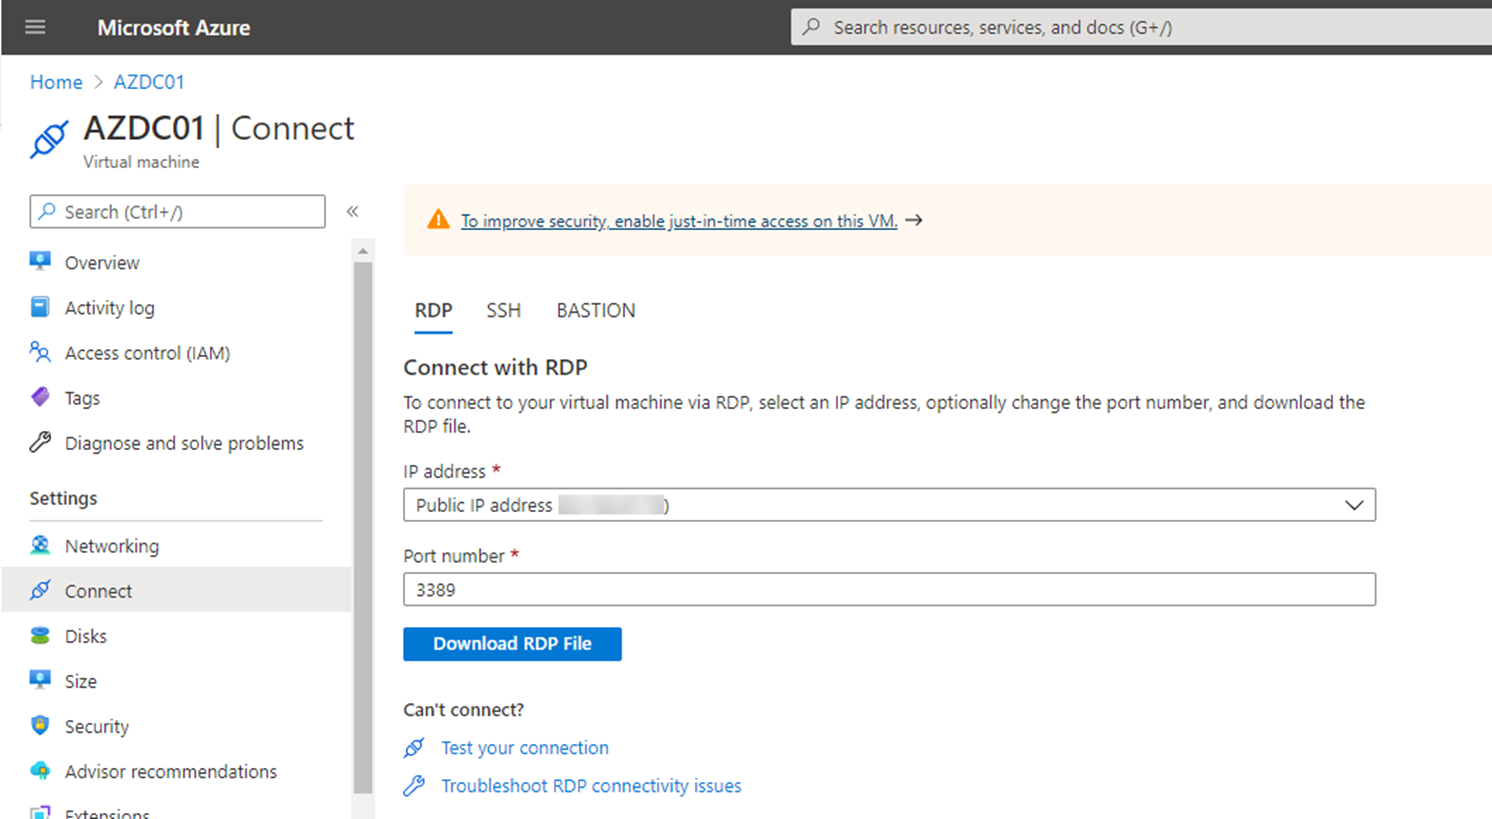
7.Click the download file.

8.Login to domain controller server.
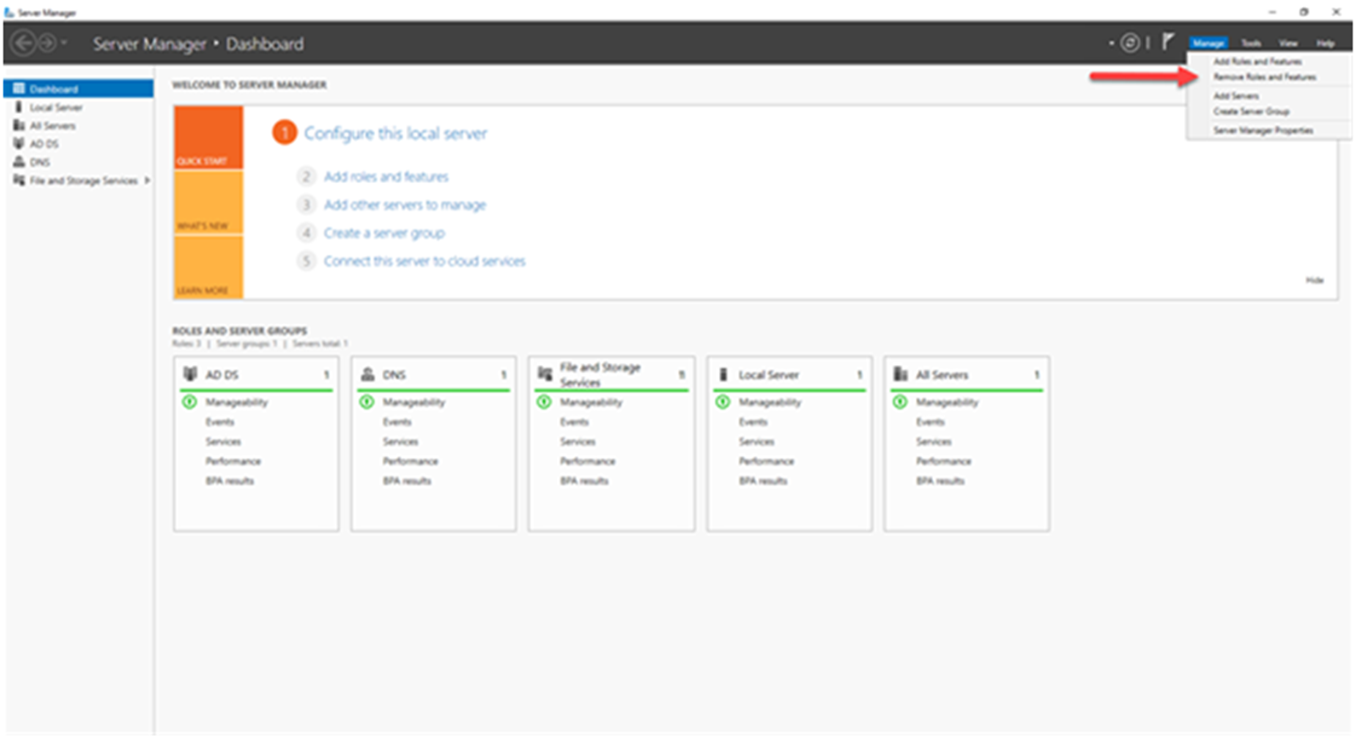
9.On the Server Manager page, select Manager, click Remove Roles and Features.
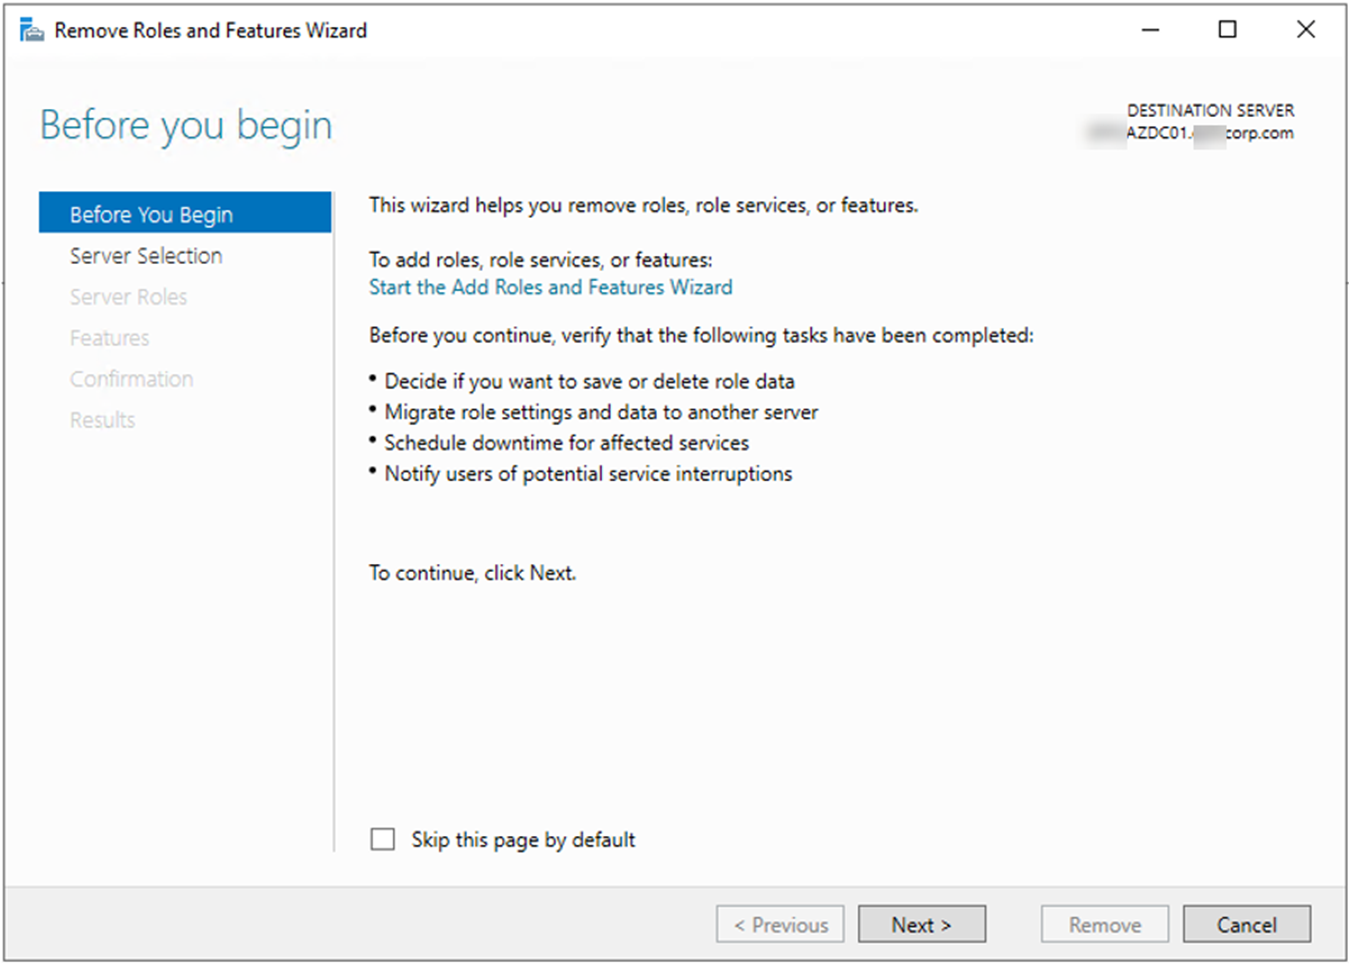
10.On the Before You begin page, click Next.
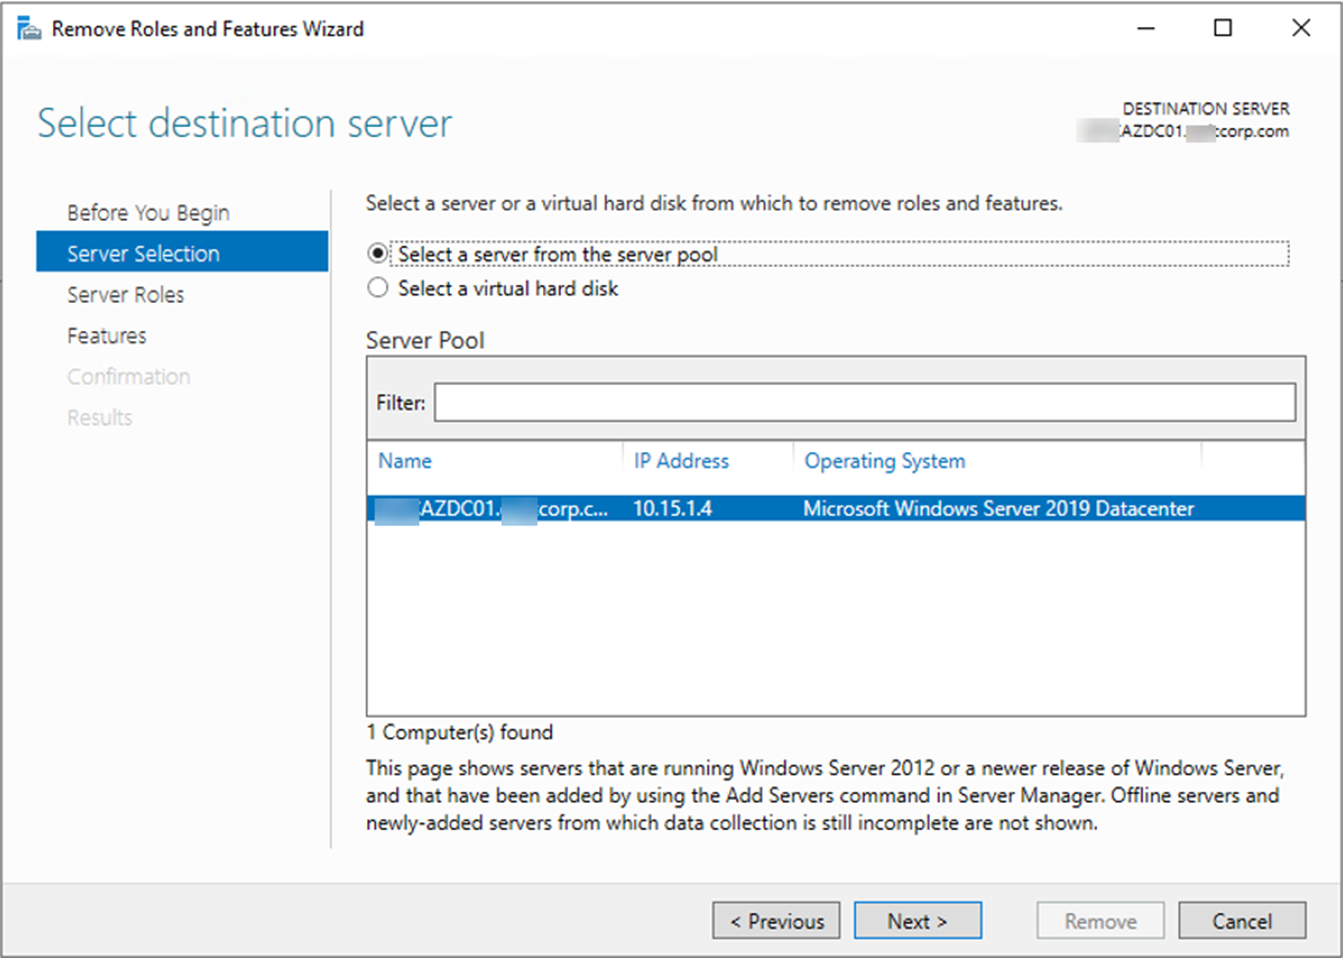
11.On the Select Destination server page, click Next.
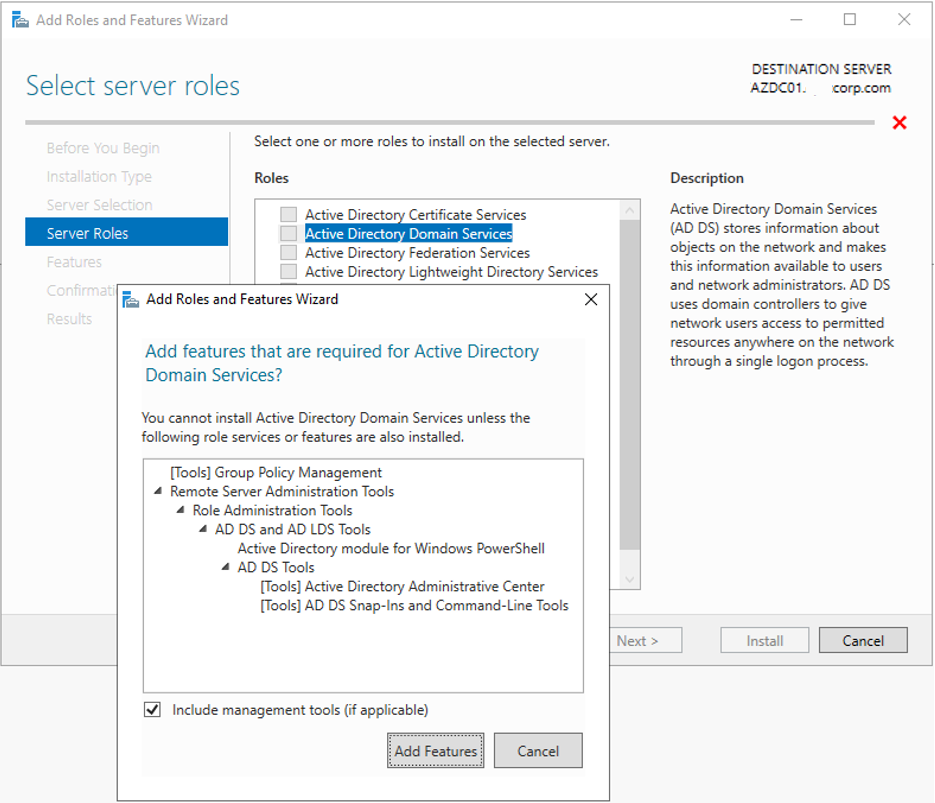
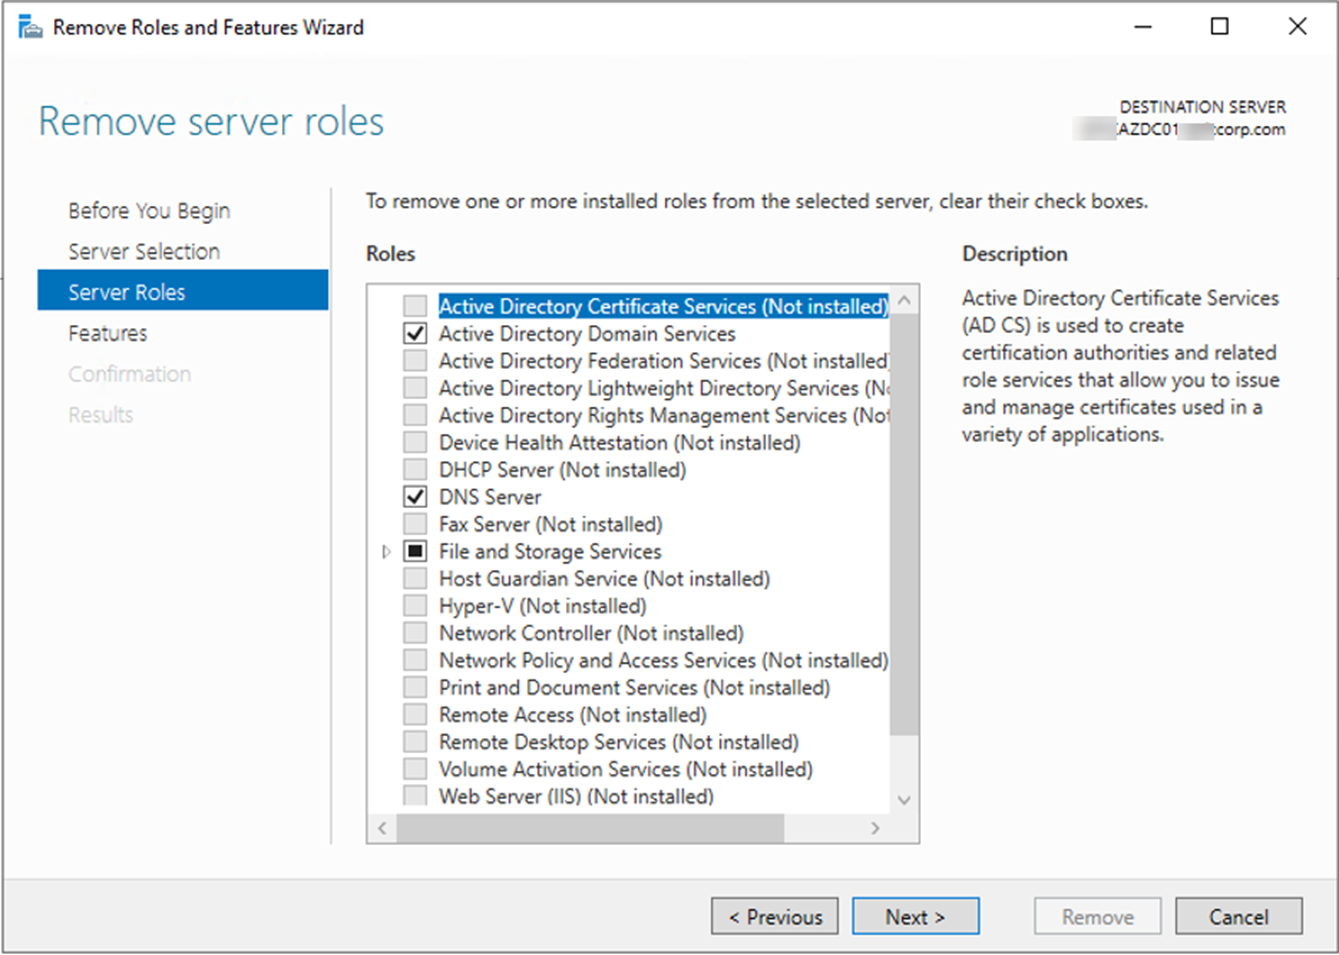
12.On the Remove server roles page, unselect Active Directory Domain Services, click Next.
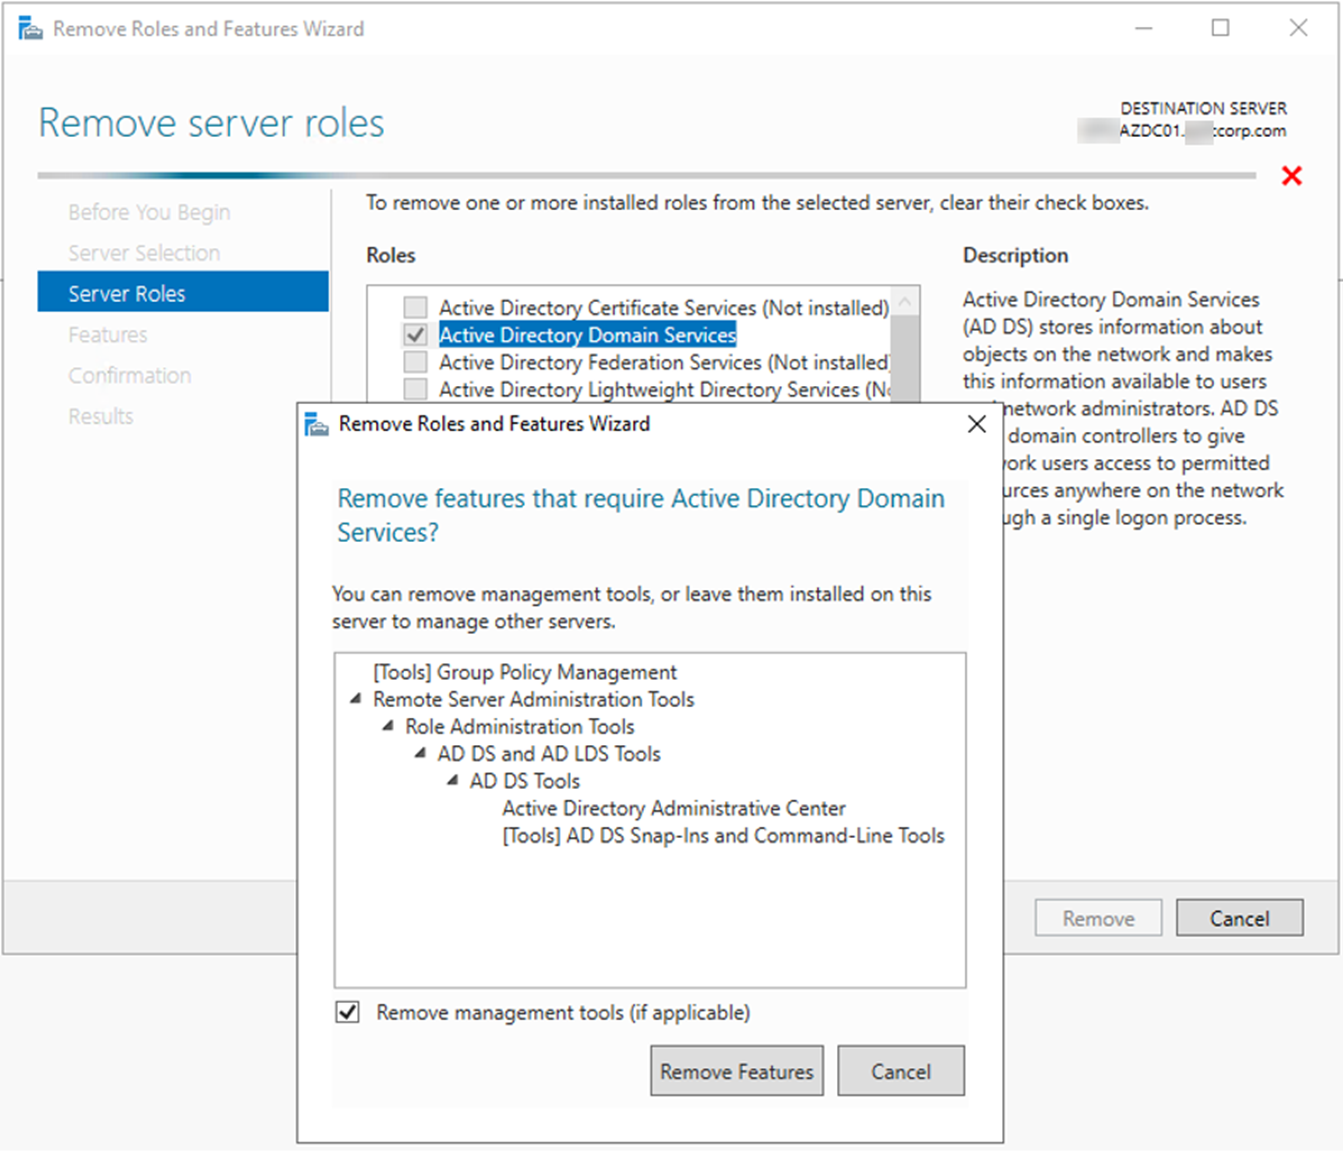
13.On the Remove features page, click Remove Features.
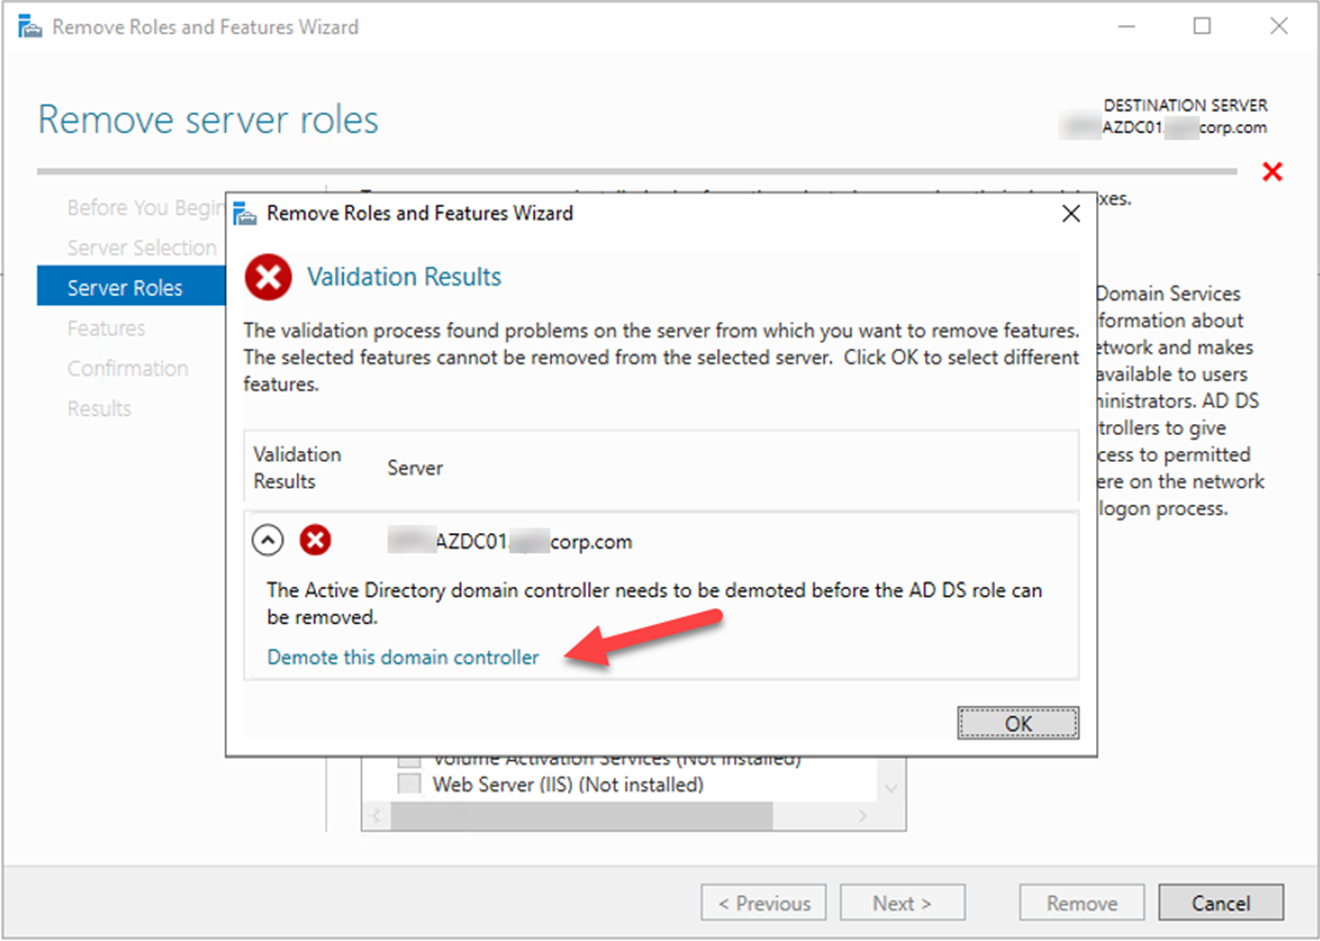
14.You will notice you cannot remove Active Directory Domain Services before demote it, click Demote this domain controller.
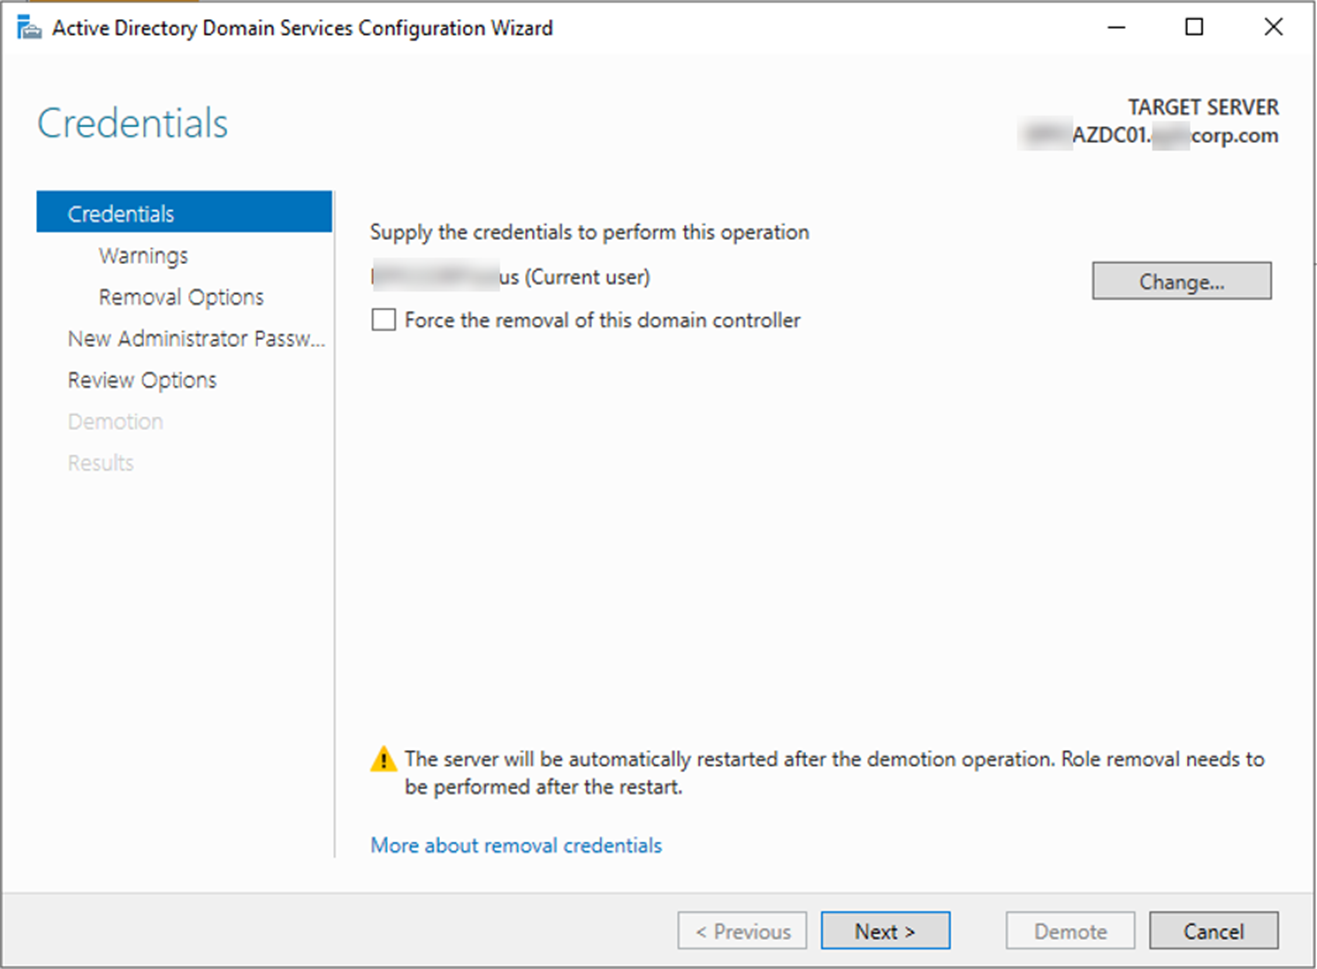
15.On the Credentials page, If you are login with domain admin account, click Next, if not, click Change, enter the domain admin credential, and then click Next.
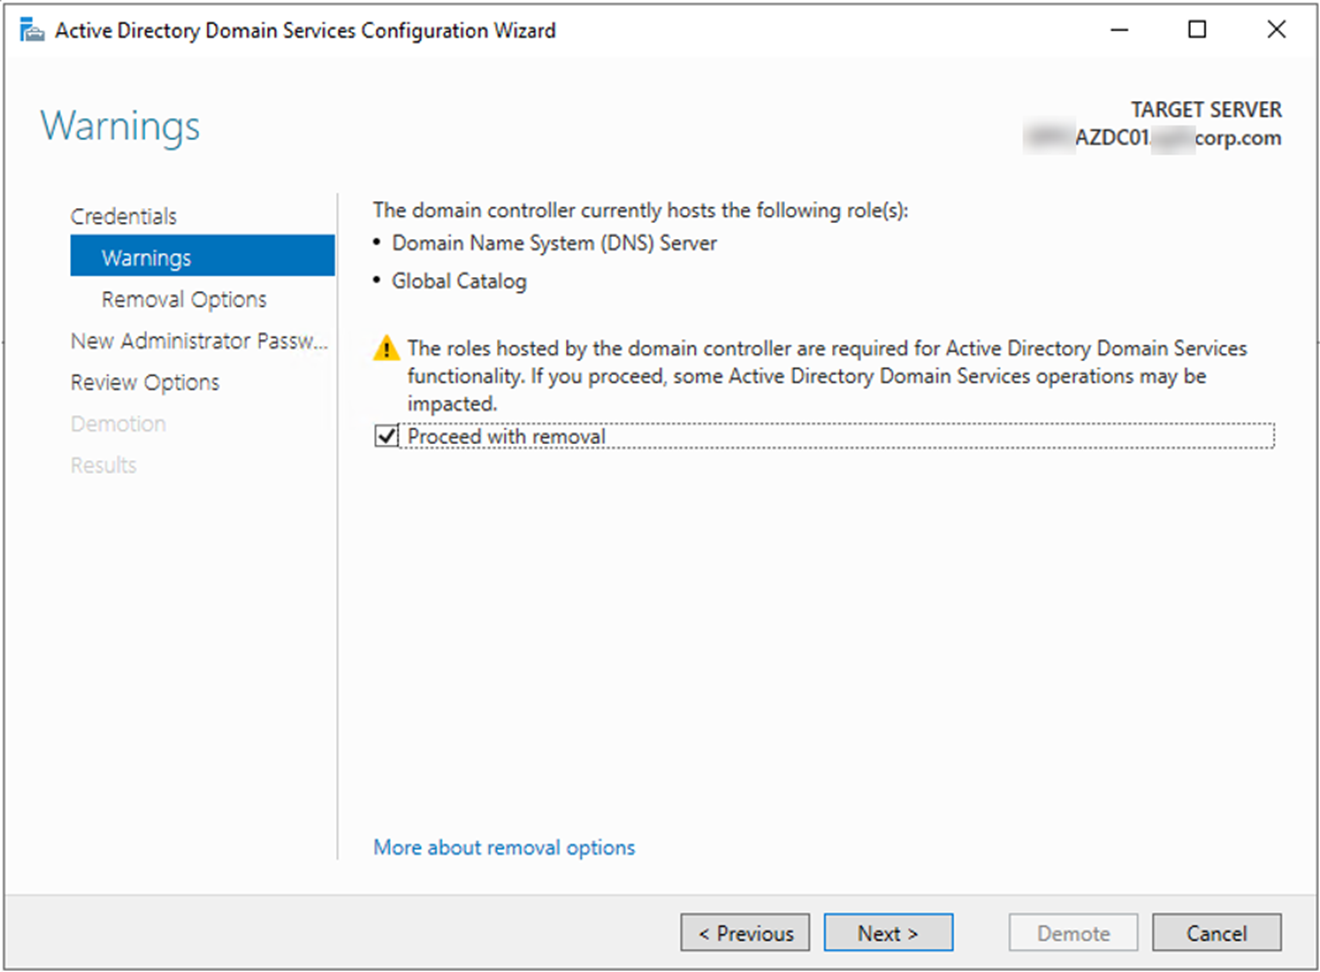
16.On the Warning page, click Next.
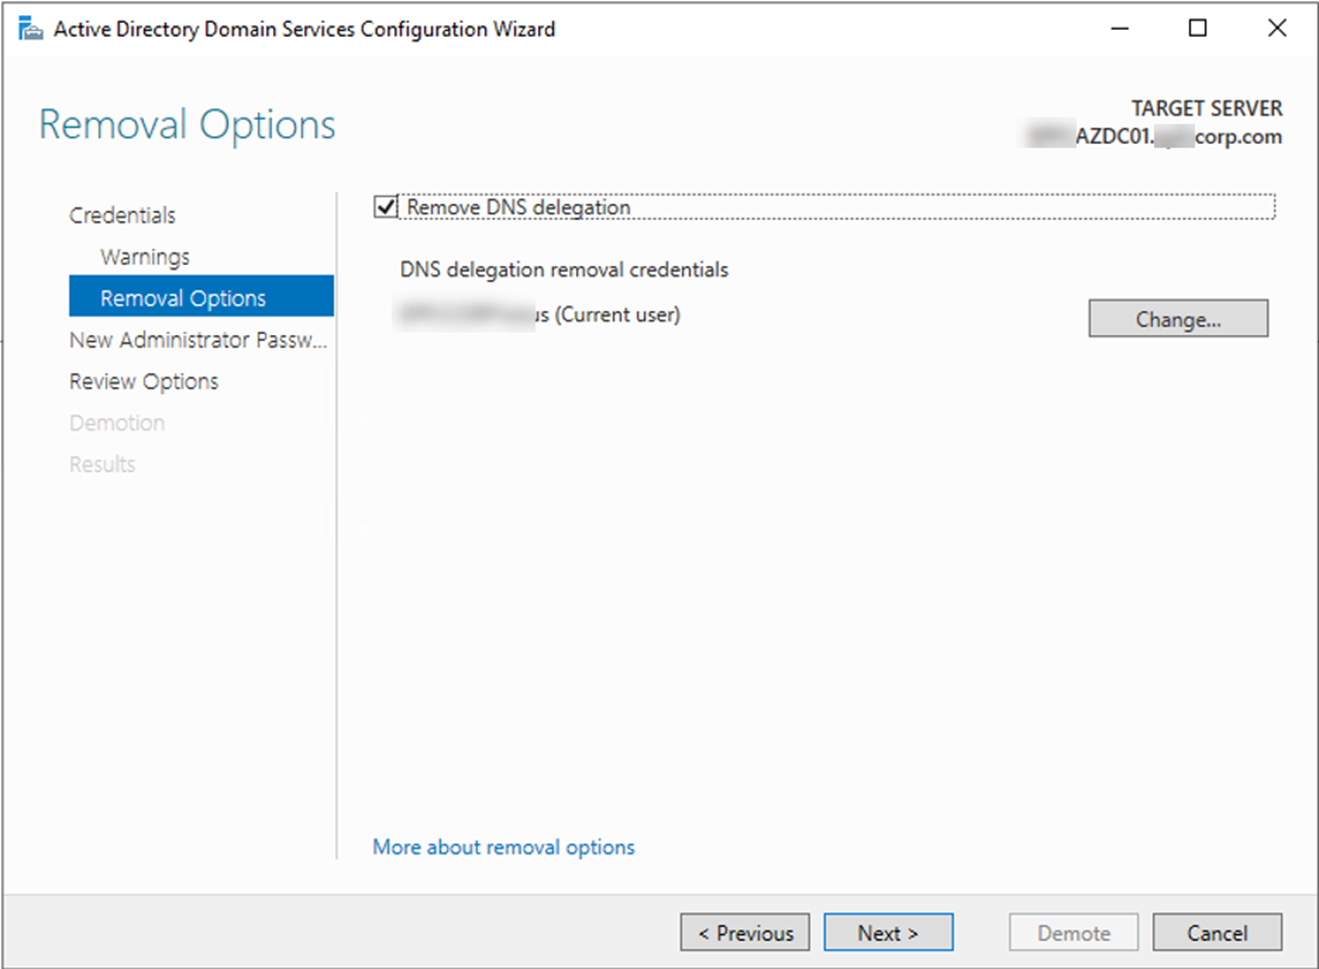
17.On the Removal Options page, select Remove DNS delegation, click Next.
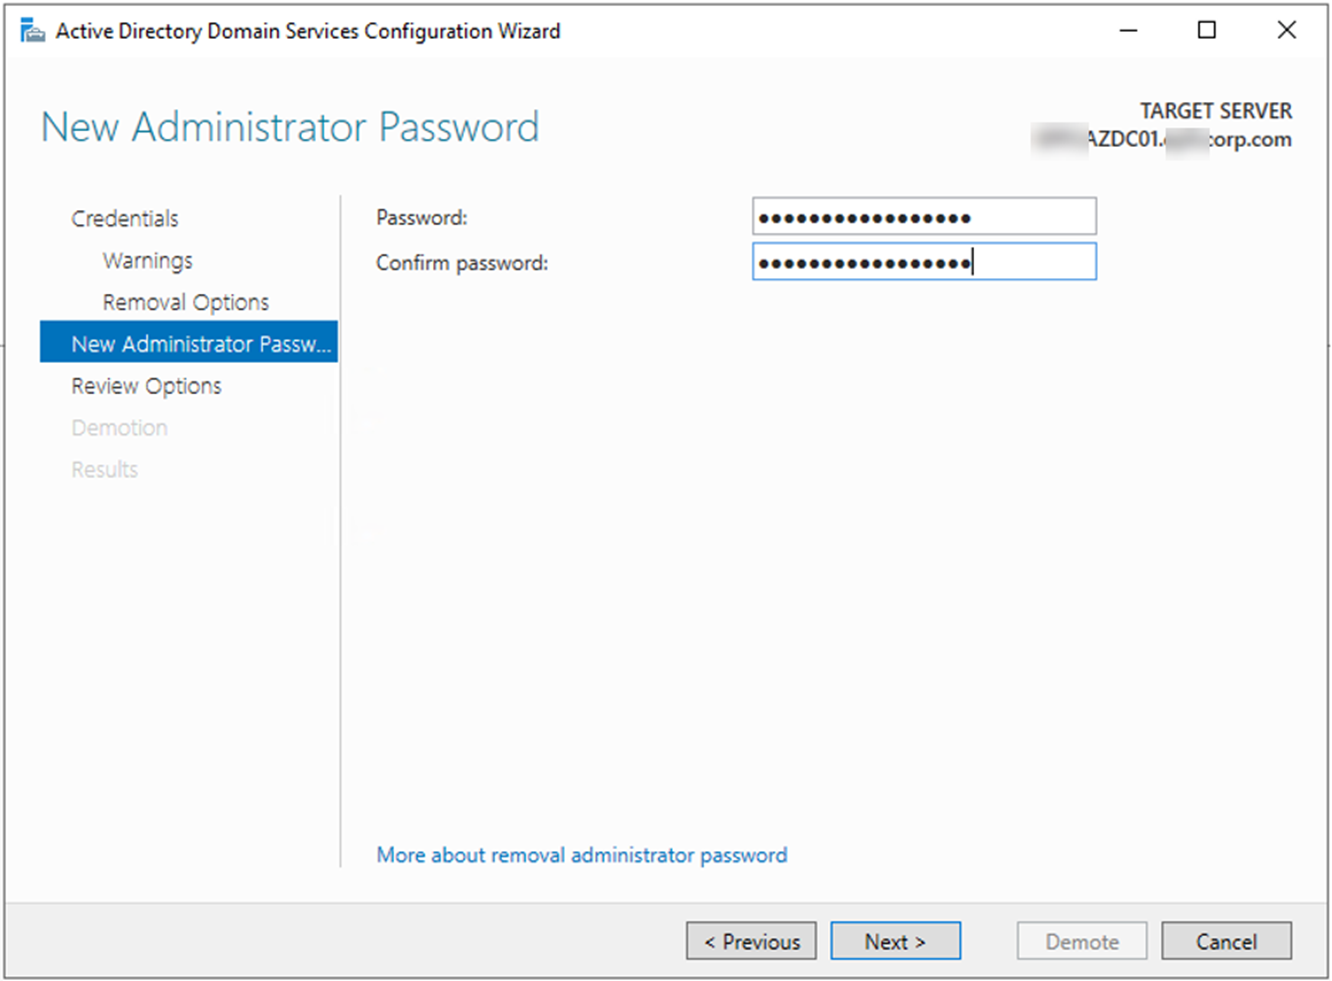
18.On the New Administrator Password page, type the password for local administrator, click Next.
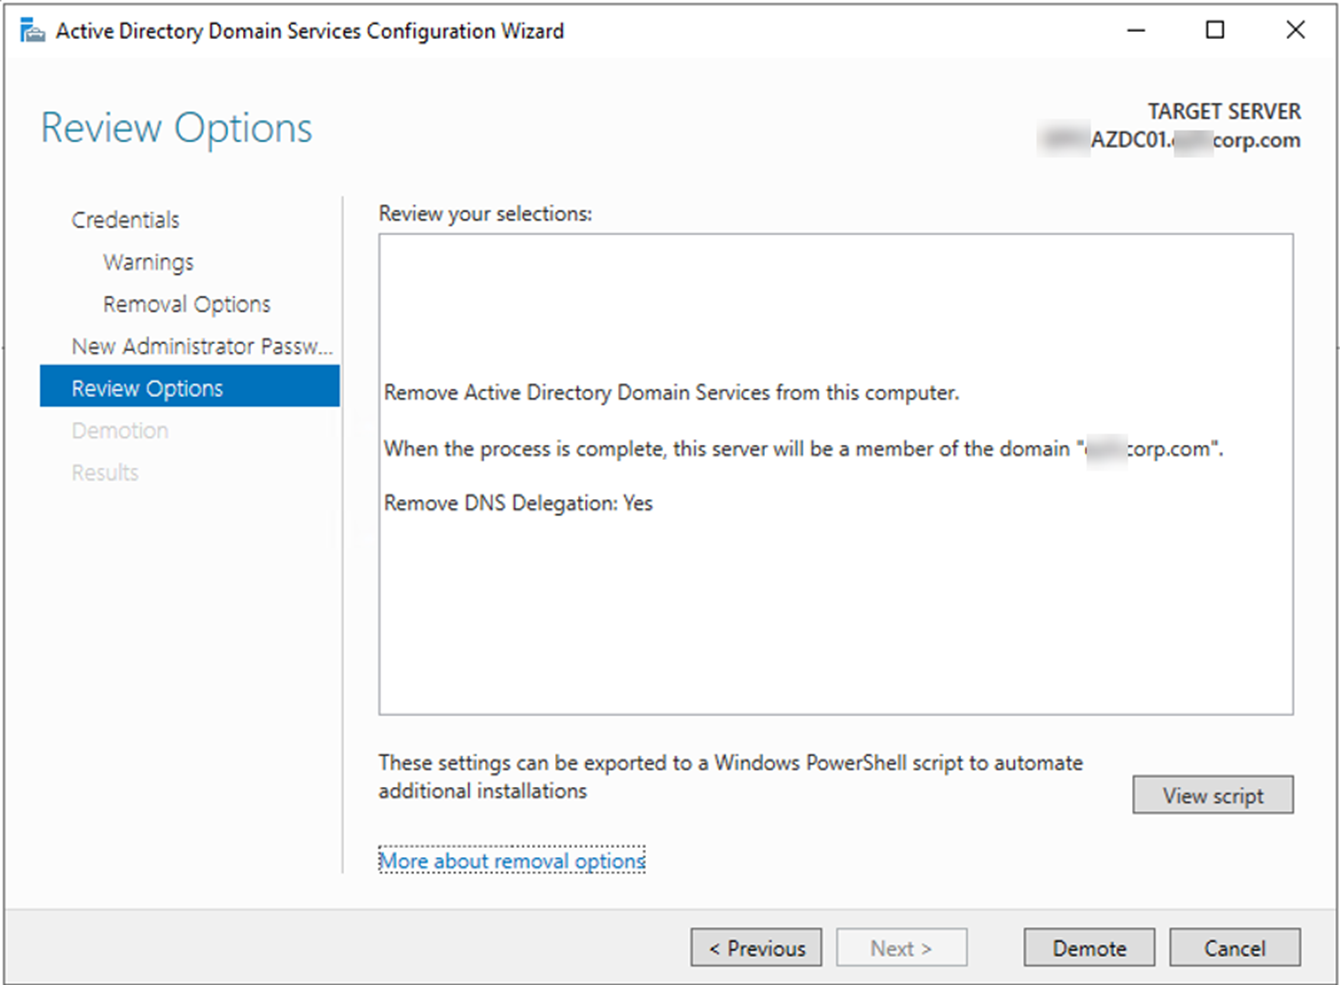
19.On the Review Options page, click Demote.
Note: if you don’t need it anymore, you can disjoint domain and then delete this machine. Also, don’t forget to delete Azure resources of this VM, e.g. public IP and VNet…
But if it still needs to be another features server, you can follow below steps to move Active Directory Domain Services features from this server.
20.On the Server Manager page, select Manager, click Remove Roles and Features.

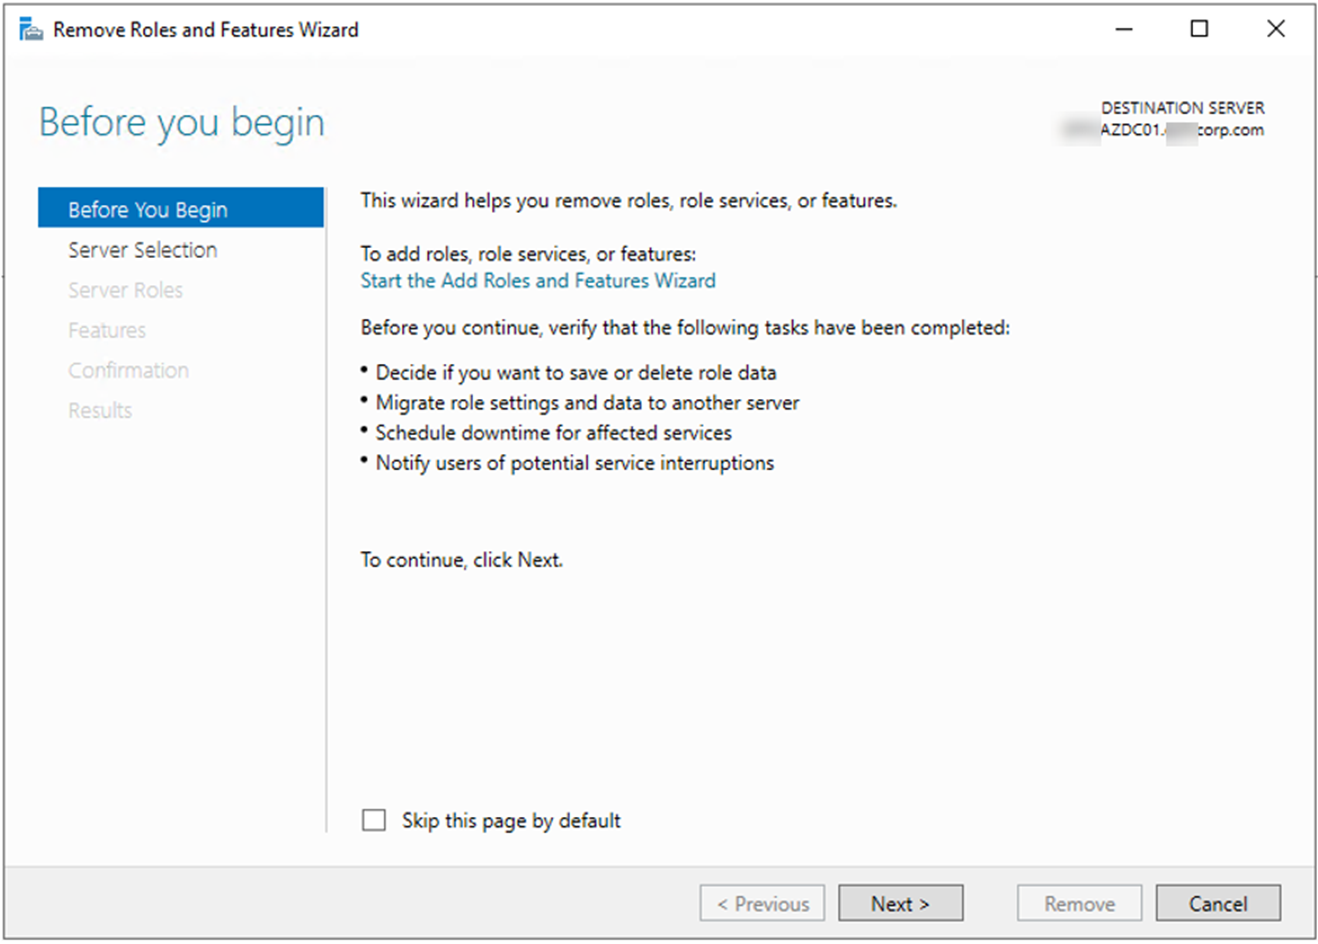
21.On the Before You begin page, click Next.
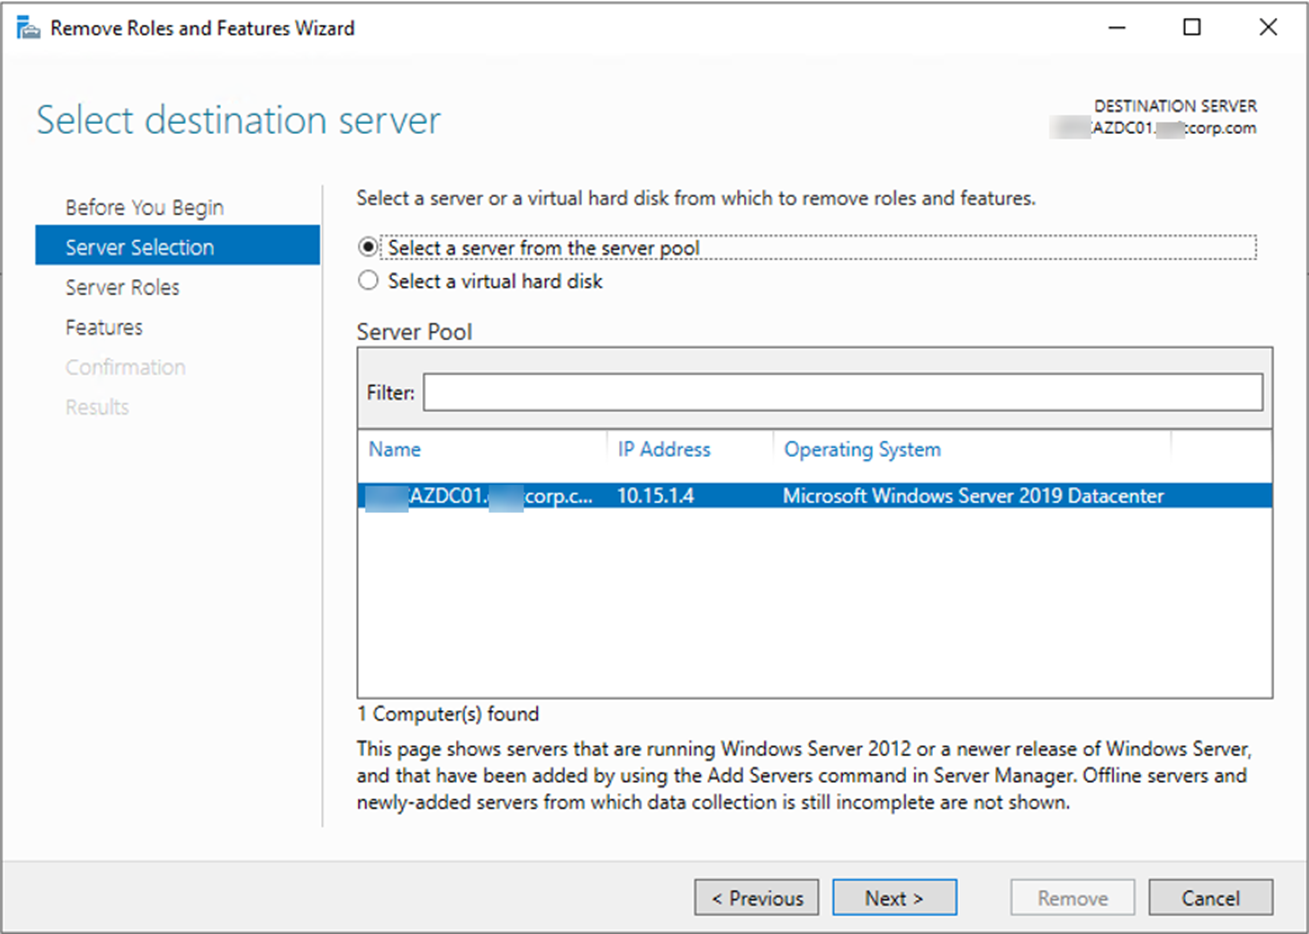
22.On the Select Destination server page, click Next.
23.On the Remove server roles page, unselect Active Directory Domain Services, click Next.
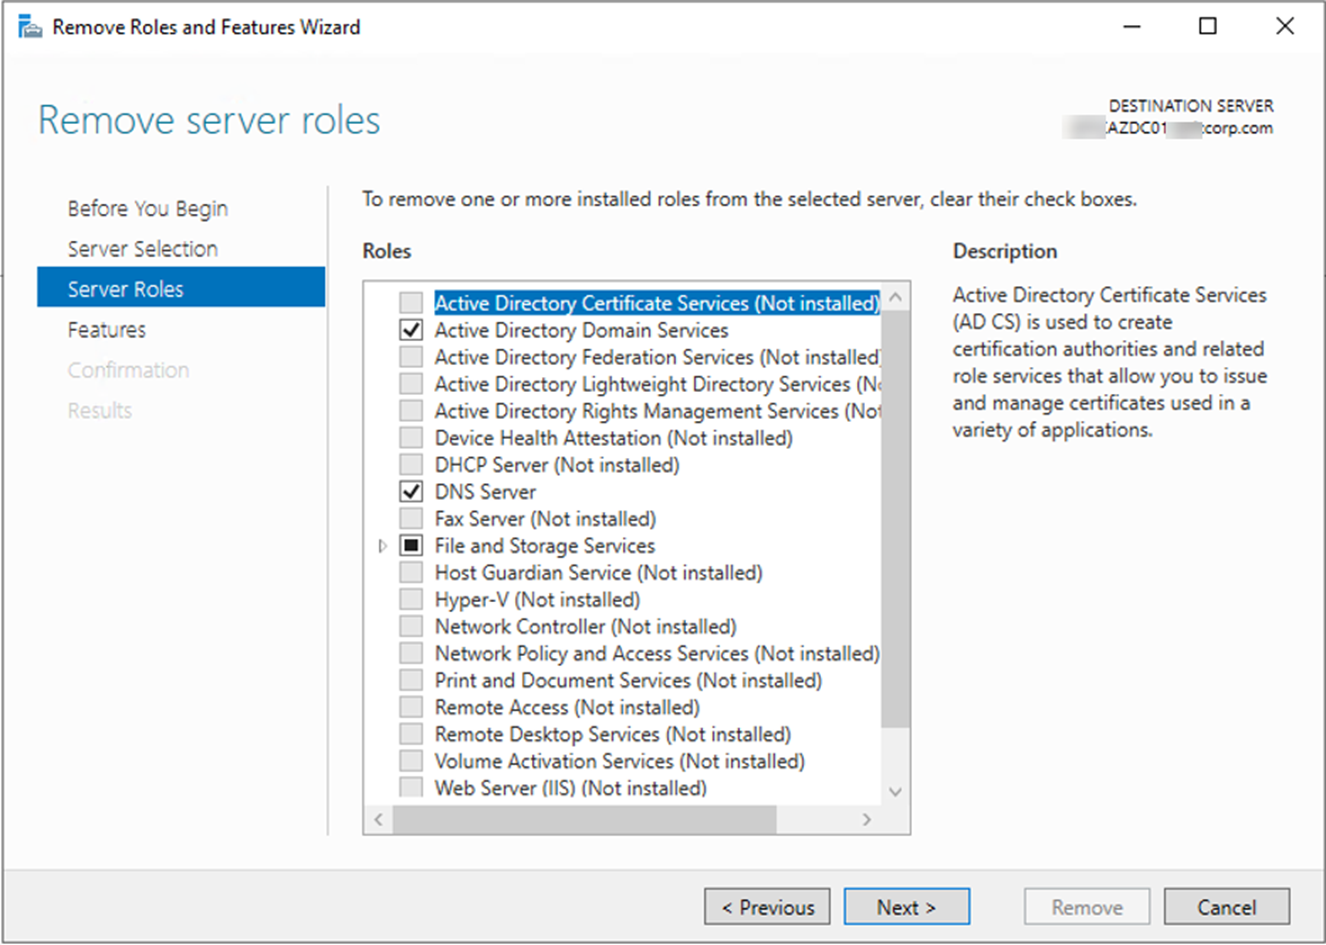
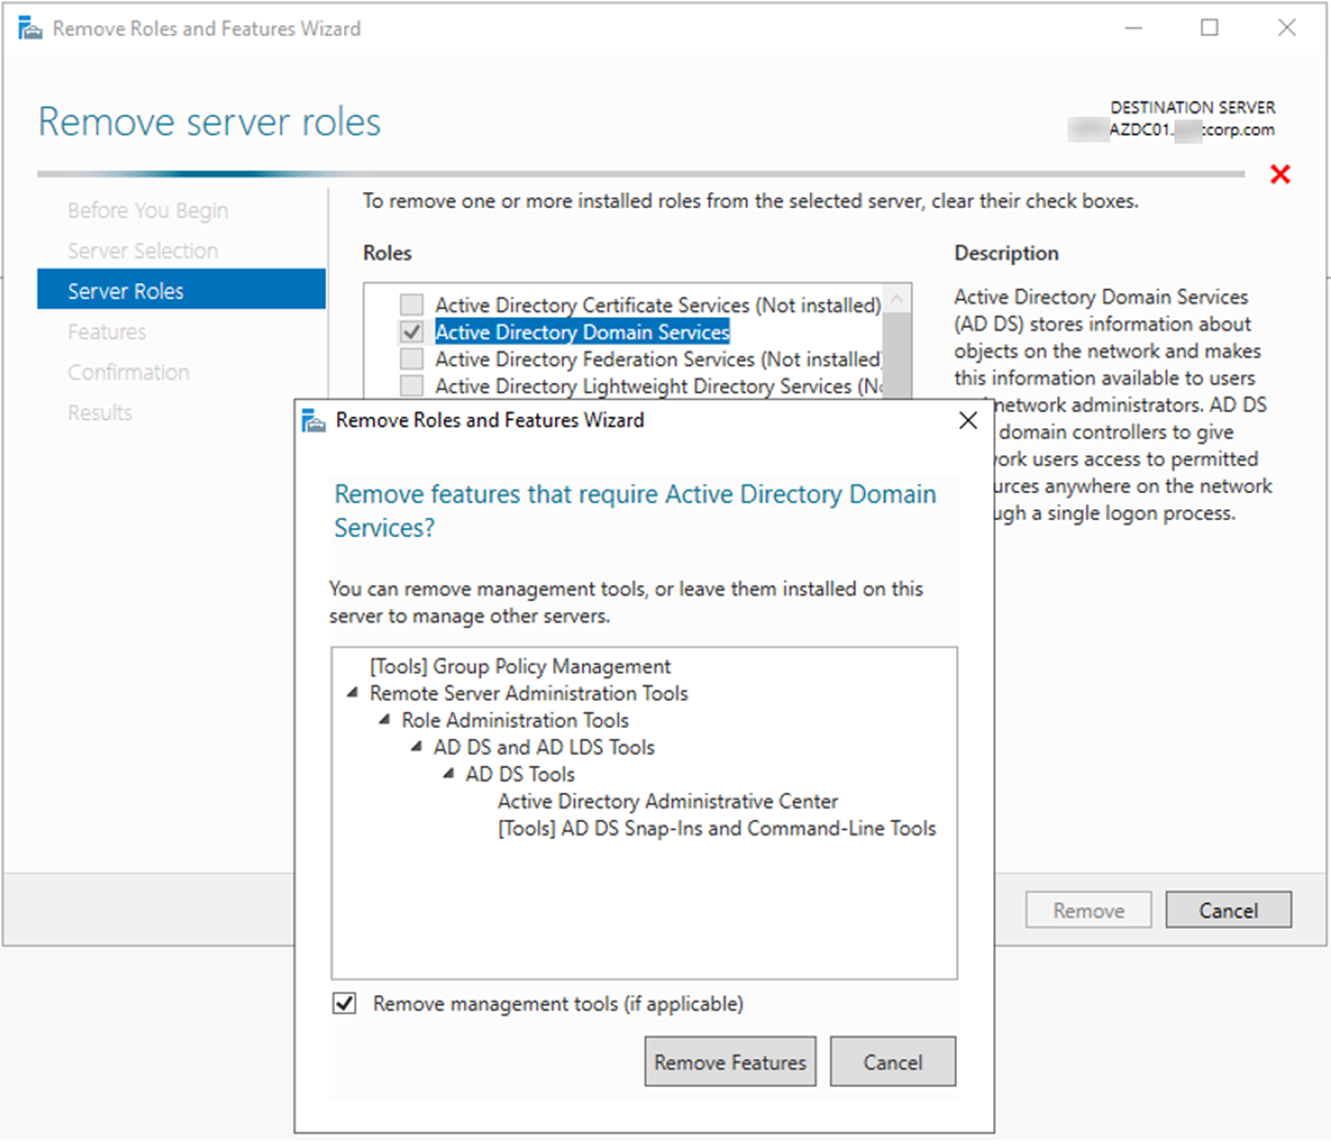
24.On the Remove features page, click Remove Features.
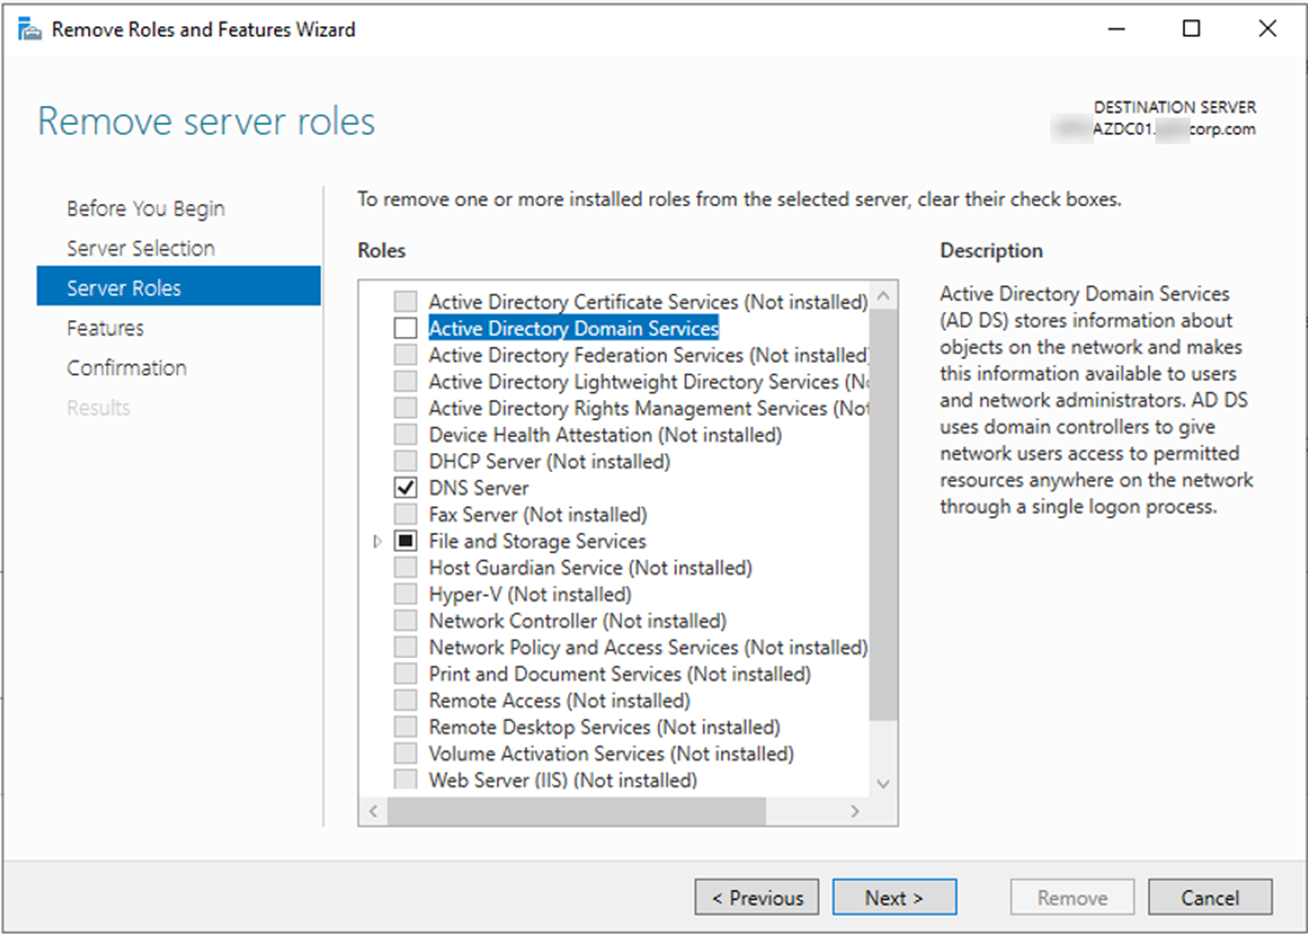
25.On the Server Roles page, it’s unchecked successfully this time, click Next.
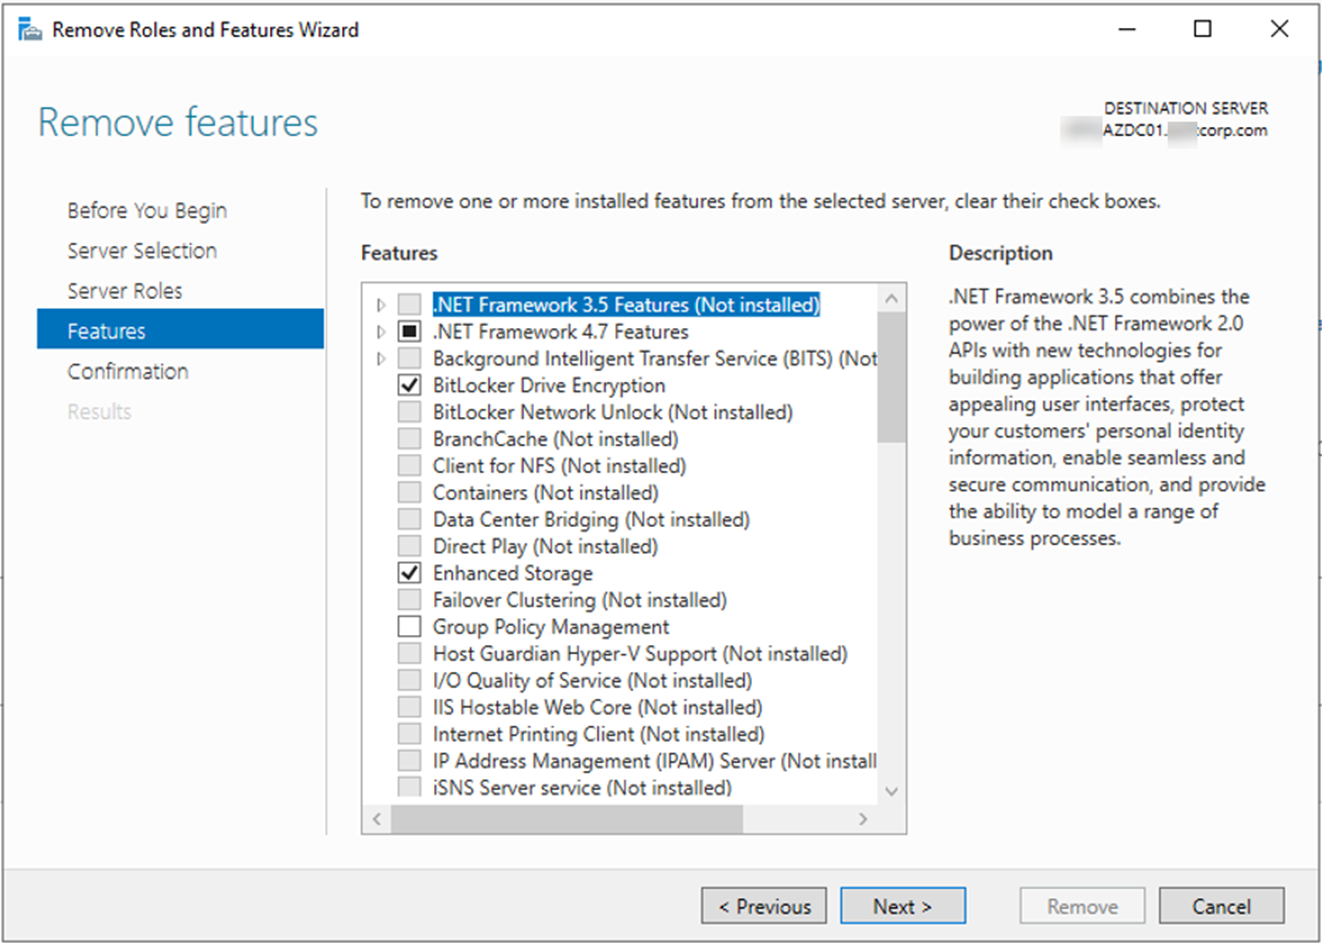
26.On the Features page, click Next.
27.On the Confirmation page, select Restart the destination server atomically if required, click yes on the warning message.
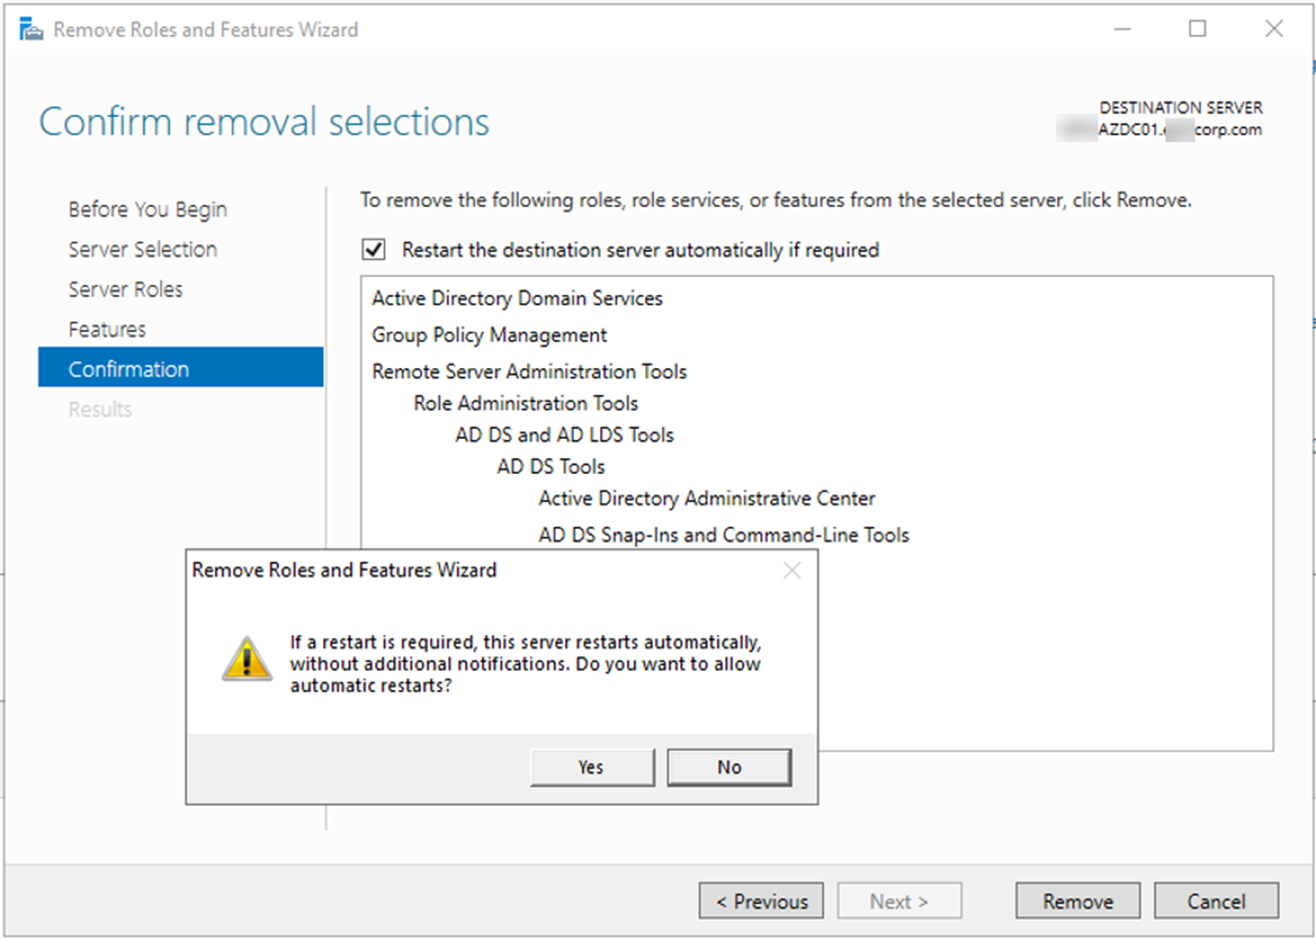
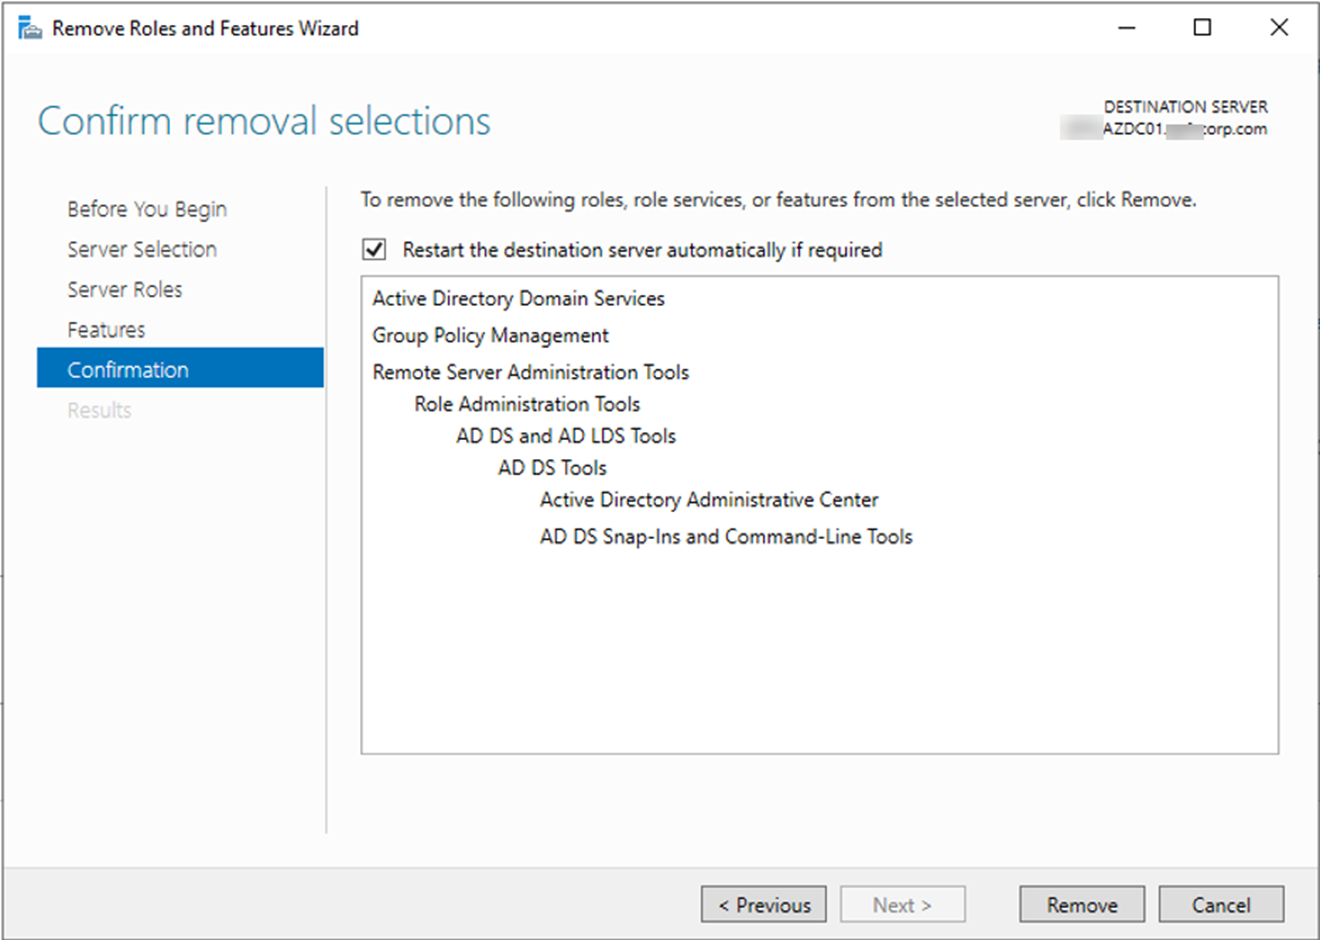
28.On the Confirmation page, click Remove. The server will reboot.
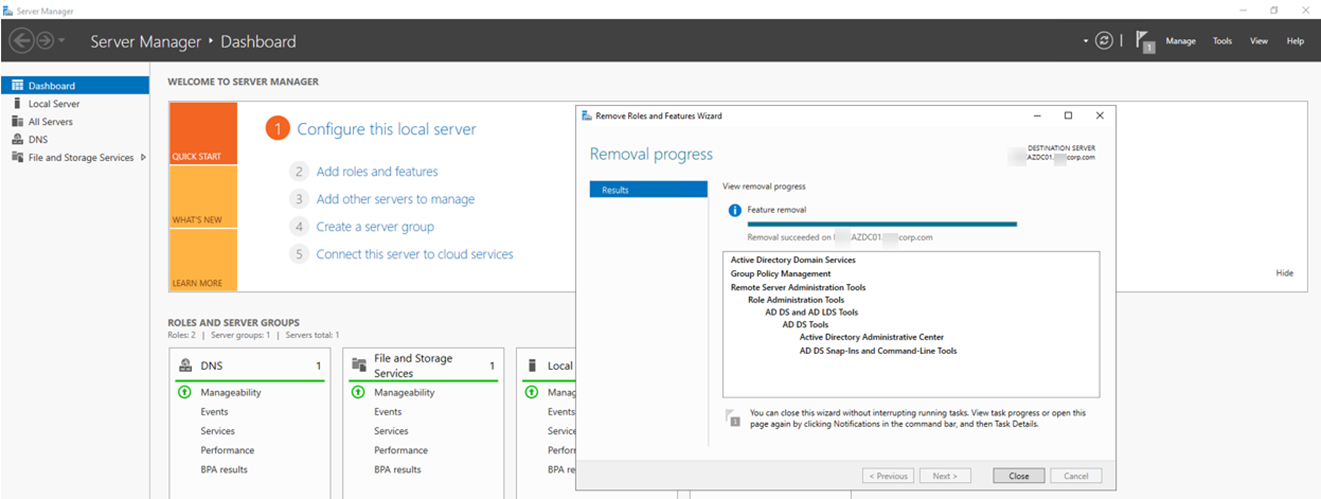
29.login to server, verify the removal progress succeeded, click Close.
Hope you enjoy this post.
Cary Sun
Twitter: @SifuSun
Web Site: carysun.com
Blog Site: checkyourlogs.net
Blog Site: gooddealmart.com
Author: Cary Sun
Cary Sun has a wealth of knowledge and expertise in data center and deployment solutions. As a Principal Consultant, he likely works closely with clients to help them design, implement, and manage their data center infrastructure and deployment strategies.
With his background in data center solutions, Cary Sun may have experience in server and storage virtualization, network design and optimization, backup and disaster recovery planning, and security and compliance management. He holds CISCO CERTIFIED INTERNETWORK EXPERT (CCIE No.4531) from 1999. Cary is also a Microsoft Most Valuable Professional (MVP), Microsoft Azure MVP, Veeam Vanguard and Cisco Champion. He is a published author with several titles, including blogs on Checkyourlogs.net, and the author of many books.
Cary is a very active blogger at checkyourlogs.net and is permanently available online for questions from the community. His passion for technology is contagious, improving everyone around him at what they do.
Blog site: https://www.checkyourlogs.net
Web site: https://carysun.com
Blog site: https://gooddealmart.com
Twitter: @SifuSun
in: https://www.linkedin.com/in/sifusun/
Amazon Author: https://Amazon.com/author/carysun
